Booking Widget Configuration
The Booking Widget is the customer-facing interface where your players browse availability, select time slots, and complete their bookings. You can fully customise its appearance, checkout flow, and embedding options to match your brand and website.
You can find widget settings by navigating to Settings > Booking Widget in the Buzzshot admin panel.
Managing Widgets
You can create multiple booking widgets for the same booking site. This is useful when you want different configurations for different pages on your website -- for example, one widget that shows all your rooms on your main booking page, and another that only shows a specific room on that room's dedicated page.
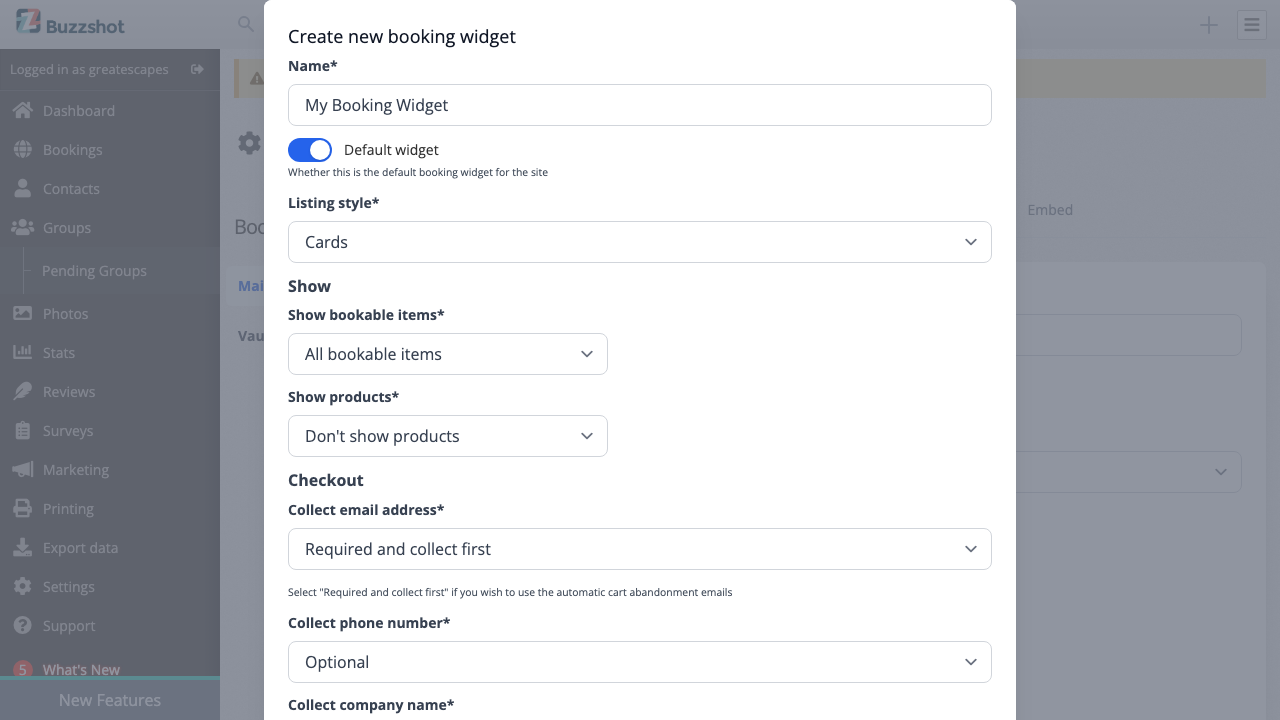
Each site always has one default widget. The default widget is used when no specific widget is requested. You can change which widget is the default by opening a different widget and turning on the "Default widget" toggle.
To create a new widget, click the + Add Widget button at the top of the sidebar. To delete a widget, click the delete icon next to it in the sidebar. You cannot delete the default widget -- set another widget as the default first.

Details Tab
The Details tab controls the core behaviour of your widget.
-
Widget Name -- A descriptive name so you can tell your widgets apart. Shown in the sidebar and as the browser tab title. Your customers will not normally see it.
-
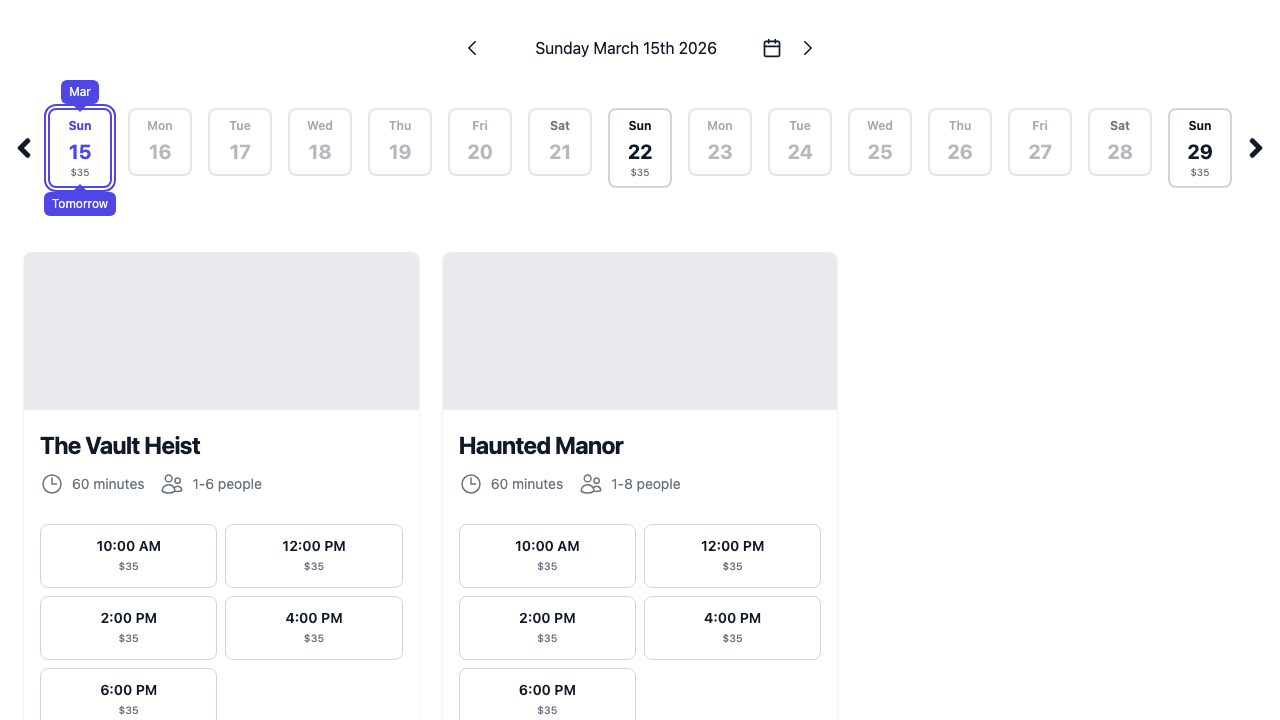
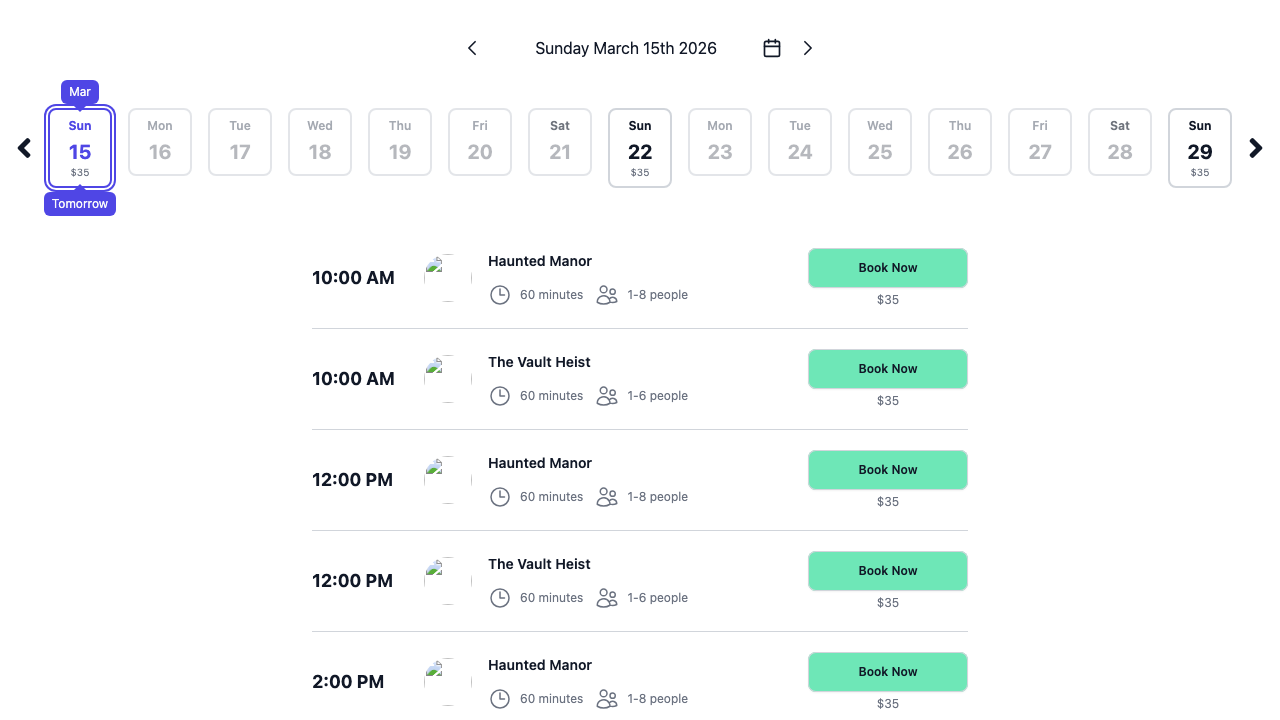
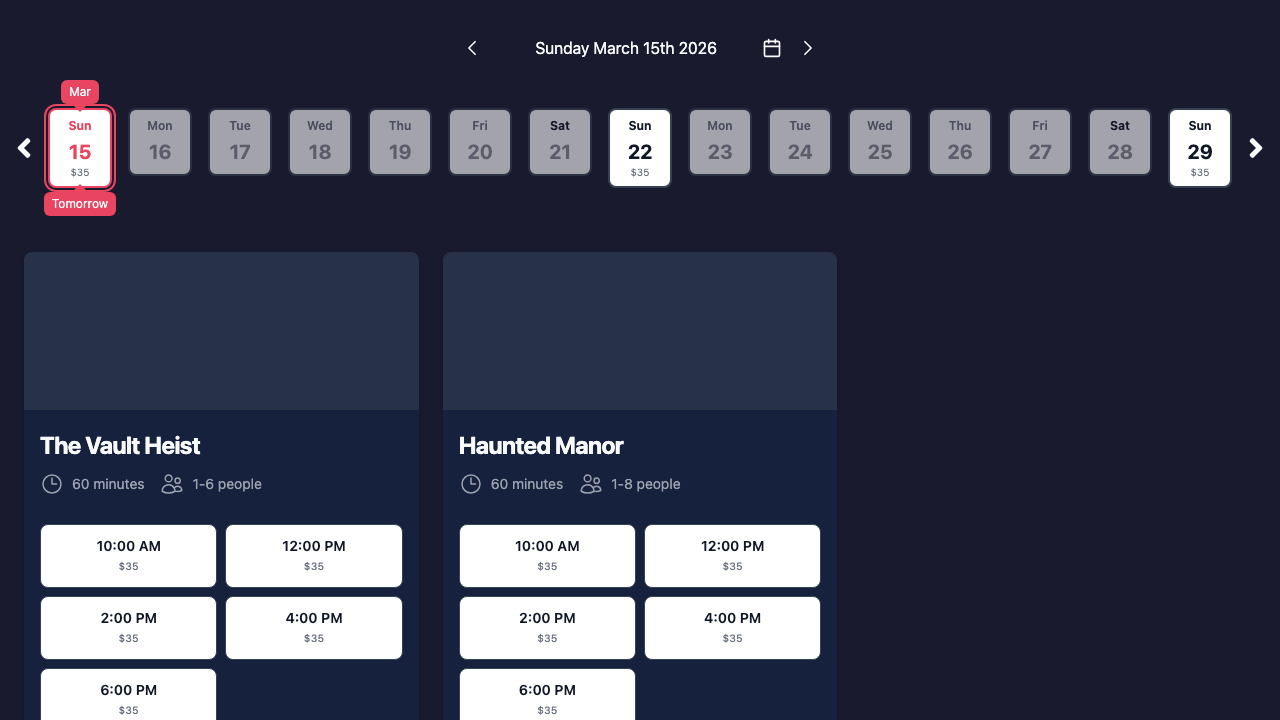
Listing Style -- Choose how bookable items are displayed:
- Cards (default) -- A calendar date selector at the top, then a card for each bookable item with available time slots below it. Stand-alone products are also shown as cards.
- List -- A calendar date selector at the top, then a flat list of all available time slots sorted by time. More compact, works well when you have many rooms.
-
Bookable Items / Products filters -- Control which bookable items and products appear in each widget. You can show all, none, or a specific selection. This is useful when you want a widget on a specific room's page that only shows that room's availability.
-
Languages -- If your site has multiple languages, choose which are available in each widget. A language switcher appears when more than one is selected.
Checkout Options
These settings control what information is collected from the customer during checkout.
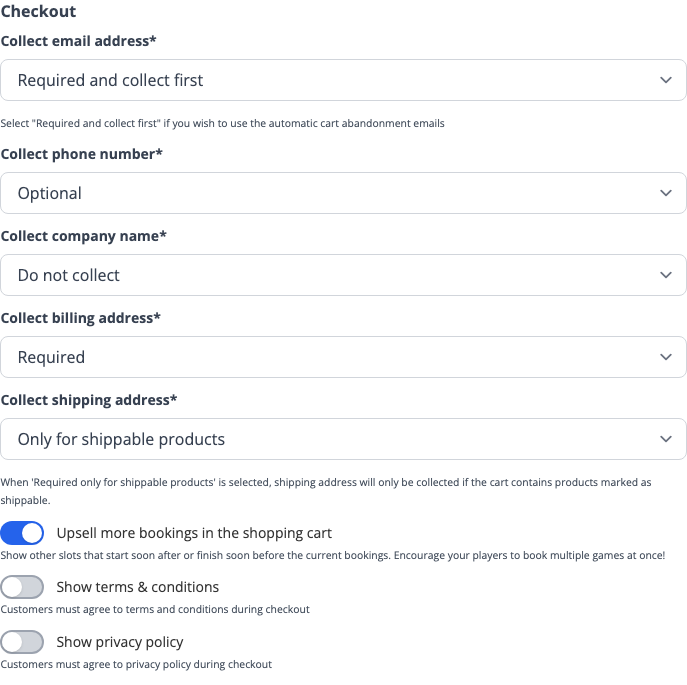
- Email Address
- Required and collect first (recommended) -- The customer enters their email as the first step of checkout, on a separate page. This enables cart abandonment emails. Switching away from this option will make cart abandonment recovery less effective, as the email address is collected later in the checkout flow.
- Required -- Collected on the same page as other details.
- Optional -- Not recommended as it prevents you from contacting the customer.
- Phone Number -- Do not collect, Optional, Required, or Required only for booking requests.
- Company Name -- Do not collect (default), Optional, or Required.
- Billing Address -- Required (default) or Do not collect. Some payment providers may still require it.
- Shipping Address -- Only for shippable products (default), Required, or Optional.
- Require Payment -- On by default. When turned off, customers can complete bookings without making a payment. Regular bookings are confirmed immediately and booking requests go to pending as normal. This is useful if you take payment in person at your venue instead of online. You can still have payment providers set up for other widgets -- this setting is per-widget. See Payment Options Setup for payment provider configuration.
- Upsell in Cart -- When enabled (the default), the cart page suggests other available time slots near the customer's current bookings. See Upsells for details.
Terms and Privacy
You can require customers to accept your terms and conditions and/or privacy policy before completing checkout. Turn on Show terms & conditions or Show privacy policy, then choose how the policy is displayed:
- Link -- Customers see a toggle checkbox with a link that opens your external terms/privacy URL in a new tab. Enter the URL to your page.
- Show in modal -- Customers see a toggle checkbox with a clickable link that opens a pop-up dialog showing the full policy text. You enter the policy content on the Copy tab (see below).
- Show as checkout step -- The full policy text is shown as a dedicated page in the checkout flow that customers must scroll through and accept before continuing to payment. You enter the policy content on the Copy tab.
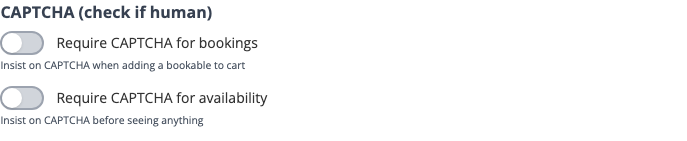
CAPTCHA Protection
CAPTCHA verification helps prevent automated abuse of your booking widget. Avoid enabling CAPTCHA unless you are actively experiencing spam or bot attacks -- it adds friction to the booking process and can reduce conversions. It's there as a protection if you come under attack, not something to enable by default.
- Require CAPTCHA for bookings -- A CAPTCHA challenge is shown when a customer tries to add an item to their cart. Use this if you are experiencing spam bookings.
- Require CAPTCHA for availability -- A CAPTCHA challenge is shown before the customer can see any availability at all. This is the most restrictive option and should only be used if you are experiencing significant automated abuse.
Both use Google reCAPTCHA Enterprise.
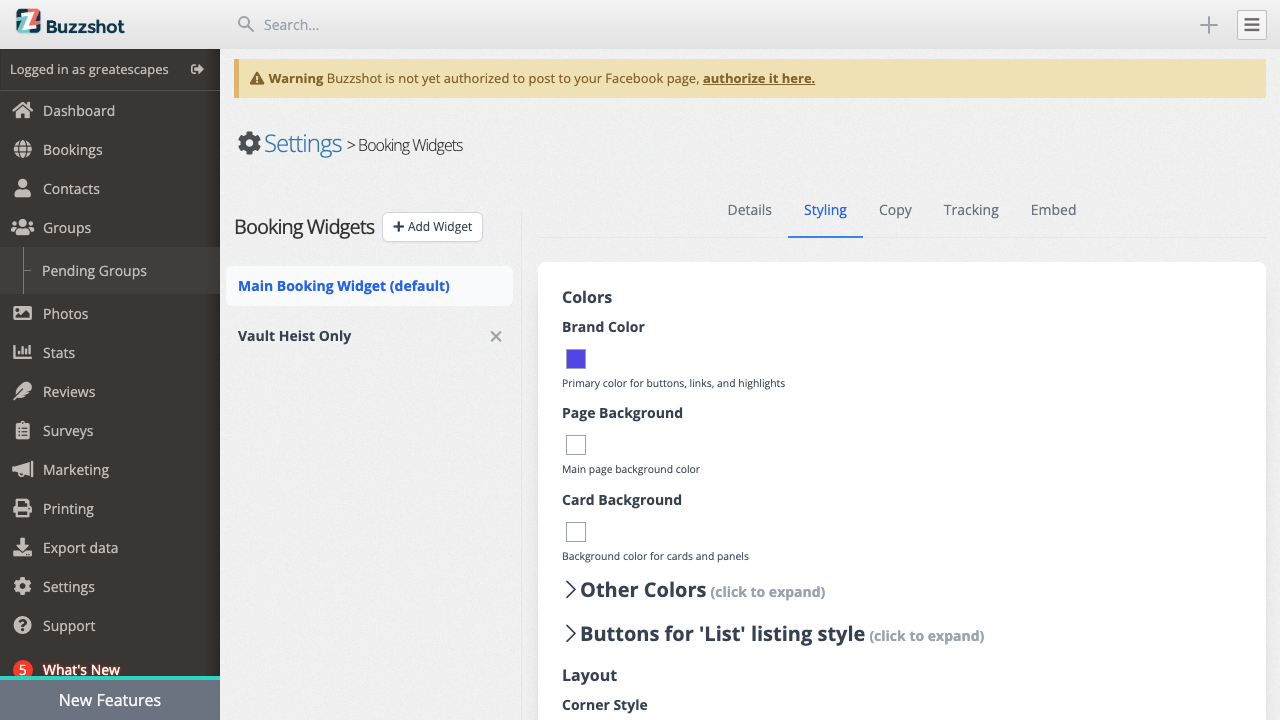
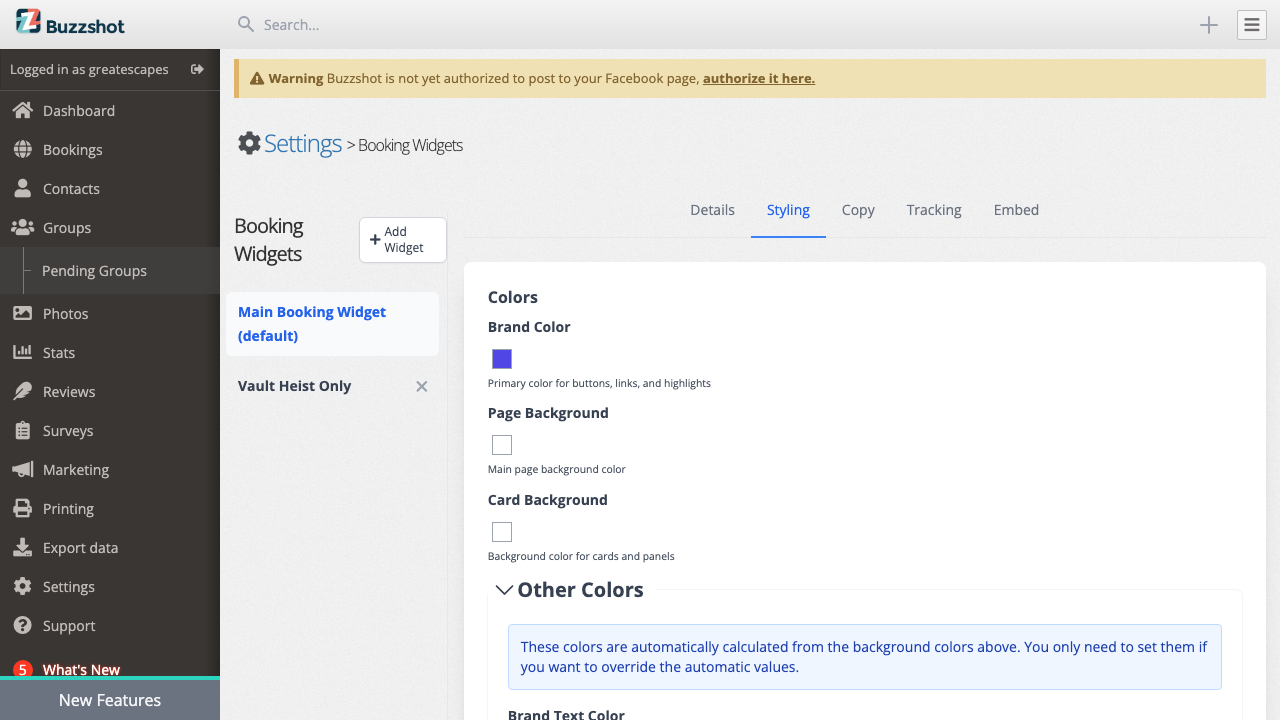
Styling Tab
The Styling tab lets you customise the visual appearance of your widget to match your brand.
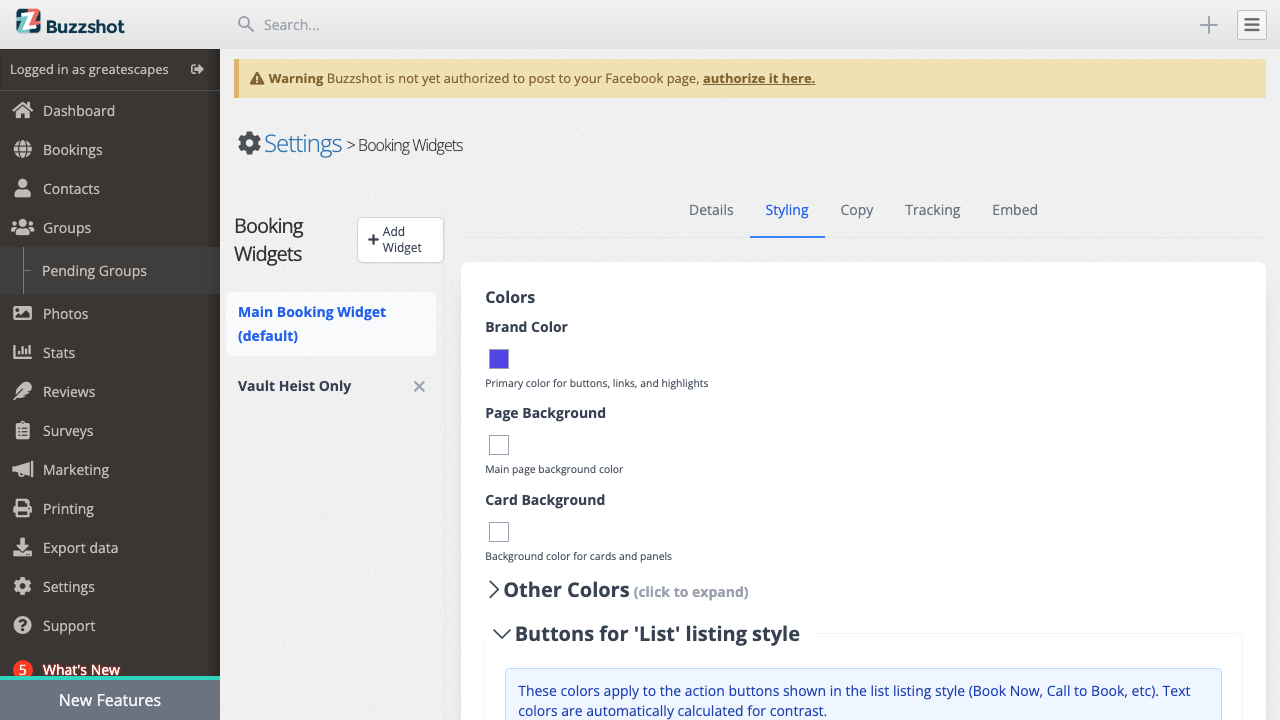
Colors
There are three primary colors that define your widget's look:
- Brand Color -- This is your main brand color, used for primary buttons, links, and highlights throughout the widget. The default is an indigo (#4f46e5).
- Page Background -- The background color of the widget itself. The default is white (#ffffff). You can set this to a dark colour for a dark theme.
- Card Background -- The background color for cards and panels that sit on top of the page background. The default is white (#ffffff).
Automatic Text Colors
Text colors are automatically calculated from your background colors to ensure good contrast and readability:
- Light backgrounds get dark text
- Dark backgrounds get light text
This means you can set your page background to a dark color and all the text will automatically switch to light colors. You rarely need to change the automatic text colors, but you can override them if needed.
Text Color Overrides
The "Other Colors" section (click to expand) allows you to override the automatically calculated colors:
- Brand Text Color -- Text color on brand-colored buttons. Clear to use the auto-calculated value.
- Page Text -- Main text color on the page background.
- Page Muted Text -- Secondary/muted text on the page background.
- Card Text -- Main text color inside cards.
- Card Muted Text -- Secondary/muted text inside cards.
- Card Secondary Muted Text -- Additional muted text inside cards.
- Input Muted Text -- Placeholder and label text in form inputs.
- Border Color -- Color for borders and dividers.
Each of these fields has a "Clear" button. When cleared, the color is automatically derived from the relevant background color. The automatically calculated color is shown as a preview next to each field.
List Button Colors
When using the "Cards" listing style, action buttons use your brand color and cannot be individually customised per status.
When using the "List" listing style, each time slot has an action button. These buttons are color-coded by status and can be individually customised. Click to expand the "Buttons for 'List' listing style" section to customise these colors:
- Book Now -- Green by default. Shown for instantly bookable slots.
- Call to Book -- Orange by default. Shown for slots that require a phone call.
- Request Booking -- Lime by default. Shown for slots that accept booking requests.
- Sold Out -- Pink/rose by default. Shown for fully booked slots.
- In Cart -- Blue by default. Shown for slots already in the customer's cart.
Text colors on these buttons are automatically calculated for contrast -- you do not need to set them separately.
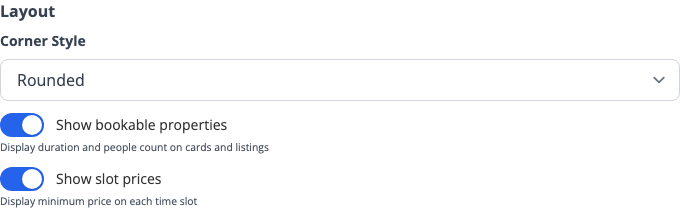
Layout
-
Corner Style -- Controls how rounded the corners of buttons and cards are, from sharp corners to very rounded.
-
Show bookable properties -- When enabled (the default), bookable cards and listings display properties like duration and maximum number of people.

- Show slot prices -- When enabled, the minimum price is displayed on each time slot. This is off by default. Useful when you have different prices for different slots or days (e.g. peak vs off-peak) and want customers to easily spot the cheaper options.
Copy Tab
The Copy tab lets you customise the text shown in your booking widget.
Booking Mode Messages
- Call to book -- The message displayed when a time slot requires the customer to call you to book. A sensible default is provided, but we recommend overriding this to include your actual phone number so customers can act on it immediately.
- Request to book -- The message displayed when a time slot accepts booking requests rather than instant bookings. A booking request must be accepted or declined by your venue before it is confirmed. The default message is fine for most businesses, but you can customise it if needed.
These booking modes are configured in your Rules settings, not in the widget itself. The Copy tab only controls the messages customers see for each mode. If you leave a field blank, the default text is used.
Policy Documents
If you have set your terms or privacy policy display mode to Show in modal or Show as checkout step on the Details tab, you can enter the full text of each policy here. The editor supports rich text formatting including headings, bold, italic, and lists.
If your site has multiple languages configured, all text fields on this tab support multi-language input so you can provide translations for each language.
Tracking Tab
The Tracking tab has one setting:
Enable host page Google Tag Manager tracking -- When turned on, the booking widget will forward e-commerce events (such as "add to cart" and "purchase") to the Google Tag Manager data layer on the page where the widget is embedded.
Important: When your widget is embedded on your website, the events are pushed to your website's GTM container (the one already installed on your page), not a GTM container inside the widget itself. Your website must have Google Tag Manager installed for this to work. The widget sends standard GA4 e-commerce events that can be picked up by GTM triggers.
Note: GTM tracking only works when the widget is embedded on your website. If you open the widget via its Direct URL (from the Embed tab), no events will fire because there is no host page with a GTM container. Always test tracking from your actual website, not the Direct URL.
See our GA4/GTM Ecommerce Tracking guide for step-by-step setup instructions.
![]()
Embed Tab
The Embed tab provides everything you need to add the booking widget to your website.
Direct URL
The simplest option. Copy the URL and share it directly with customers via email, social media, QR codes, or as a link on your website. When customers visit this URL, they see the full booking widget.
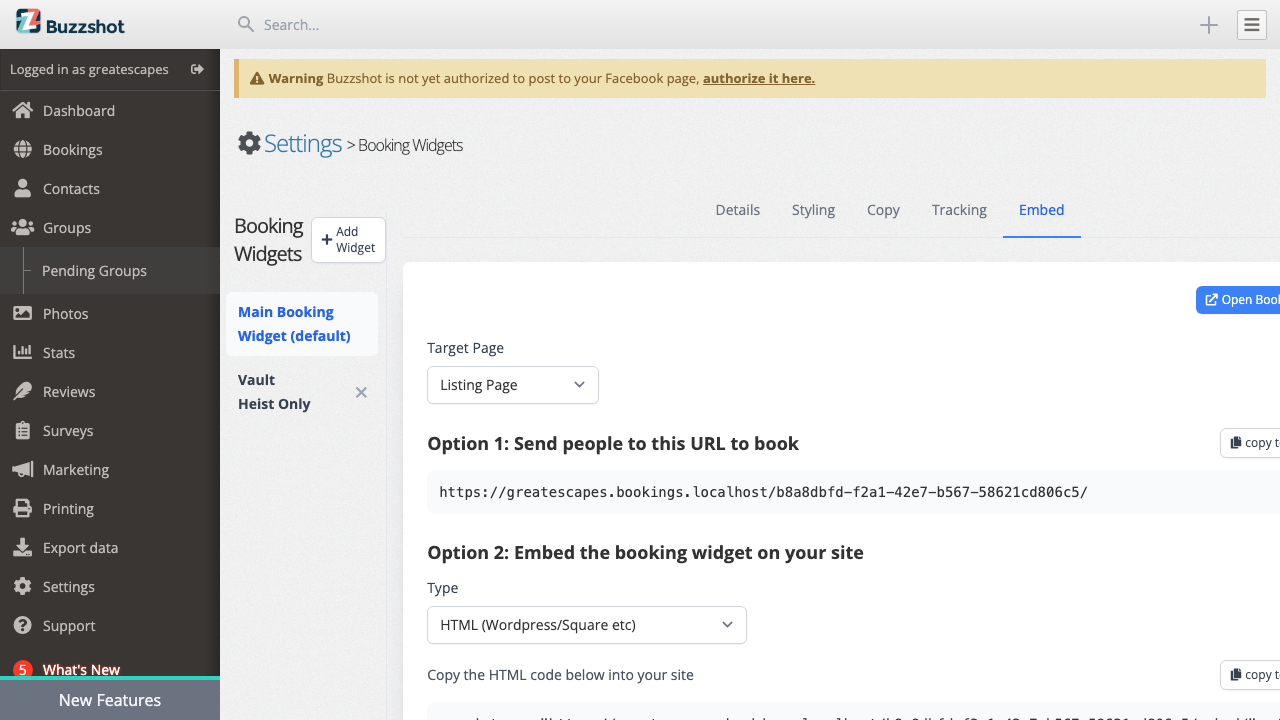
Embedding on Your Website
You can embed the booking widget directly into a page on your website. The widget appears as part of your page and automatically resizes to fit its content.
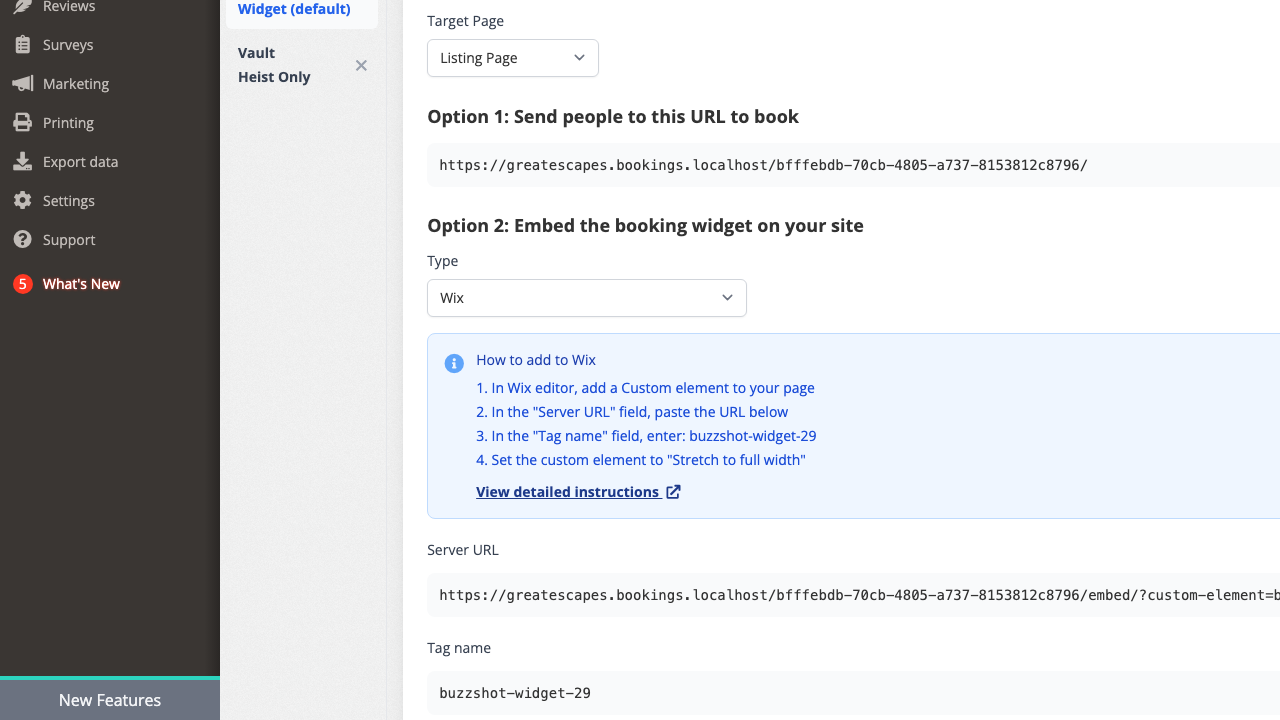
HTML Embed (WordPress, Squarespace, and others)
Wix users: Do not use the HTML embed method below. Wix requires a different approach using Custom Elements. See the Wix Embed section or our detailed Wix embedding guide.
- Select HTML (WordPress/Square etc) from the Type dropdown
- Copy the embed code (a single
<script>tag) - Paste it into your website's HTML wherever you want the widget to appear
In WordPress, you can paste this into a Custom HTML block. In Squarespace, use a Code block. Most website builders have a way to add custom HTML.

Wix Embed
Wix requires a different approach using Custom Elements:
- Select Wix from the Type dropdown
- Follow the step-by-step instructions shown, or see our detailed Wix embedding guide
The key pieces of information you need are the Server URL and Tag name, both of which are displayed with copy buttons.
Target Page
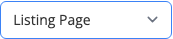
By default, the embed code opens to the listing page showing all available bookable items and products. You can change this using the Target Page dropdown to link directly to:
- A specific bookable item's detail page
- A specific product group's detail page
This is useful when you want to embed a widget on a room's page that goes straight to that room's booking details, skipping the listing page entirely.
Language Selection
If your widget has multiple languages configured, the Language dropdown lets you choose which language the embed code defaults to. The customer can still switch languages using the language switcher within the widget.
Tips
-
Match your brand -- Set the brand color to your primary brand color and the page background to match or complement your website's background. The automatic text color system will handle the rest.
-
Use multiple widgets -- Create separate widgets for different pages. A room-specific page can have a widget filtered to show only that room, while your main booking page shows everything.
-
Enable email collection first -- The "Required and collect first" email option is strongly recommended. It enables cart abandonment recovery emails, which can recapture bookings from customers who didn't complete checkout.
-
Consider CAPTCHA only if needed -- CAPTCHA adds friction to the booking process. Only enable it if you are experiencing automated abuse or spam bookings.
-
Widget showing no slots? -- If your widget appears but shows no available time slots, the issue is almost always with your schedule configuration, not the widget itself. Make sure your bookable items have schedules set up with available slots.
-
Test before going live -- Use the Direct URL from the Embed tab to preview and test your full booking flow before embedding the widget on your website.
-
Set up GTM tracking -- If you use Google Analytics, enable GTM tracking and follow our setup guide to get e-commerce conversion data in your GA4 reports.
-
Only collect the fields you need -- Every additional checkout field (company name, billing address, etc.) adds friction and can reduce conversion. Only enable fields you genuinely need.