Buzzshot Bookings: Custom Fields
Custom Fields let you collect additional information from your customers during the booking process. Whether you need to ask how they heard about you, collect team names, or gather dietary requirements. Custom fields give you the flexibility to capture exactly the data you need. They can even be used to offer optional paid extras, like a photo package or a birthday celebration add-on, right inside the booking form.
Order Fields vs Booking Fields
There are two types of custom field, and understanding the difference is important:
Order Fields appear once per order during checkout, regardless of how many rooms the customer is booking. Use these for information that applies to the customer or the order as a whole. For example:
- "How did you hear about us?"
- "Is this a special occasion?"
- "Do you have a promotional code?"
Booking Fields appear for each room or time slot in the customer's cart. If a customer is booking two rooms, they will see the booking fields twice, once for each room. Use these for information that relates to a specific game session. For example:
- "What is your team name?"
- "What difficulty level would you like?"
- "Any special requests for this session?"
Getting to Custom Fields Settings
- Log in to your Buzzshot admin panel
- Go to Settings
- Click Custom Fields (under the Bookings section)
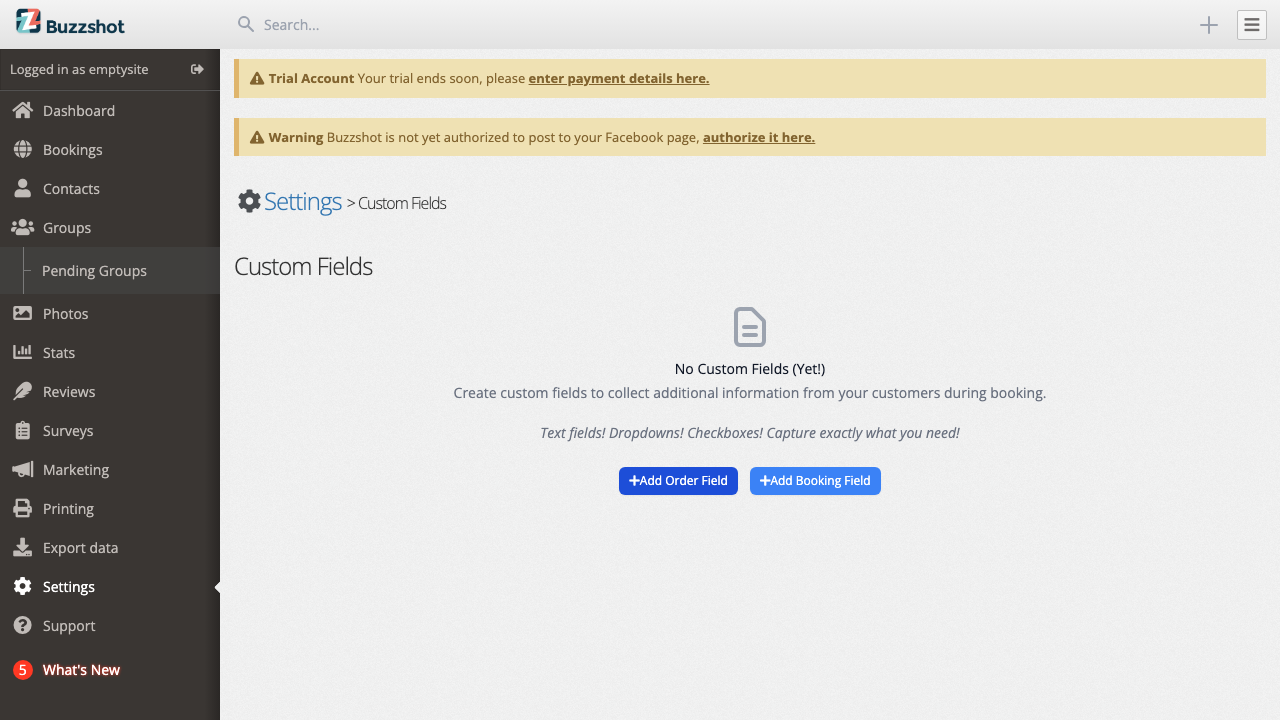
If you haven't created any custom fields yet, you'll see an empty state with buttons to add your first order or booking field.
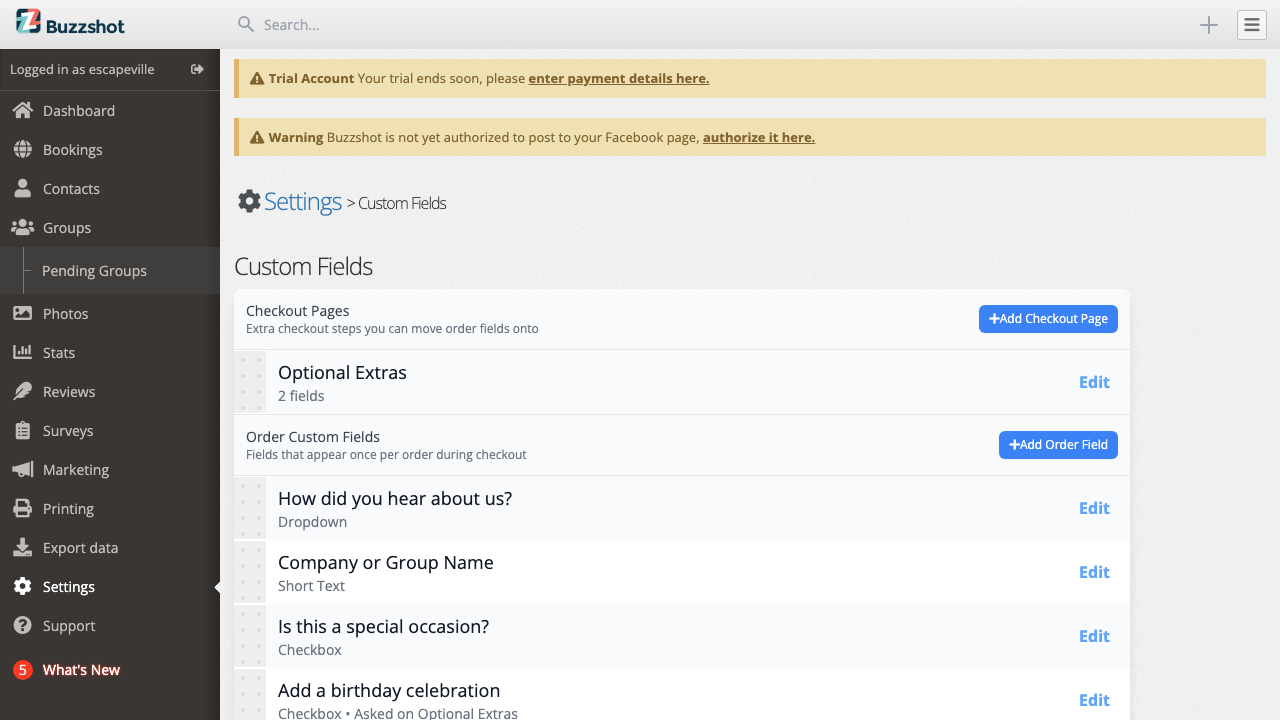
Once you have created some fields, you'll see them listed in two sections: one for order fields and one for booking fields.
Field Types
When creating a custom field, you need to choose what type of input your customers will see:
Checkbox
A simple yes/no toggle. Great for:
- Opt-ins ("This is a birthday party")
- Simple yes/no questions
- Optional paid extras (see Charging a Fee below)
The default can be set to checked or unchecked. Checkboxes can also carry a fee that is charged when the box is ticked, and a calendar icon that appears next to the booking when it's ticked.
Dropdown
A dropdown menu where customers select from a list of options you define. Great for:
- "How did you hear about us?" (Google, Facebook, Friend, etc.)
- Difficulty level selection (Easy, Medium, Hard)
- T-shirt sizes or similar fixed choices
- Paid upgrades where each choice costs a different amount (e.g. Standard, Premium, VIP)
You must add at least one option when using the dropdown type. Each option can have its own fee and its own calendar icon (see Charging a Fee and Calendar Icons below).
Short Text
A single-line text input. Great for:
- Team names
- Company names
- Brief answers
Long Text
A multi-line text area for longer responses. Great for:
- Special requests
- Additional notes or instructions
Creating a Custom Field
- Go to Settings > Custom Fields
- Click Add Order Field or Add Booking Field depending on which type you need
- A modal will open where you can configure the field:
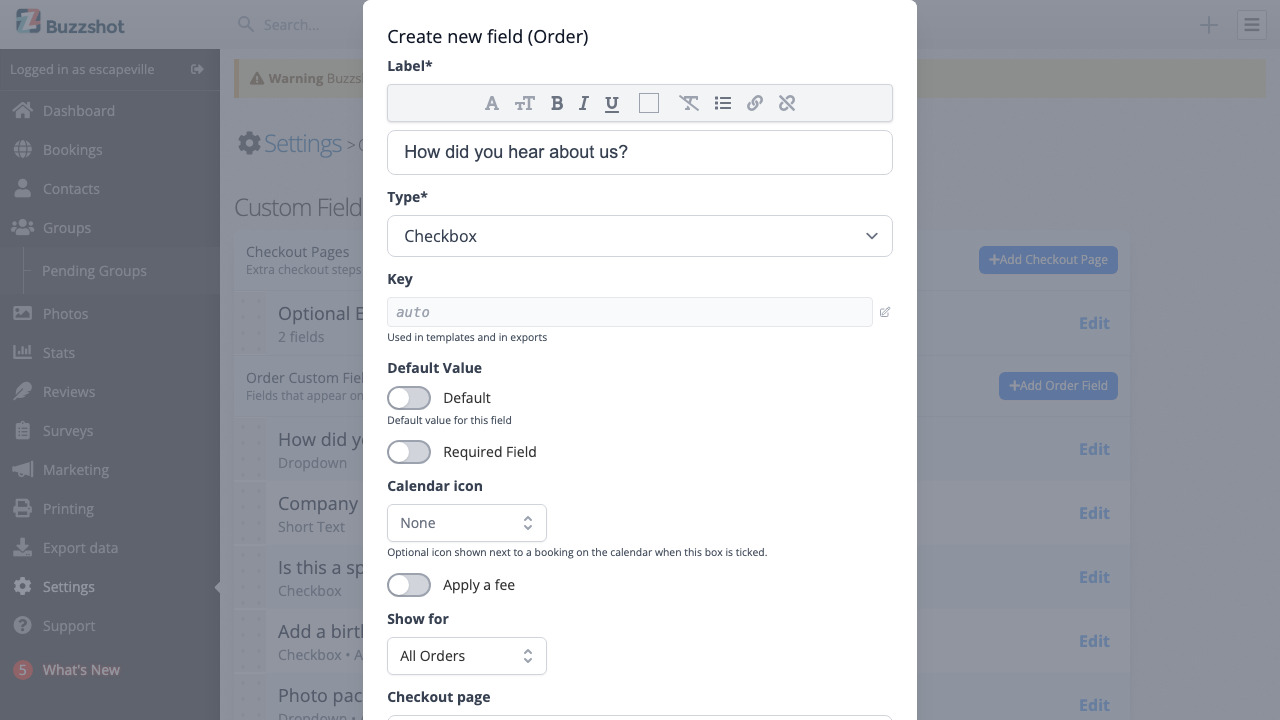
Label
Enter the text your customers will see. This is the question or prompt, for example "How did you hear about us?" or "Team Name".
Type
Choose the field type: Checkbox, Dropdown, Short Text, or Long Text.
Key
The key is used in CSV exports as the column header. It is automatically generated from your label text (for example, "How did you hear about us?" becomes how_did_you_hear_about_us). You can change the key if you prefer something shorter or more descriptive.
Warning: Once you have started collecting data, treat the key as permanent. Changing it later will break any spreadsheet workflows, integrations, or exports that reference the old key. Old export files will have the old column header and new exports will use the new one, so they will no longer match.
Options (Dropdown only)
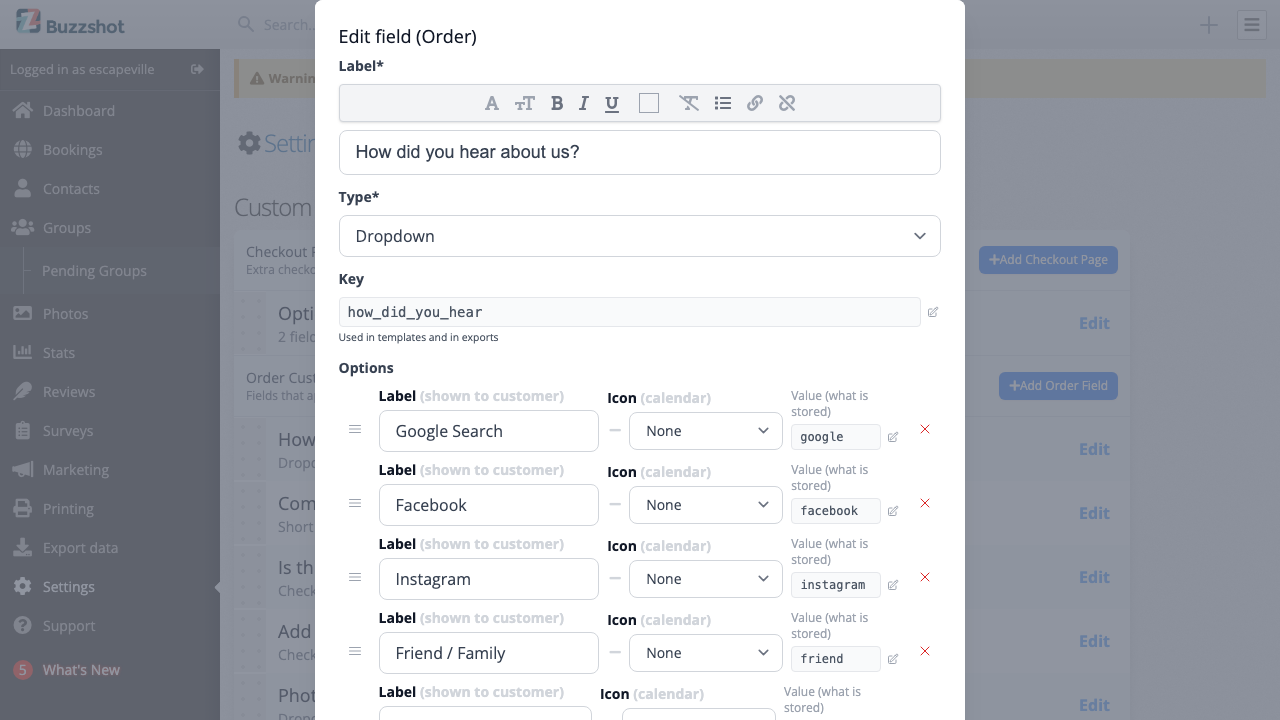
When you select "Dropdown" as the type, an options section will appear. Click Add Option to add each choice that will appear in the dropdown. You can set both a value (what gets stored) and a label (what the customer sees). You can reorder options by dragging them.
Each option can have a calendar icon that appears on the booking when that option is chosen. If you turn on Apply a fee, each option can also have its own fee amount. See Charging a Fee and Calendar Icons below.
Default Value
Optionally set a default value for the field. For checkboxes, this determines whether the toggle starts checked or unchecked. For dropdowns, you can pre-select one of your options. For text fields, you can provide default text.
Required
Toggle this on if customers must fill in this field before they can proceed through checkout. Use this sparingly. Every required field adds friction to the booking process. For checkbox fields, "required" means the checkbox must be checked to proceed.
Note: Remember that required booking fields must be completed for each room in the cart. A customer booking 3 rooms will see each required booking field 3 times, so the friction multiplies quickly.
Checkboxes with fees cannot be required. The Required toggle is automatically hidden when you enable a fee on a checkbox field. This ensures customers can always opt out of the extra charge.
Required dropdowns with fees must include an option that doesn't charge. If a dropdown charges a fee on some options and you mark it required, at least one option must be free or a discount, so the customer is never forced into paying. The field will refuse to save otherwise.
Charging a Fee
Checkbox and dropdown fields can charge a fee, so you can sell optional extras and paid upgrades right inside the booking form. This is perfect for things like:
- Birthday and celebration add-ons
- Premium photo packages
- Upgraded experiences
- Optional merchandise or souvenirs
To turn on fees, set the field type to Checkbox or Dropdown and toggle on Apply a fee. What you configure next depends on the type.
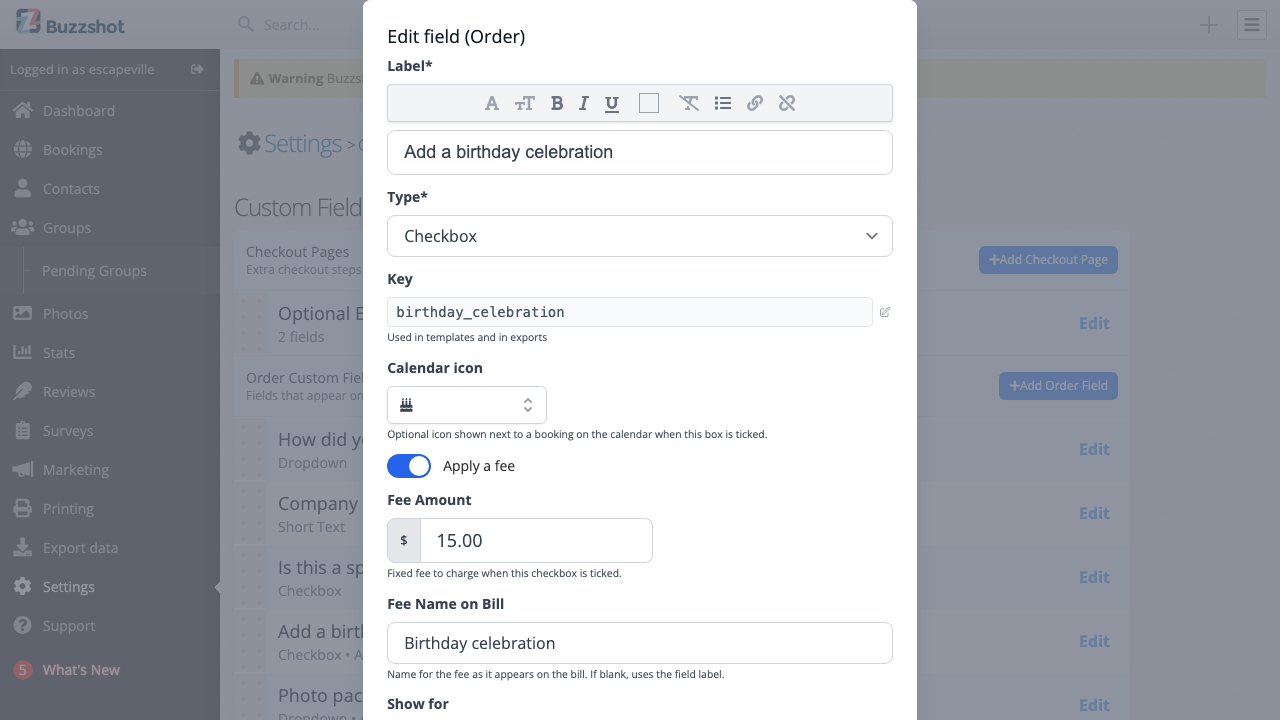
Fee on a Checkbox
A checkbox has a single fee that is charged when the customer ticks the box.
- Set the field type to Checkbox
- Toggle on Apply a fee
- Enter the Fee Amount: a fixed price that is added when the box is ticked
- Optionally set a Fee Name on Bill: this is how the fee appears on the customer's bill. If you leave this blank, it uses the checkbox label
When a checkbox has a fee, the fee amount displays beneath the checkbox in the booking widget, so customers know exactly what they're agreeing to pay.
Fees on a Dropdown
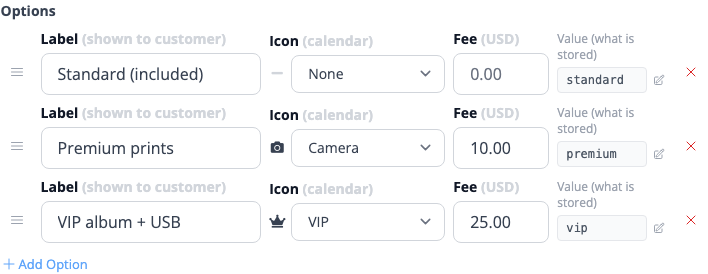
A dropdown charges a fee per option, so different choices can cost different amounts (for example: Standard free, Premium +£10, VIP +£25).
- Set the field type to Dropdown
- Add your options as usual
- Toggle on Apply a fee
- Enter a fee amount against each option that should cost extra. Leave an option's fee blank (or zero) for it to be free.
The fee for the selected option is added to the order, and each option shows its price to the customer in the dropdown.
Two rules keep customers from being trapped into paying:
- If the dropdown is required, at least one option must not charge: either free, or a discount.
- The default option cannot have a fee or a discount. The price should not move for a customer who never touches the dropdown.
Giving a Discount Instead
Anywhere you can enter a fee you can enter a discount, by typing a negative amount. Enter -5 as a checkbox's Fee Amount and ticking the box takes £5 off instead of adding it; enter -10 as a dropdown option's fee and choosing that option does the same. For a percentage, set Fee type to Percentage first, then enter -10% as the Fee Percent.
The settings screen shows a reminder whenever an amount is negative, so you can tell at a glance that a field is giving money back rather than charging. Customers see the direction too: a fee shows as +£5.00 beside the answer, a discount as -£5.00, and it appears on the bill as a discount.
This is handy for member rates, staff discounts, or a "bring your own equipment" option that costs less.
Important notes:
- Fees apply per order for order-level custom fields, or per booking for booking-level custom fields
- A checkbox fee is only charged if the customer ticks the box; a dropdown fee is only charged if the customer picks a paid option
- Checkboxes with a fee cannot be marked as required
- Fixed fees stay the same. Percentage fees scale with the order or booking total. Fees cannot vary by anything else
Calendar Icons
You can attach an icon to a checkbox or dropdown field so that, when the customer's answer matches, a small icon appears next to their booking on your calendar. This gives your team an at-a-glance heads-up without having to open each booking: a camera for a photo add-on, a birthday cake for a birthday, or a crown for a VIP package.
- Checkbox: choose one Calendar icon. It appears next to the booking whenever the box is ticked.
- Dropdown: choose an icon per option. The chosen option's icon appears next to the booking. Leave an option's icon blank for no icon.
Icons are picked from a set of ready-made choices, including a camera, birthday cake, gift, drinks, wine, hot drink, pizza, food, t-shirt, VIP crown, star, heart, key, clock, ticket, music, trophy and puzzle piece.
Here's how they look on a booking in the calendar. This customer ticked a checkbox with a birthday cake icon and chose a dropdown option with a crown icon:
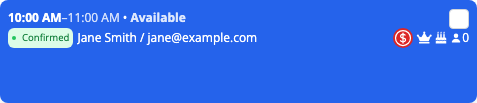
Calendar icons are shown only on your admin calendar. Customers never see them.
Controlling Where Fields Appear
Order Fields: the "Show for" Filter
By default, order custom fields appear for all orders. You can use the Show for filter to restrict which orders see the field. This uses the same powerful filter system available elsewhere in Buzzshot Bookings. For example, you could show a field only for orders that contain a specific bookable item or product.
For most use cases, leaving this set to "All Orders" is what you want.
Checkout Page (Order fields only)
By default, order fields are asked on the Details page, alongside the customer's contact and billing details. If you've set up extra checkout pages, you can use the Checkout page setting to ask a field on a page of its own instead. Leave it on "Details page" to keep it with the billing details. See Checkout Pages below for how to set these up.
Booking Fields: Bookable Items and Filters
Booking custom fields have two layers of control over where they appear:
Bookable Items Selection
Choose which rooms or experiences the field appears for:
- All bookable items: the field appears for every room (default)
- Selected bookable items: the field only appears for the rooms you choose
- All bookable items except selected: the field appears for all rooms except the ones you choose
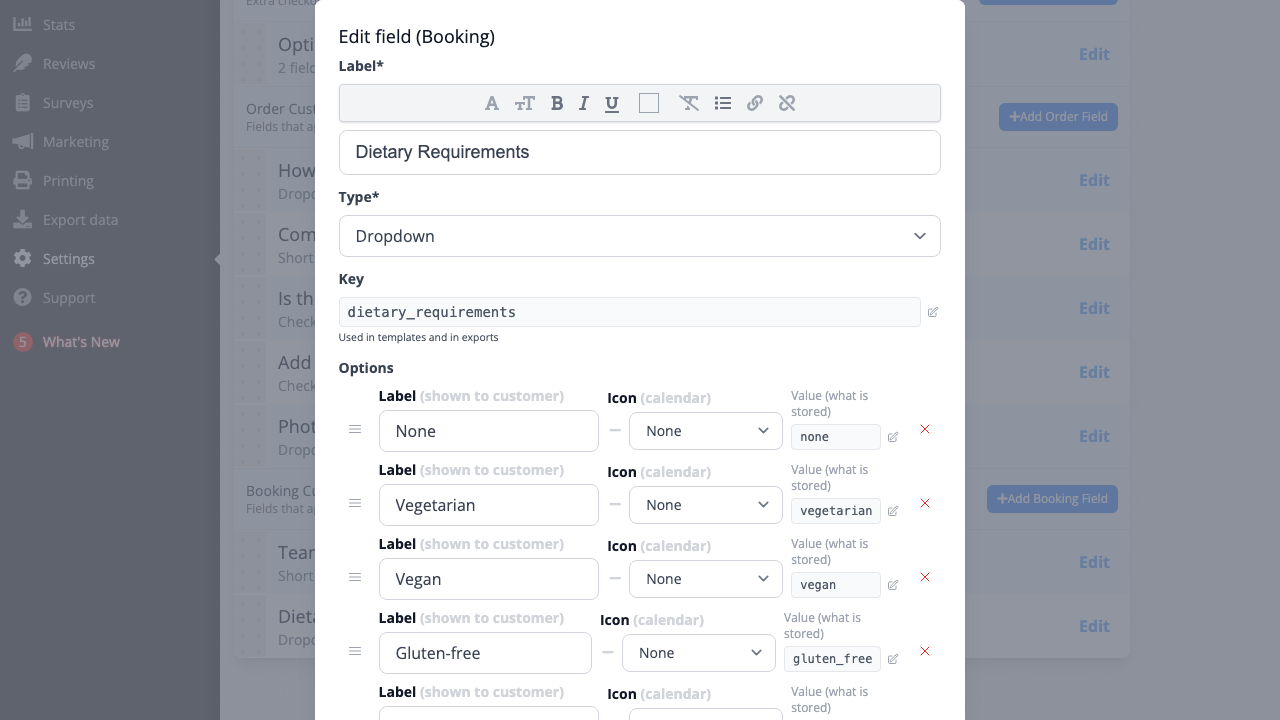
This is useful when a question only applies to certain rooms. For example, if only one of your rooms includes a food experience, you can show a "Dietary Requirements" field only for that room.
Additional Booking Filter
You can add further conditions to control when the field appears. For example, you could show a "Large Group Coordinator" field only for bookings with 4 or more people.
Note: Fields can be filtered based on order and booking properties (such as which room is being booked or the group size), but you cannot currently make one custom field appear or hide based on how a customer answered another custom field. For example, you cannot set up a "Please describe your accessibility needs" text field that only appears if the customer checked "Yes" on a separate accessibility question.
Checkout Pages
By default all your order fields are asked on the Details page, together with the contact and billing details. If you have a lot of questions, or want to give something like paid extras a step of its own, you can create checkout pages. Each checkout page becomes its own step in the booking widget, with its own heading and a label in the checkout progress bar.
Creating a Checkout Page
- Go to Settings > Custom Fields
- In the Checkout Pages section at the top, click Add Checkout Page
- Give the page a heading, shown above the questions. You can also add a shorter progress bar label for the step indicator at the top of checkout; if left blank, it uses the heading
- Save the page
Adding Fields to a Page
Checkout pages only appear if they have at least one order field to ask. To move an order field onto a page, edit the field and set its Checkout page to the page you created (see Checkout Page (Order fields only) above). On the Custom Fields list, each field shows which page it's asked on.
Booking fields cannot be moved onto a checkout page. They always appear per-booking on the Details page.
How It Looks to the Customer
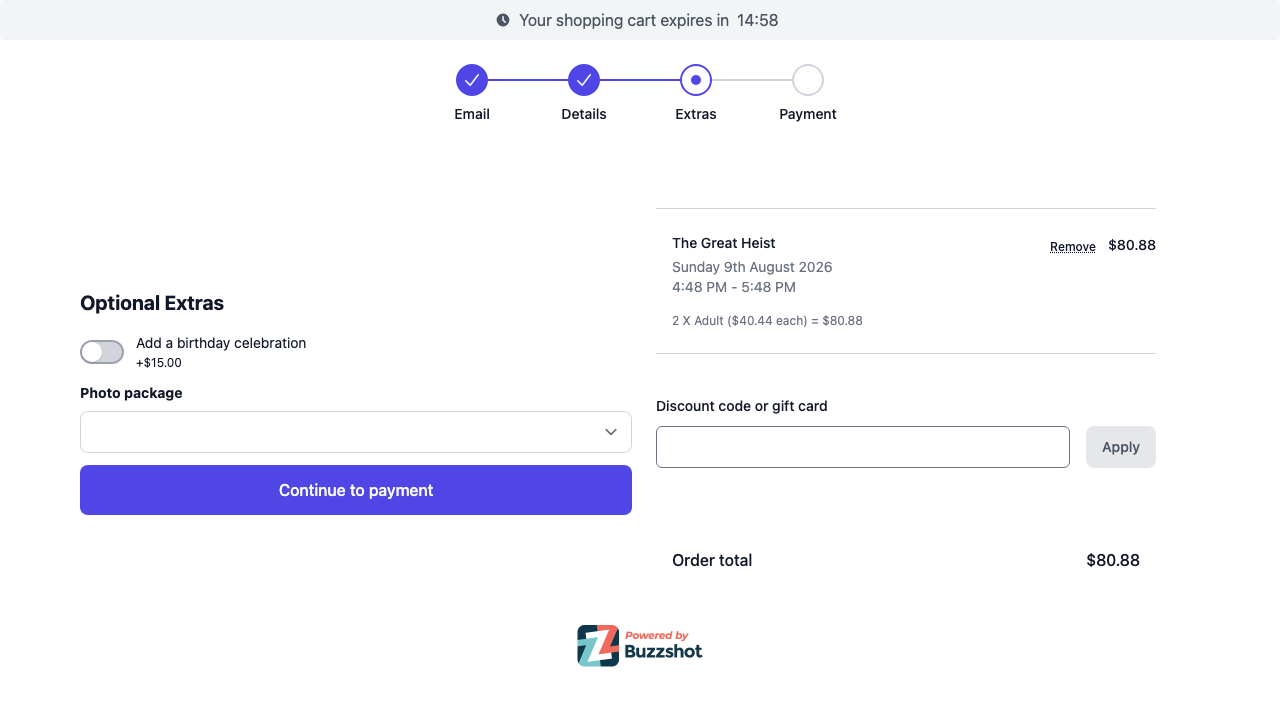
The customer moves through your checkout pages as separate steps. The example below shows an "Optional Extras" page with a paid birthday celebration and a photo package, sitting as its own step between Details and Payment:
Reordering Fields
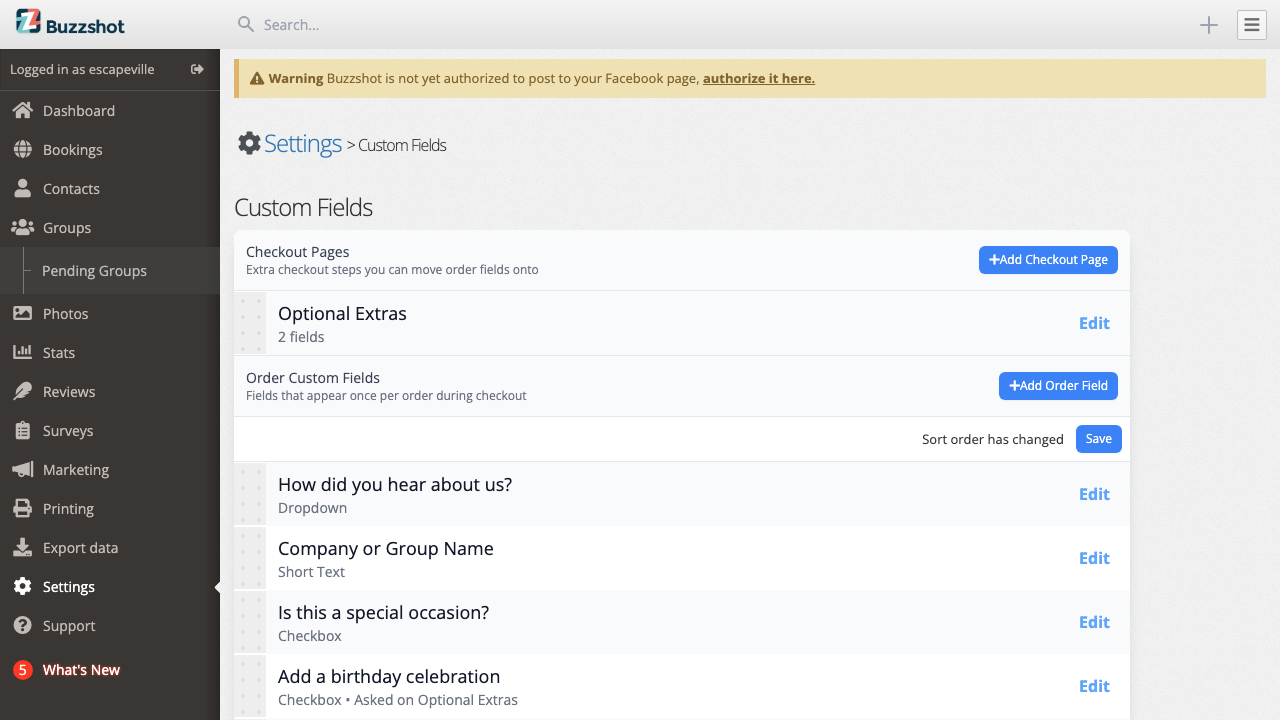
You can change the order in which fields appear by dragging them on the custom fields settings page. After dragging, a "Sort order has changed" bar will appear. Click Save to confirm the new order. Checkout pages can be reordered the same way, which changes the order of the steps in checkout.
Editing and Deleting Fields
To edit an existing field, click the Edit button next to it on the custom fields settings page. The edit modal is the same as the create modal, with the addition of a Delete button.
Important: Deleting a custom field removes the field definition. Data that was already collected for that field remains stored in your orders and bookings, but it will no longer be displayed or included in exports. Similarly, if you delete an option from a dropdown field, any existing orders that selected that option will still have the old value stored, but it will no longer match a current option.
How Custom Fields Appear in Checkout
Custom fields appear on the details step of your booking widget checkout, alongside the contact and billing details form, unless you've moved an order field onto its own checkout page (see above).
Order custom fields appear after the standard contact fields.
Booking custom fields appear per-booking. When a customer is booking multiple rooms, each room's fields appear under a heading showing the room name and time slot.
Required fields must be filled in before the customer can proceed to payment. If a required field is left empty, a validation error will be shown.
Fields with fees show their prices to the customer as they choose: a checkbox displays its fee beneath the label, and a dropdown shows each paid option's price in the list. The order total updates automatically as the customer ticks a paid checkbox or picks a paid option.
Where Custom Field Data Shows Up
Once your customers have filled in their custom fields, the data appears in several places:
Order Details
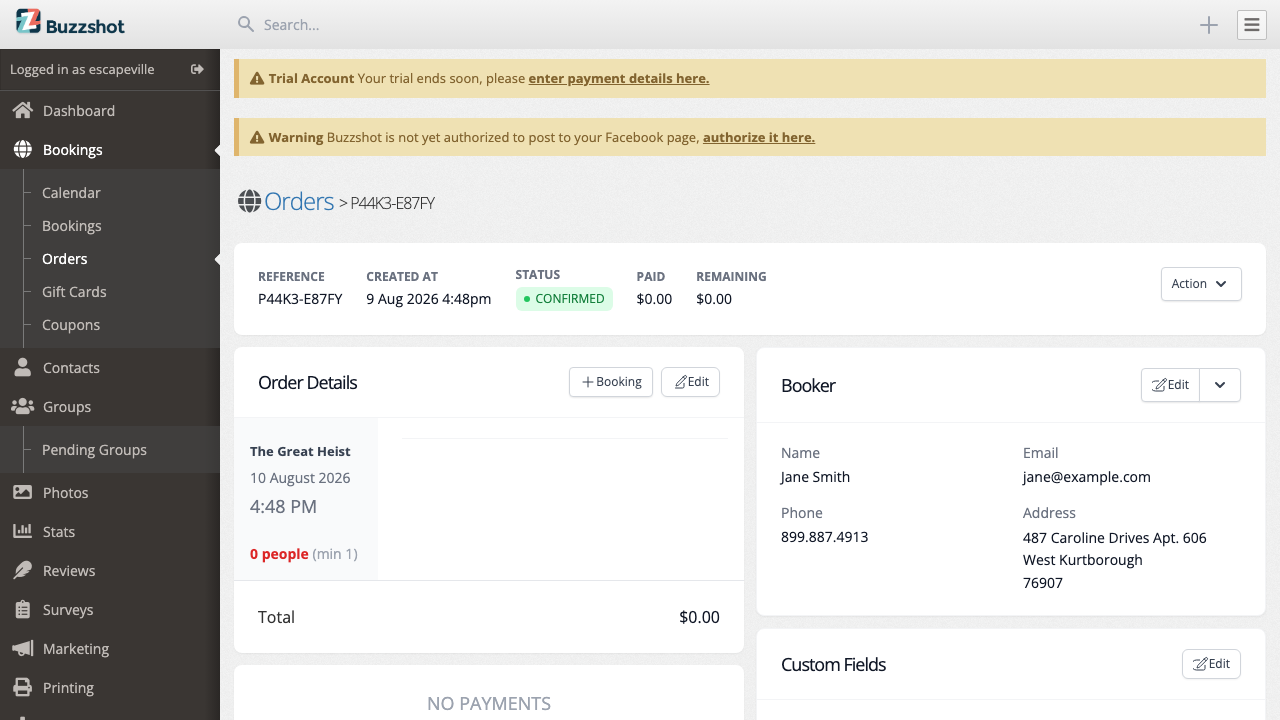
On the order details page in your admin panel, you will see a Custom Fields section showing all the captured data. If there are both order-level and booking-level custom fields, they are displayed together. Booking fields are grouped under the room name and time slot.
You can click Edit to modify the custom field values directly from the order details page.
CSV Exports
When you export orders or bookings as CSV, custom field values are included as additional columns. The column headers use the key you set when creating the field.
- In order exports, order custom fields appear as columns
- In booking exports, both order and booking custom fields appear. Order-level fields are prefixed with "Order - " to distinguish them
For checkbox fields, the exported values are "Yes" or "No".
Staff Notification Emails
If you have order notification emails set up (so that your staff receive an email when a new booking comes in), custom field data is automatically included in those notification emails. Both order-level and booking-level custom field values are shown.