For Staff: Shifts, Availability & the Time Clock
If your manager has added you as a staff member, you get your own pages in Buzzshot for managing your work: checking your upcoming shifts, letting your manager know when you can work, and clocking in and out.
Staffing is a new, optional feature. If it isn't switched on for your account yet, get in touch and we'll enable it for you.
You'll find your pages when you sign in with the login your manager set up for you: a Schedule page and an Availability page (the time clock is on your Schedule). If you can't see them, ask your manager to check that you've been added as a staff member.
There are three things you'll use here:
- Your schedule: your upcoming shifts, and confirming or declining them.
- Your availability: telling your manager which days and times you can work.
- The time clock: clocking in and out, and taking breaks.
Your Schedule
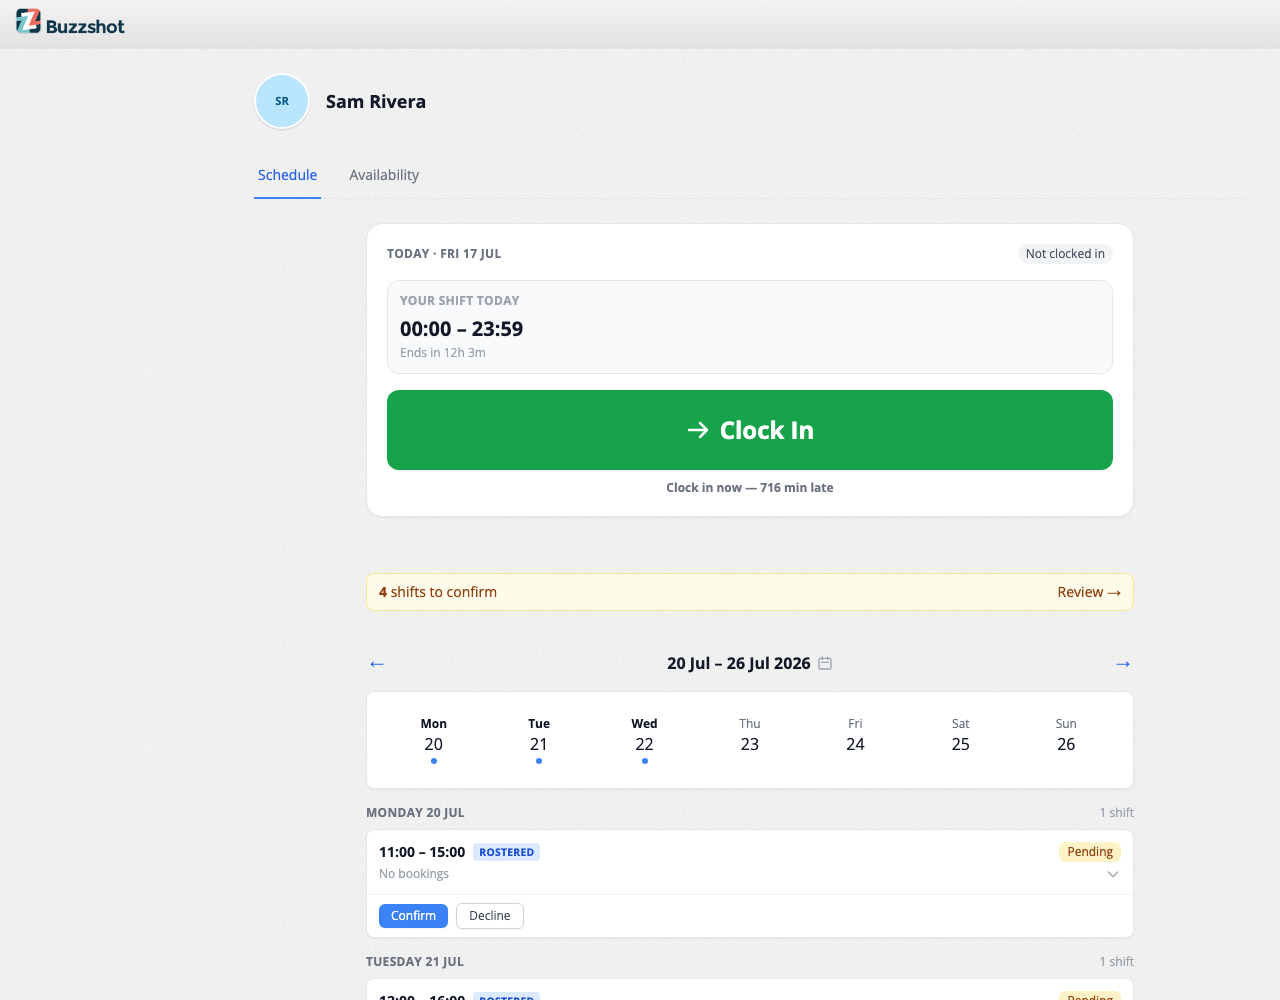
Your Schedule shows your upcoming shifts, one week at a time. You can move between weeks to look ahead or back.
When your manager publishes the schedule, any shift assigned to you starts out as Pending. The shift is already yours. You're expected to work it unless you Decline it, so confirming is really just letting your manager know you've seen it and you're good to work it. A count of your shifts to confirm shows how many you haven't responded to yet.
Each shift is in one of three states:
- Pending: waiting for you to respond (amber).
- Confirmed: you've accepted the shift (green).
- Declined: you've turned the shift down (red).
Confirming a shift
If you can work a shift, click Confirm. The shift turns green and drops off your "shifts to confirm" count. That's all there is to it. Your manager can now see you're good to go.
Declining a shift
If you can't work a shift, click Decline. A short form opens where you:
- Choose a reason, such as Sick, Personal, Conflict, or Other.
- Optionally add a note with any extra detail (for example, "Away at a wedding" or "Back Monday").
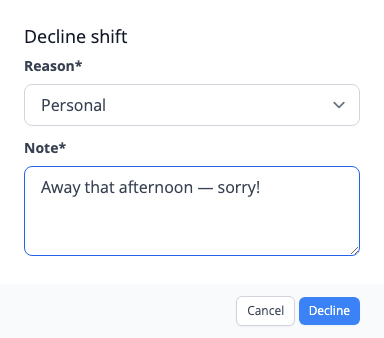
Click to send it, and the shift turns red to show it's declined. Your manager sees the reason and note so they can arrange cover.
Your Availability
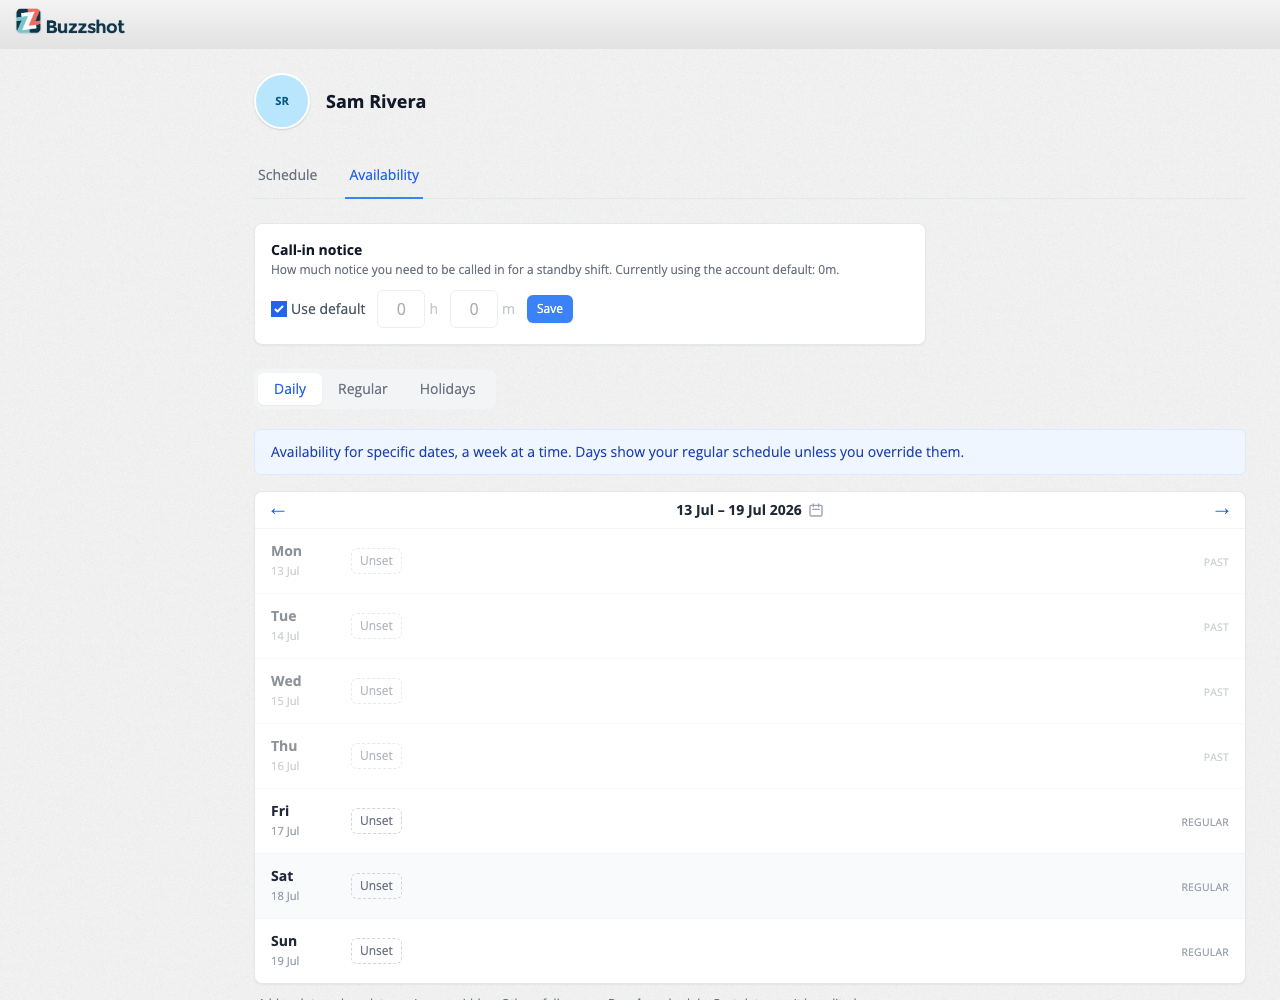
Your Availability page is where you tell your manager which days and times you're free to work. Your manager uses this when building the schedule, so keeping it up to date makes it much more likely you'll be given shifts that suit you.
The page has three tabs: Regular, Daily, and Holidays.
Regular
Your Regular availability is your usual weekly pattern: the hours you can normally work on each day of the week. This is the main one to keep up to date. For each day of the week you can:
- Add one or more windows: the times you are available.
- Mark the day Unavailable all day: you don't work that day.
- Leave it Unset if you haven't decided. (This is different from saying you're unavailable. It just means you haven't said either way.)
A window is simply a start time and an end time. For example, a window from 5:00pm to 10:00pm means you're available during those hours. You can add more than one window to a day if your availability is split (for instance, mornings and evenings but not the afternoon).
Daily
The Daily tab lets you override your regular availability for particular dates. Any date you haven't changed simply follows your Regular pattern; change one and it's marked so you can see it's different. Use this for one-offs without changing your usual week: "I can work late this Friday" or "I can't make it next Tuesday".
Holidays
The Holidays tab is for longer stretches of time off. Add a start date and an end date, and you'll be marked as away for that whole period so your manager knows not to roster you.
The Time Clock
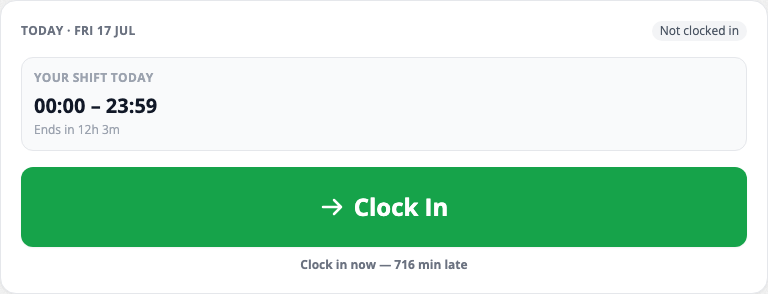
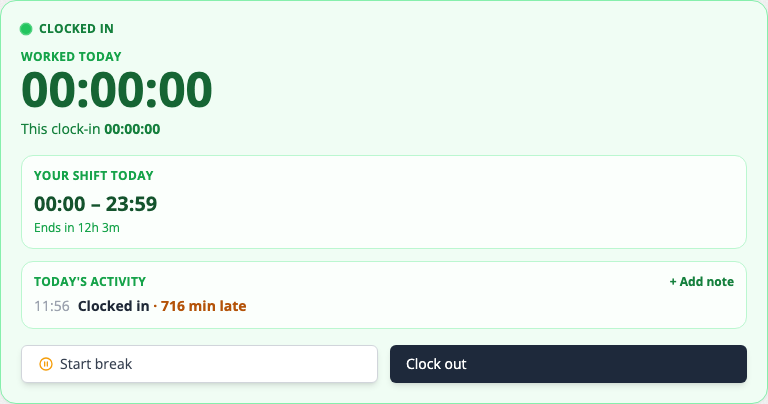
At the top of your Schedule you'll find your time clock. This is how you record the hours you actually work, so your manager has an accurate record.
If you have a shift today, the clock card shows your shift today (your rostered times) so you know what you're clocking in against.
Clocking in and out
- At the start of your shift, click Clock In.
- At the end, click Clock out.
While you're clocked in, the card shows a running Worked today timer so you can see how long you've been on the clock.
Taking a break
When you take a break, click Start break. The worked timer pauses while you're away. When you come back, click End break to start it again. Your breaks are recorded separately, so your worked hours stay accurate.
Adding a clock note
You can attach a short clock note at any point during your day with + Add note on the activity list. This is handy for passing on anything your manager should know, like "Left a prop out for the next group" or "Ran 10 minutes late, traffic". Notes are entirely optional. Clocking in and out never asks you for one.
The clock indicator
While you're clocked in, a small clock indicator follows you around the admin. It stays visible even when you move to other pages. It's a quick reminder that you're still on the clock, and you can clock out straight from it without going back to your Schedule.