Ticket Types
Ticket types define the different categories of tickets customers can purchase when booking your experiences -- things like "Adult", "Child", "Family", or "Student". They are one of the first things you should set up in Buzzshot Bookings.
Ticket types are shared across all your bookable experiences (escape rooms, games, etc.), so you only need to define them once. Each bookable then gets its own pricing for each ticket type.
What Is a Ticket Type?
A ticket type has three main properties:
- Name -- What your customers see when booking (e.g., "Adult", "Child (4-12)", "Family Pack").
- Person Count -- How many people one ticket represents. An "Adult" ticket typically covers 1 person, while a "Family" ticket might cover 4.
- Description -- Optional text shown on the booking widget to explain what the ticket includes or any restrictions.
The person count is particularly important because it directly affects your capacity calculations. When a customer selects 2 "Family" tickets with a person count of 4, that counts as 8 people towards your room's maximum capacity.
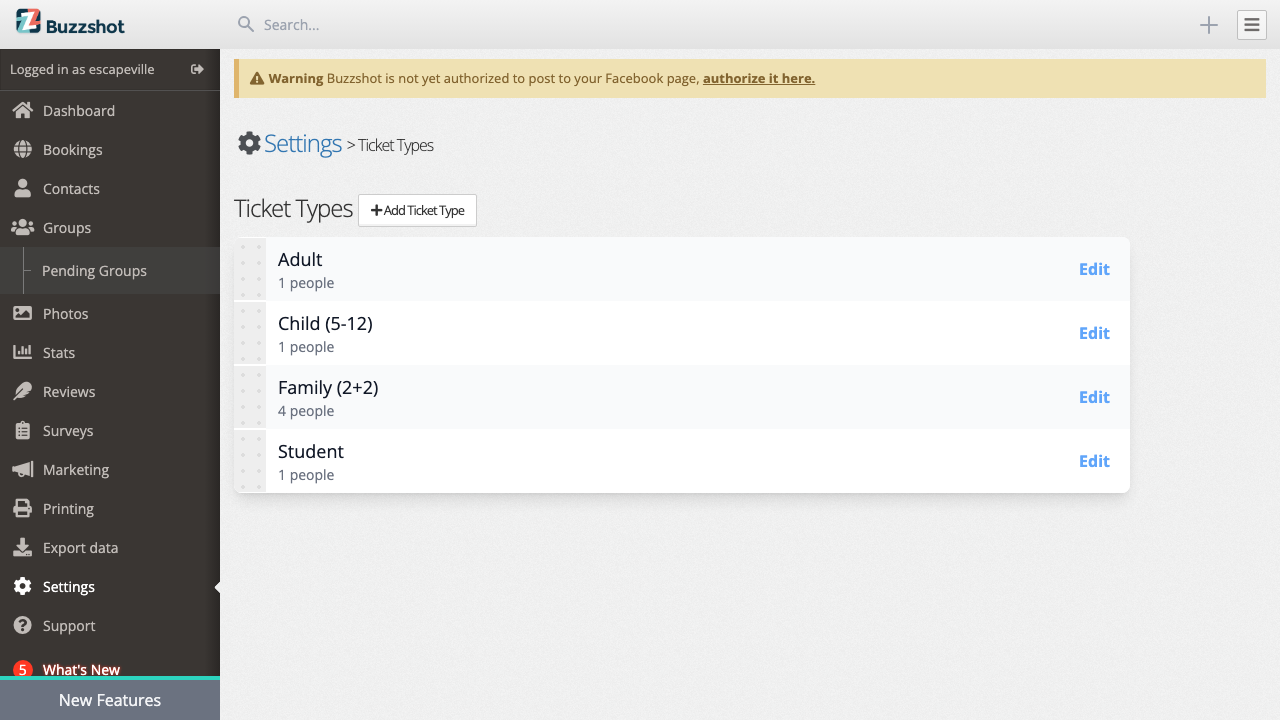
Creating Ticket Types
- Go to Settings > Ticket Types in your admin area.
- Click Add Ticket Type.
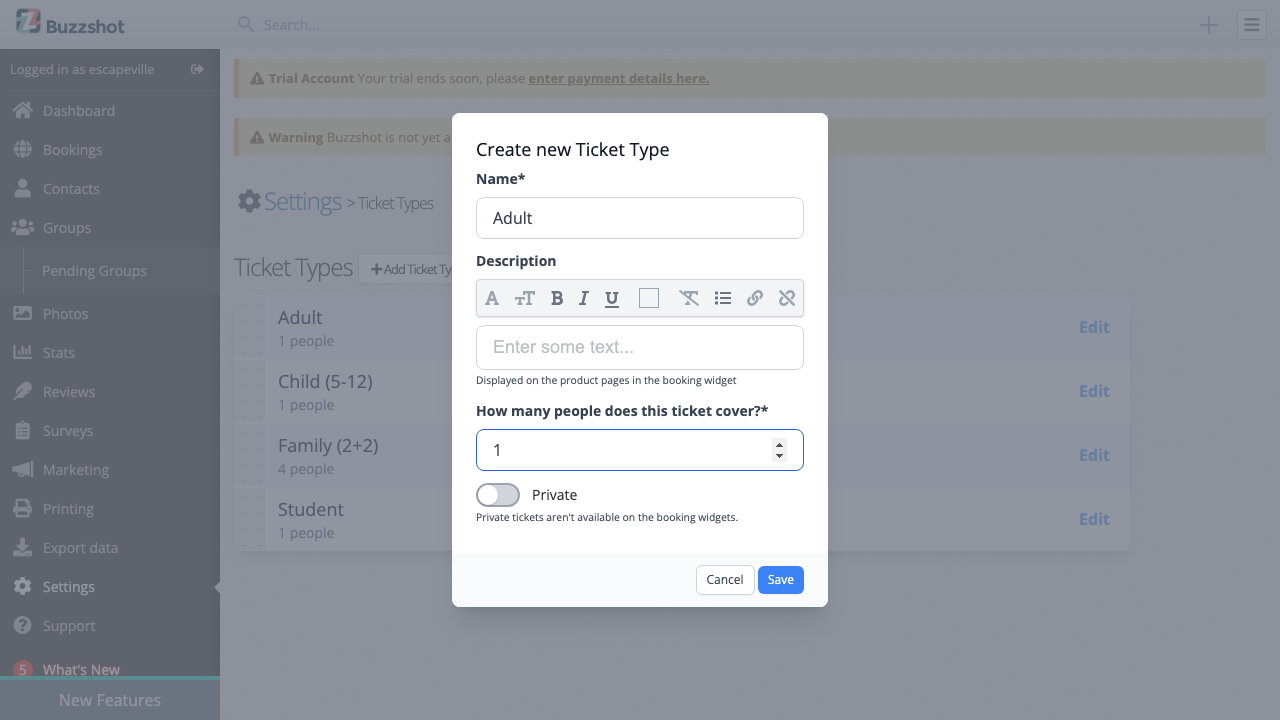
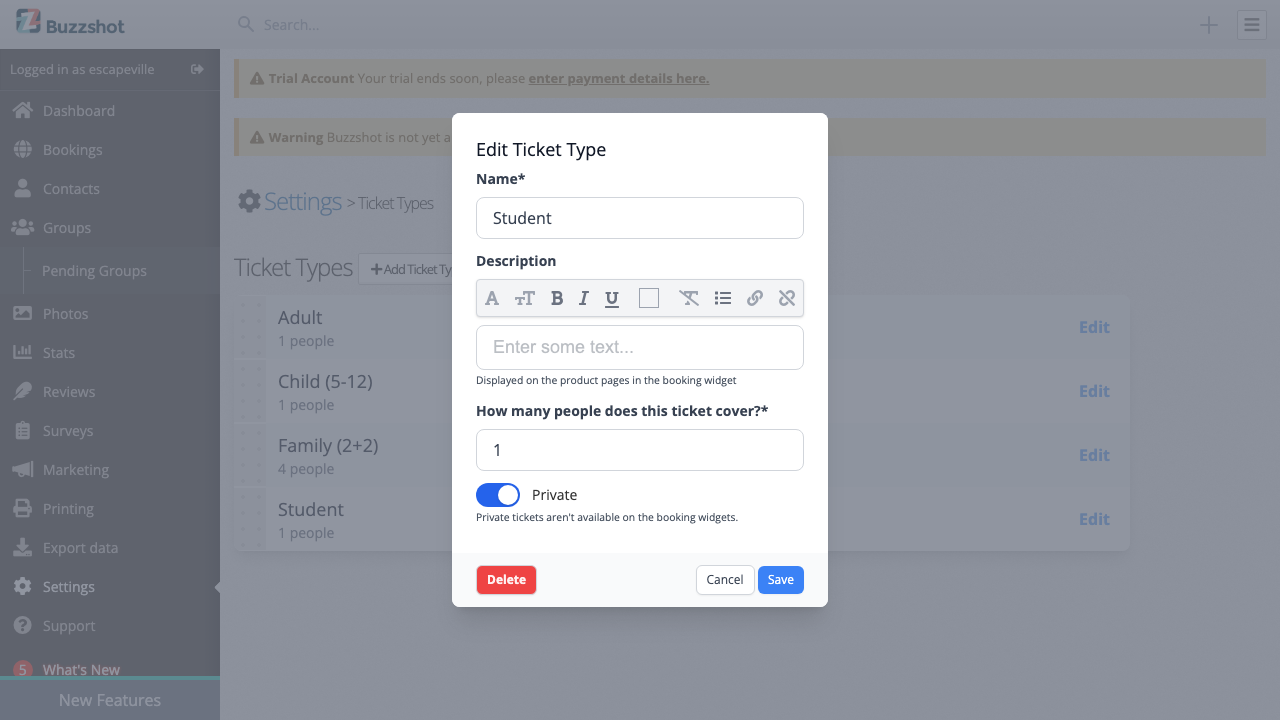
- Fill in the fields:
- Name -- Choose a clear, customer-friendly name. If your site supports multiple languages, you can provide translations for each language.
- Description -- Optionally add details such as age ranges, what's included, or any restrictions. This appears on the product page in the booking widget.
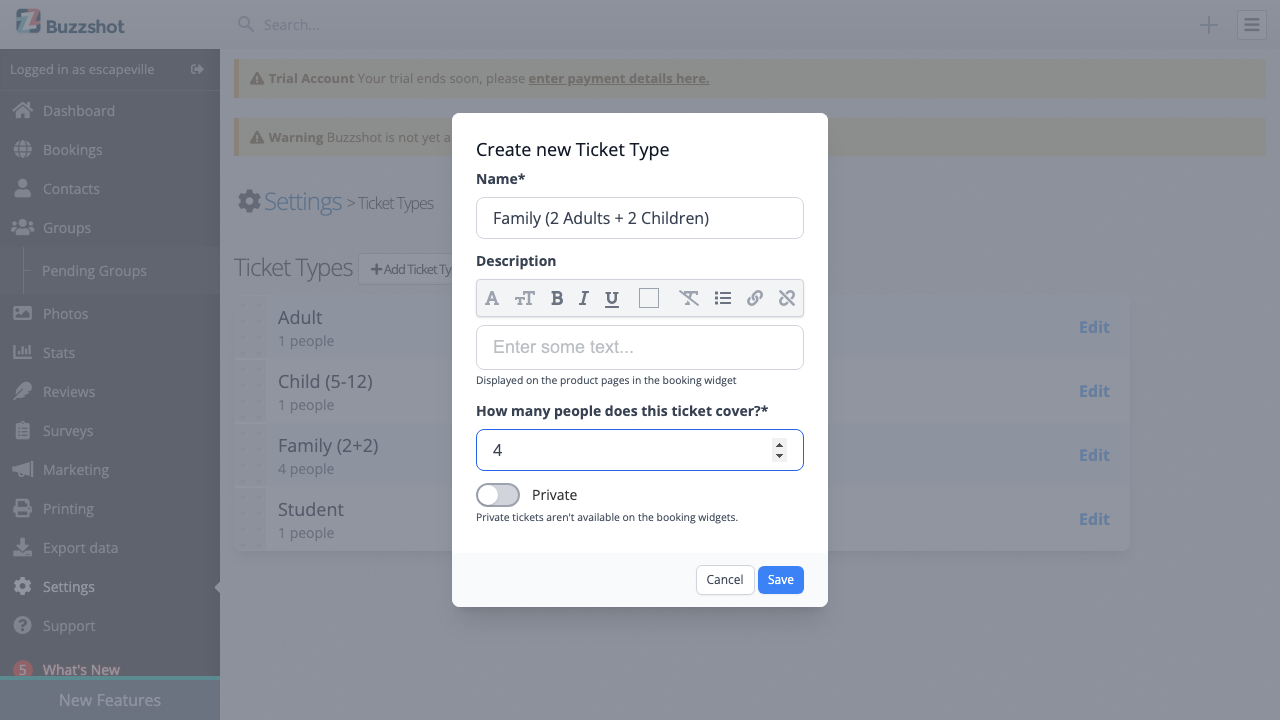
- How many people does this ticket cover? -- Enter the number of people this ticket represents. For individual tickets (Adult, Child, Student) this is typically 1. For group tickets (Family, Couple) set this to the number of people included.
- Private -- Leave this off for now. See the Private Ticket Types section below.
- Click Save.
Repeat this for each ticket type you need. Most escape room businesses start with "Adult" and "Child" ticket types.
Common Ticket Type Examples
| Ticket Type | Person Count | Description |
|---|---|---|
| Adult | 1 | Ages 13 and over |
| Child | 1 | Ages 4-12 |
| Family (2+2) | 4 | 2 adults and 2 children |
| Student | 1 | Valid student ID required |
| Concession | 1 | Seniors, military, etc. |
For group tickets like "Family", the person count reflects the total number of people included:
Reordering Ticket Types
The order of your ticket types determines the order they appear in the booking widget. To rearrange them:
- Go to Settings > Ticket Types.
- Drag the ticket types into your preferred order using the handles on the left side of each entry.
- A notification will appear saying "Sort order has changed".
- Click Save to confirm the new order.

Editing and Deleting Ticket Types
To edit a ticket type, click "Edit" next to it on the Ticket Types page. You can change the name, description, person count, or private setting.
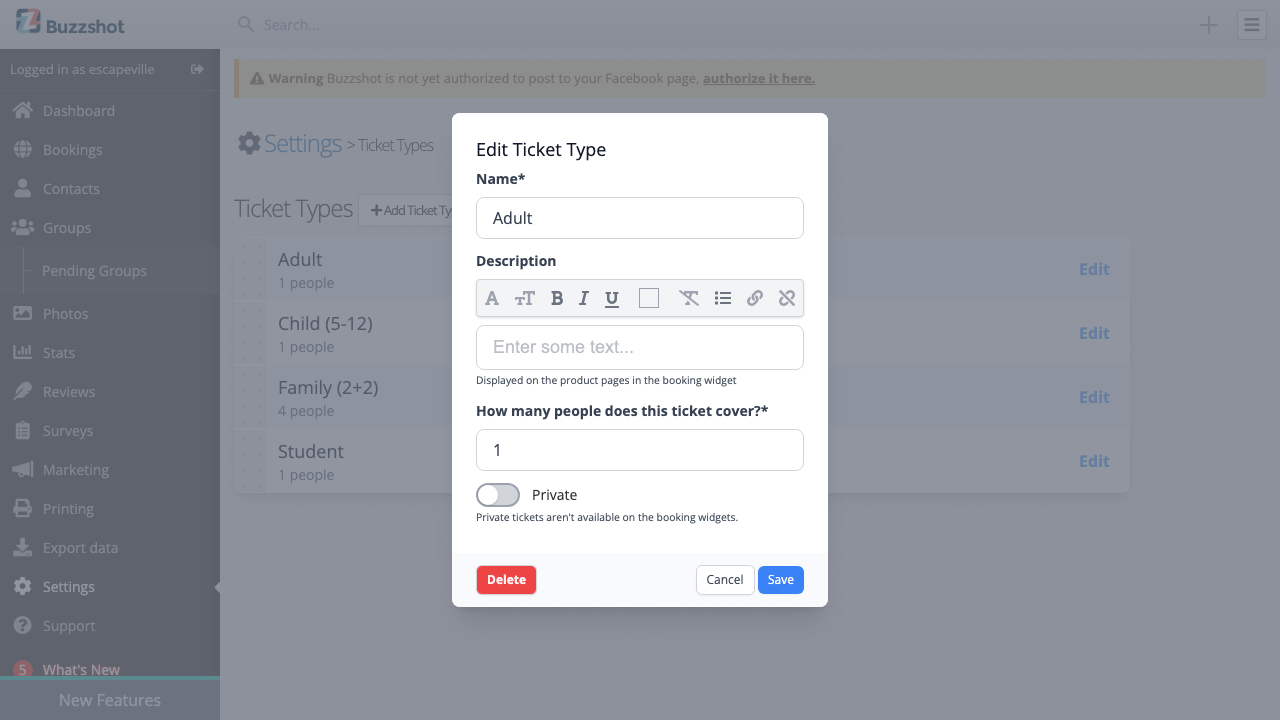
To delete a ticket type, open the edit dialog and click the "Delete" button.
Warning: Deleting a ticket type is permanent and cannot be undone. It will remove all associated pricing from every bookable, and any existing bookings that used this ticket type will lose their ticket type details. Always double-check before deleting -- if you're unsure, consider making the ticket type Private instead so it no longer appears to customers but remains in your system.
Note: Changing a ticket type's name or person count affects every bookable that uses it, since ticket types are shared across your entire booking site.
Setting Up Pricing
Ticket types on their own do not have prices -- prices are always set per bookable experience. After creating your ticket types, you'll need to set prices for each one on every bookable's Prices tab.
For full details on pricing, including tiered pricing and price groups, see Setting Up Pricing.
Minimum Quantities
You can require a minimum number of each ticket type per booking. This is set per bookable, not on the ticket type itself.
- Go to Bookable Items (your rooms and games) and select the experience.
- On the Details tab, you will see a "Minimum quantity" field for each ticket type.
- Set the minimum (e.g., set "Adult" to 1 to require at least one adult ticket).
- A value of 0 means the ticket type is optional -- customers can book without selecting any of that type.
This is useful for:
- Safety and supervision -- Require at least one adult ticket per booking so children are always accompanied.
- Preventing gaming of discounts -- If you offer a discounted "Child" ticket, requiring at least one "Adult" ticket prevents customers from booking only cheap tickets.
- Enforcing minimum group sizes -- Require a minimum of 2 players to ensure your rooms are not booked for just one person.
Private Ticket Types
Marking a ticket type as Private hides it from your public booking widget. Customers will not see it when booking online.
Private ticket types are still available in the admin area, so your staff can add them to bookings manually. Common uses for private ticket types include:
- Staff bookings -- Free tickets for team training or testing.
- Corporate/group rates -- Special pricing that staff apply for business bookings.
- VIP or complimentary tickets -- Tickets that should only be added by your team.
To make a ticket type private, edit it and toggle Private to on.
Controlling Ticket Types by Day or Time
You don't have to offer every ticket type for every time slot. Using Rules, you can enable or disable specific ticket types based on the day of the week, time of day, or other conditions. This is managed through the Rules settings for your bookable items.
Common examples:
- Family deals on weekdays only -- Create a "Family" ticket type and use a rule to make it available only Monday to Thursday.
- No children for evening sessions -- Disable child tickets for your after-8pm horror-themed slots.
- Happy hour pricing -- Create a special "Happy Hour" ticket type and restrict it to certain time windows.
- Weekend-only group tickets -- Offer a discounted group ticket type only on Saturdays and Sundays.
When a rule disables a ticket type for a slot, that ticket type will not appear as an option for customers booking that time slot. Your other ticket types remain available as normal.
How Ticket Types Appear to Customers
Here's how ticket types look on the customer-facing booking widget. Customers choose a time slot and then select how many of each ticket type they want:
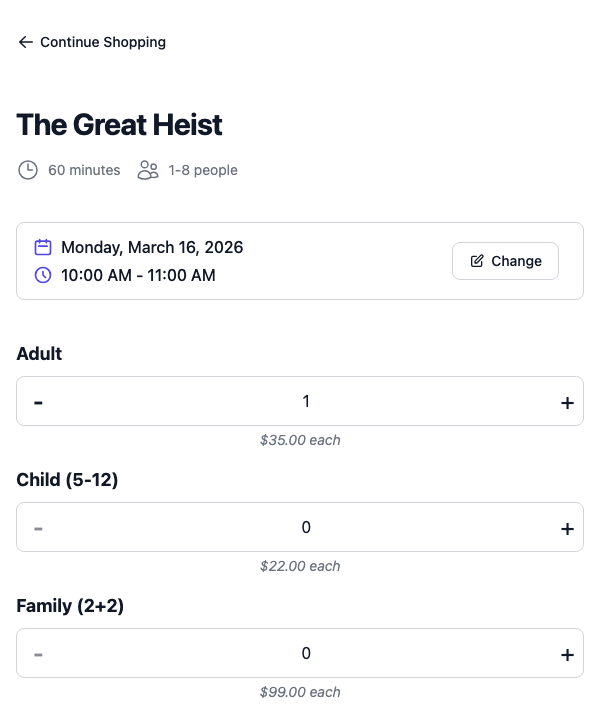
Notice that the "Student" ticket type (which is marked as Private) does not appear here -- only public ticket types are shown to customers.
Tips and Best Practices
- Keep names simple and clear. Customers should immediately understand what each ticket type is. Include age ranges if relevant (e.g., "Child (4-12)").
- Set person counts accurately. These directly control how many people count towards your room's capacity limits. Getting this wrong means rooms could be over- or under-booked. Double-check person counts before your first real booking goes live.
- Use descriptions. If a ticket type has conditions (valid student ID required, age restrictions, etc.), put this in the description so customers see it before purchasing.
- Start simple. Most escape rooms only need "Adult" and "Child" ticket types. You can always add more later.
- Remember the site-wide scope. Ticket types are shared across all your bookable experiences. If you change a ticket type's name, it changes everywhere. Don't create separate ticket types per room (e.g., "Room 1 Adult", "Room 2 Adult") -- just create one "Adult" ticket type and set different prices for each room on its Prices tab.
- Set minimum quantities thoughtfully. Requiring at least 1 adult ticket is common. Setting all minimum quantities to 0 is also fine if you do not need to enforce composition rules.