Better Escape Room Photos in Photoshop with the Vignette Effect
Posted in Marketing by Bill Parslow on Mon 17 February 2020
It’s always worth making your Escape Room group photos stand out from the crowd. One way to that is through the easily created but interesting modification, called the vignette effect. Users of Buzzshot can have this effect applied automatically of course, but here we'll look at how you can make it yourself in Photoshop
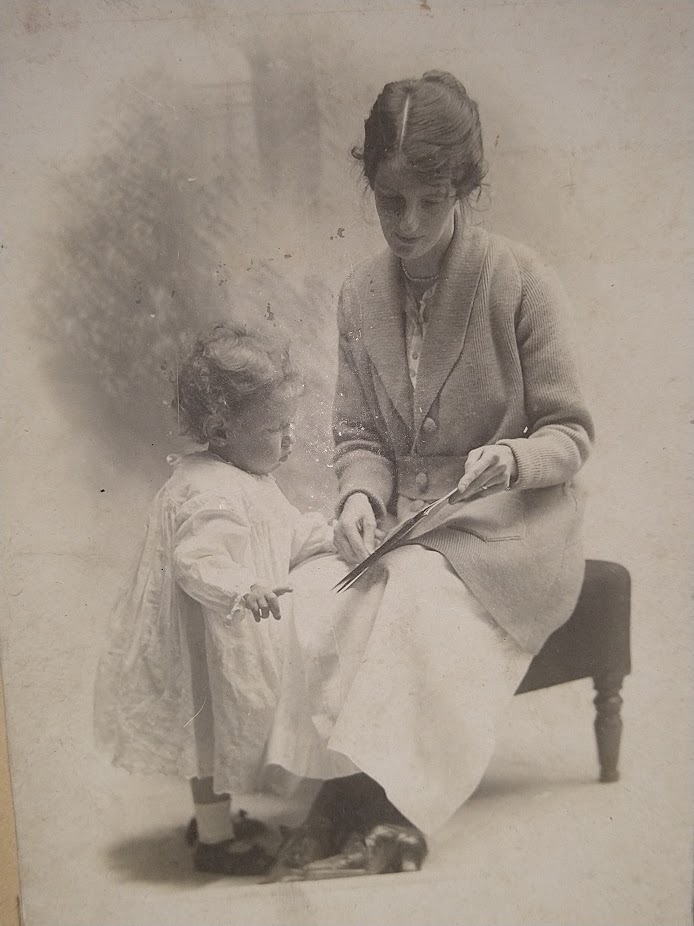
In some old vintage photos like this, half the charm comes from this slightly unwanted effect:
Now have a look at this famous image from the Matrix:
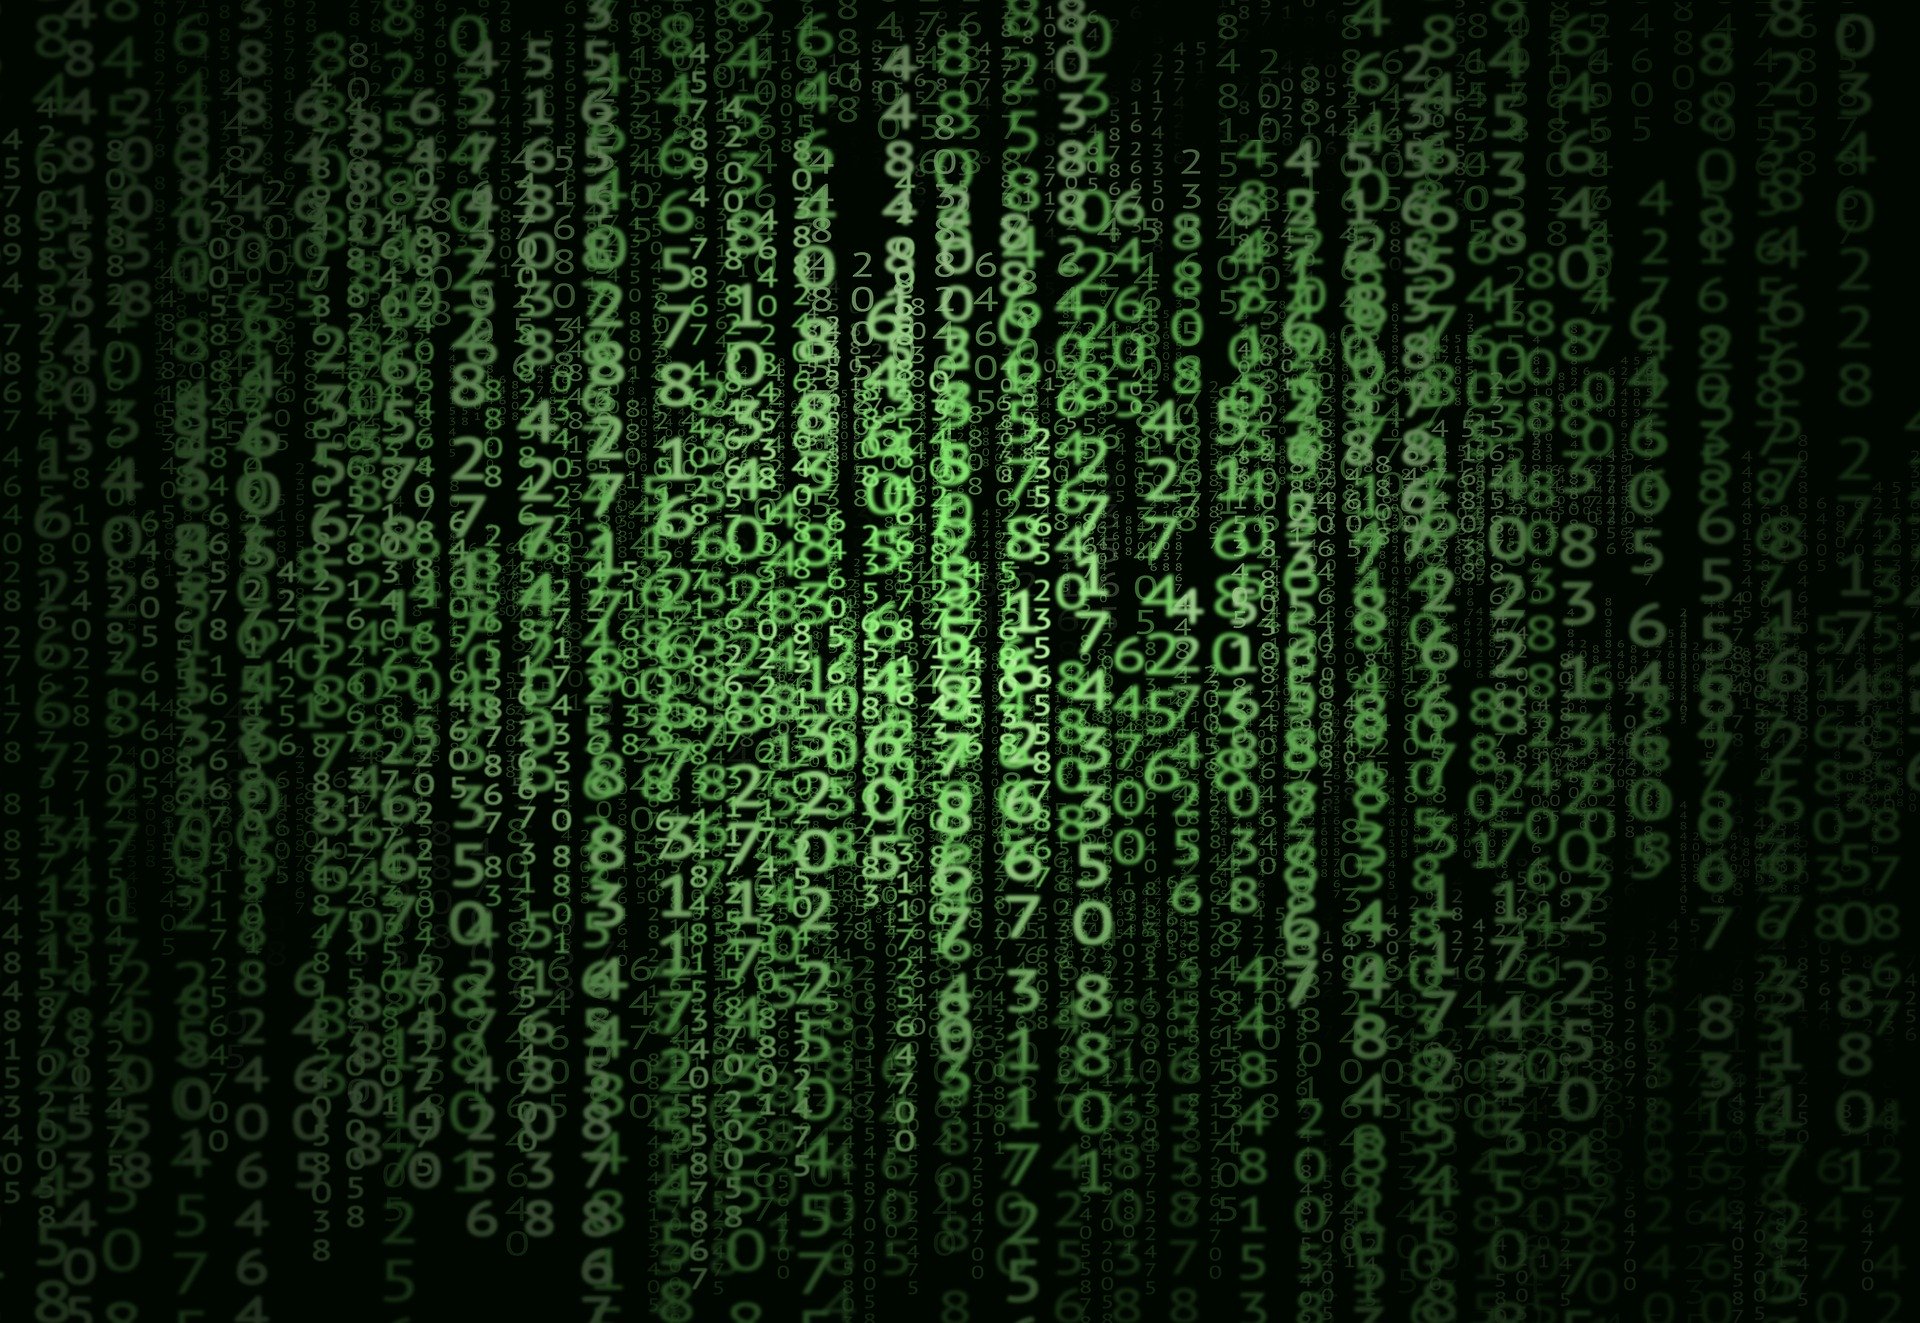
The darkness at the edges adds a sense of mystery and depth to the image.
This applies not just to your advertising but also to the pictures of your victorious (or not so victorious) players. Either way it makes their ordinary group picture just a little bit special even if you aren’t using lots of props and costumes.
And of course the vignette effect still lets your players faces shine through - this is something they want to show off to their friends, so they need to be recognizable! Indeed one of the main uses of the vignette effect is to throw your attention to the main focus of the picture.
It has another rather useful side effect as well. Unless you are lucky enough to have the perfect venue in which to set up and compose your after game portraits then it’s sometimes the case that a supermarket bag, a badly placed litter bin - or any other small but annoying contaminant can creep into the edges of your picture. The vignette effect is perfect for easily editing them out.
I spoke to Kevin Flee - an experienced Games Master with Handmade Mysteries, Photoshop expert and general all round goto person for multi-media activities who told me that much of the Photoshopping required is to compensate for slightly underpar group pictures. In the past this used to be because Escape Rooms didn’t always invest in the best camera phones, but even now taking group portraits is an art, and not all Games Masters are expert at this. And even the most expertly taken photos can still benefit from a little processing.
Thus you can expect to spend some time improving pictures and one of the best ways to get rid of those annoying distractions at the edges is the vignette effect.
Kevin also remarked said that using a pre-designed template such as that you have with Buzzshot seriously cuts down the amount of time you need to spend making the photo publishable.
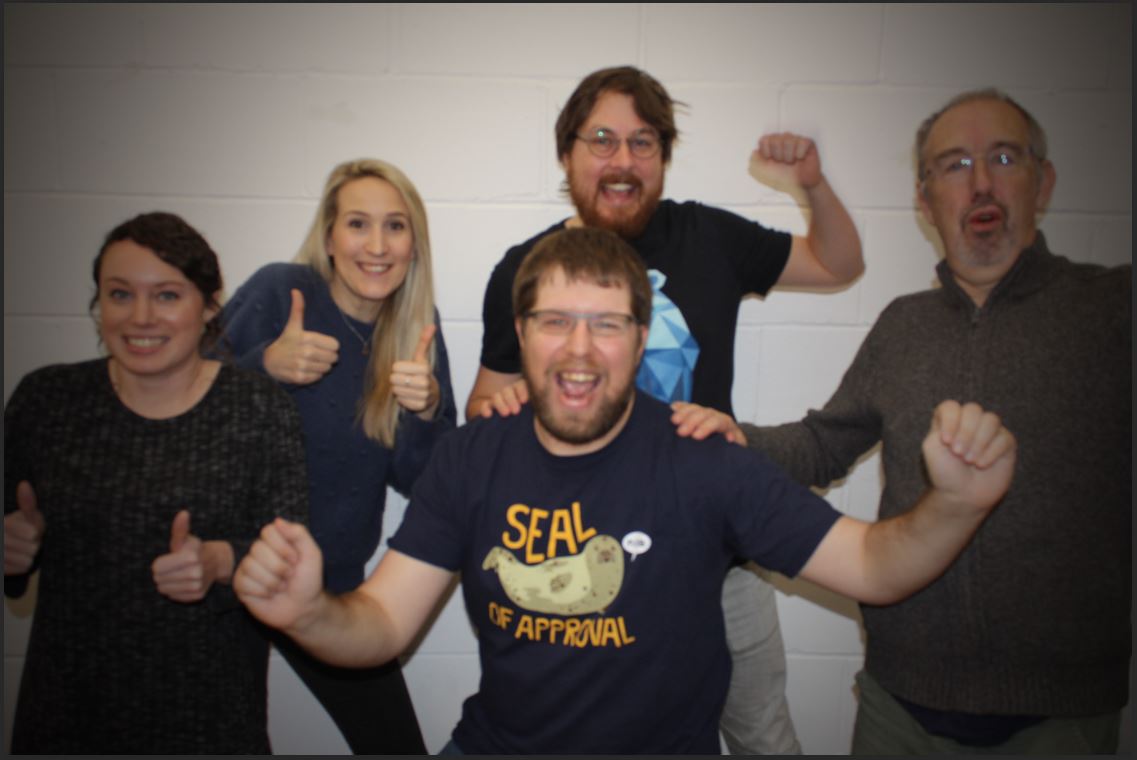
What I am going to do here is go through a couple of group pictures of happy games players showing how the effect can be used. One of the pictures, on which I will use the Lens Correction Tool, doesn’t have an annoying bits of furniture in the background, but the second has a chair, a desk and a picture on the wall all cluttering up the picture.
So the first vignette effect I will create a simple way using the Lens Correction Tool, which produces a quite a subtle effect using the Vignette effect control within it, and then I will show another more complicated way using the Ellipse Tool, where you can make the effect much stronger.
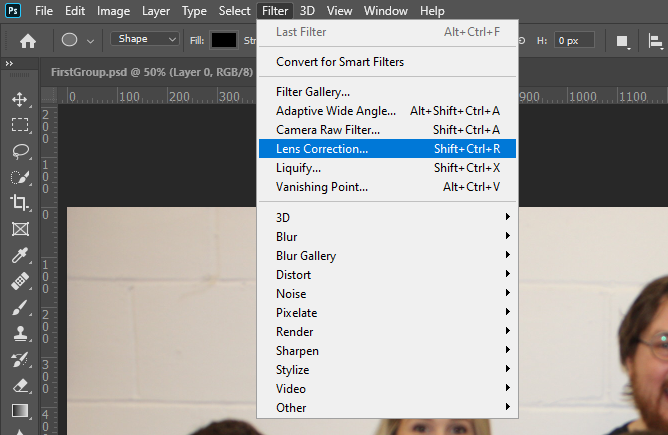
With your photograph now open in Photoshop from the top menus select Filter and from the menu items select Lens Correction. After selecting the tool you should see a screen as below, with the Lens Correction tool displayed.
The screen should look as below, with your picture inside the Lens Correction Tool.
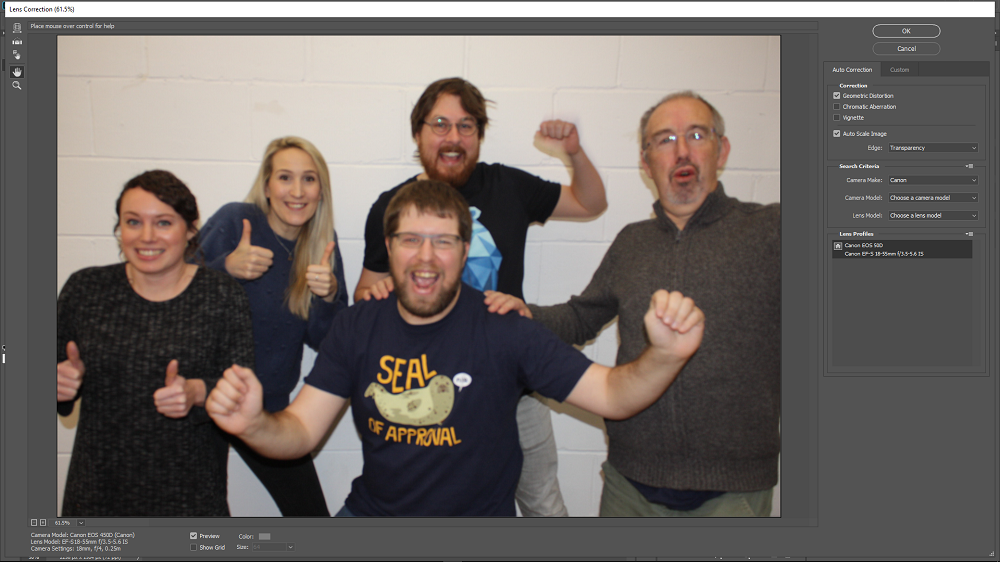
The Lens Correction Tool has a number of options - in this instance select the custom tab. From here you can see the vignette effect sliders. You can darken the edges of the photo or you can lighten them.

Slide the Vignette control over to the right from it's middle position - you might also slide the Midpoint control over to the right, but no too much.
It’s all rather subtle, even with the Vignette Slider right over to its full extent. The effect can be made a little more dramatic, adding focus to the team players faces by adjusting the Midpoint Tool which has been done above.
If this seems rather underwhelming then there are more invasive and drastic tools to alter the edges of the photograph and make more dramatic vignette effect.
We’re going to use the Ellipse Tool to select the area of the picture that we want everyone to see. The Ellipse Tool is selected by right clicking on the Rectangle Tool, about two thirds of the way down the toolbar on the left of your picture.
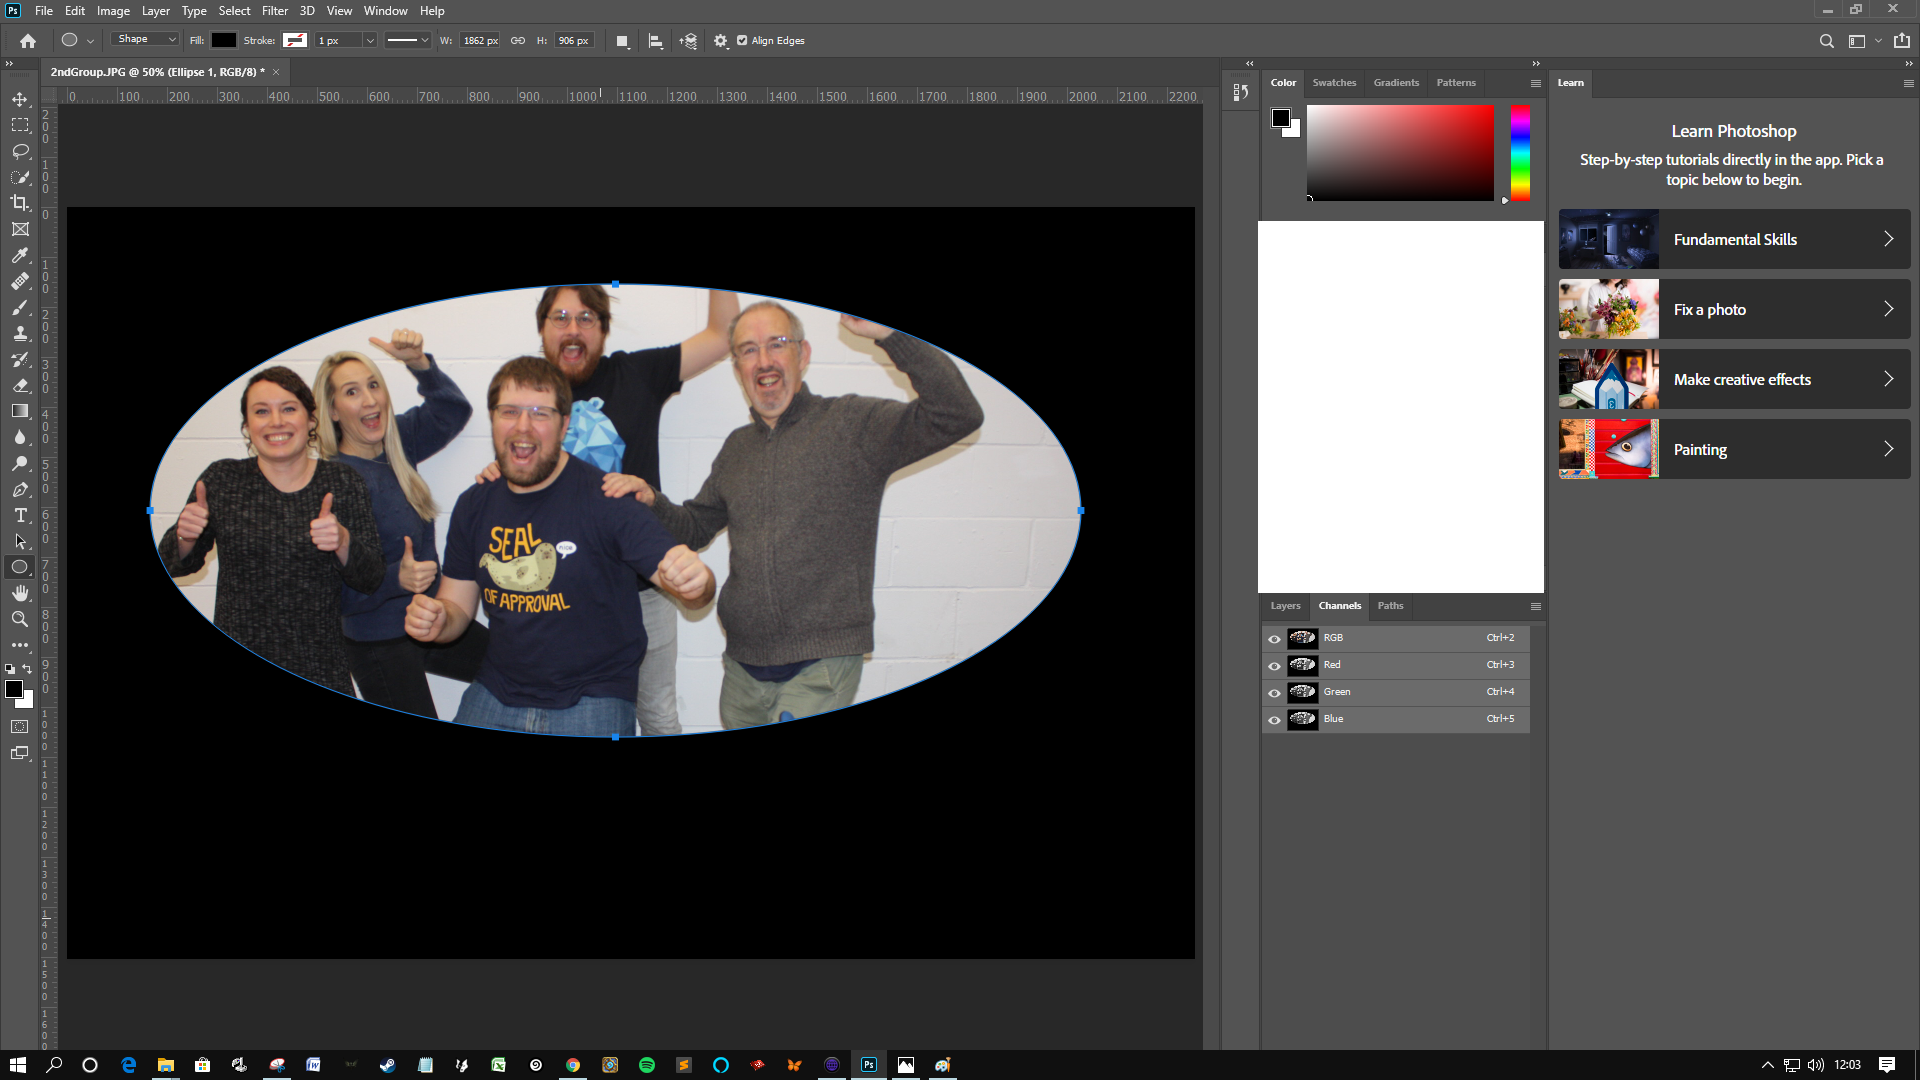
With that tool selected click on the a point in that picture on the wall and drag the blue ellipse you can see until it contains all the players as below.

Alarmingly when you take your finger off the mouse button what you get is a black ellipse that obliterates rather than focuses.
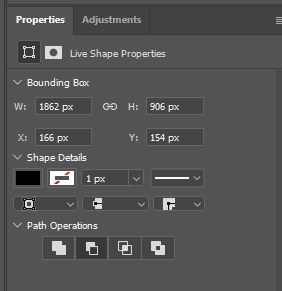
With the ellipse still selected go to the Properties box and down at the bottom select the Inverse button (2nd along from the left under Path Properties).
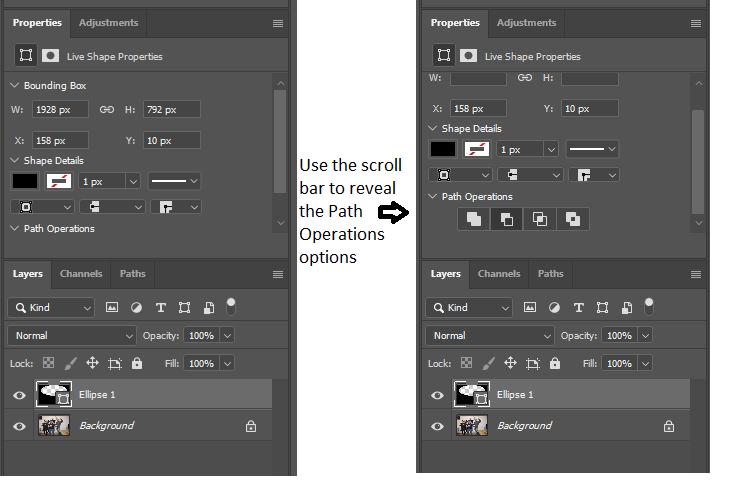
Be aware that sometimes if you have the Layers control, open beneath the Properties Box shown above it looks slightly different - the Path Operations options aren't visible until you've scrolled down the Properties box.
This selects the area inside the ellipse as below:
Use Control - T to select the ellipse and move it and/or resize it to capture all the players.
This is a very blunt and intrusive effect - but it does get rid of all the extraneous items there were in the ordinary picture.
We can use the “Feather” property in the Properties window to lessen the black frame, but still hide the chair and the picture that were intruding onto our composition.
Select the Masks tab in the Properties box:
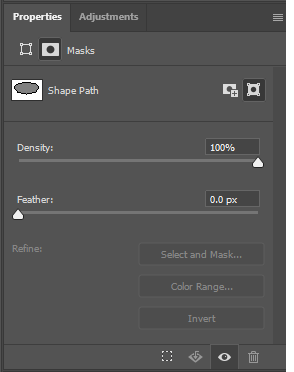
Then you will see the Feather adjustment tool.
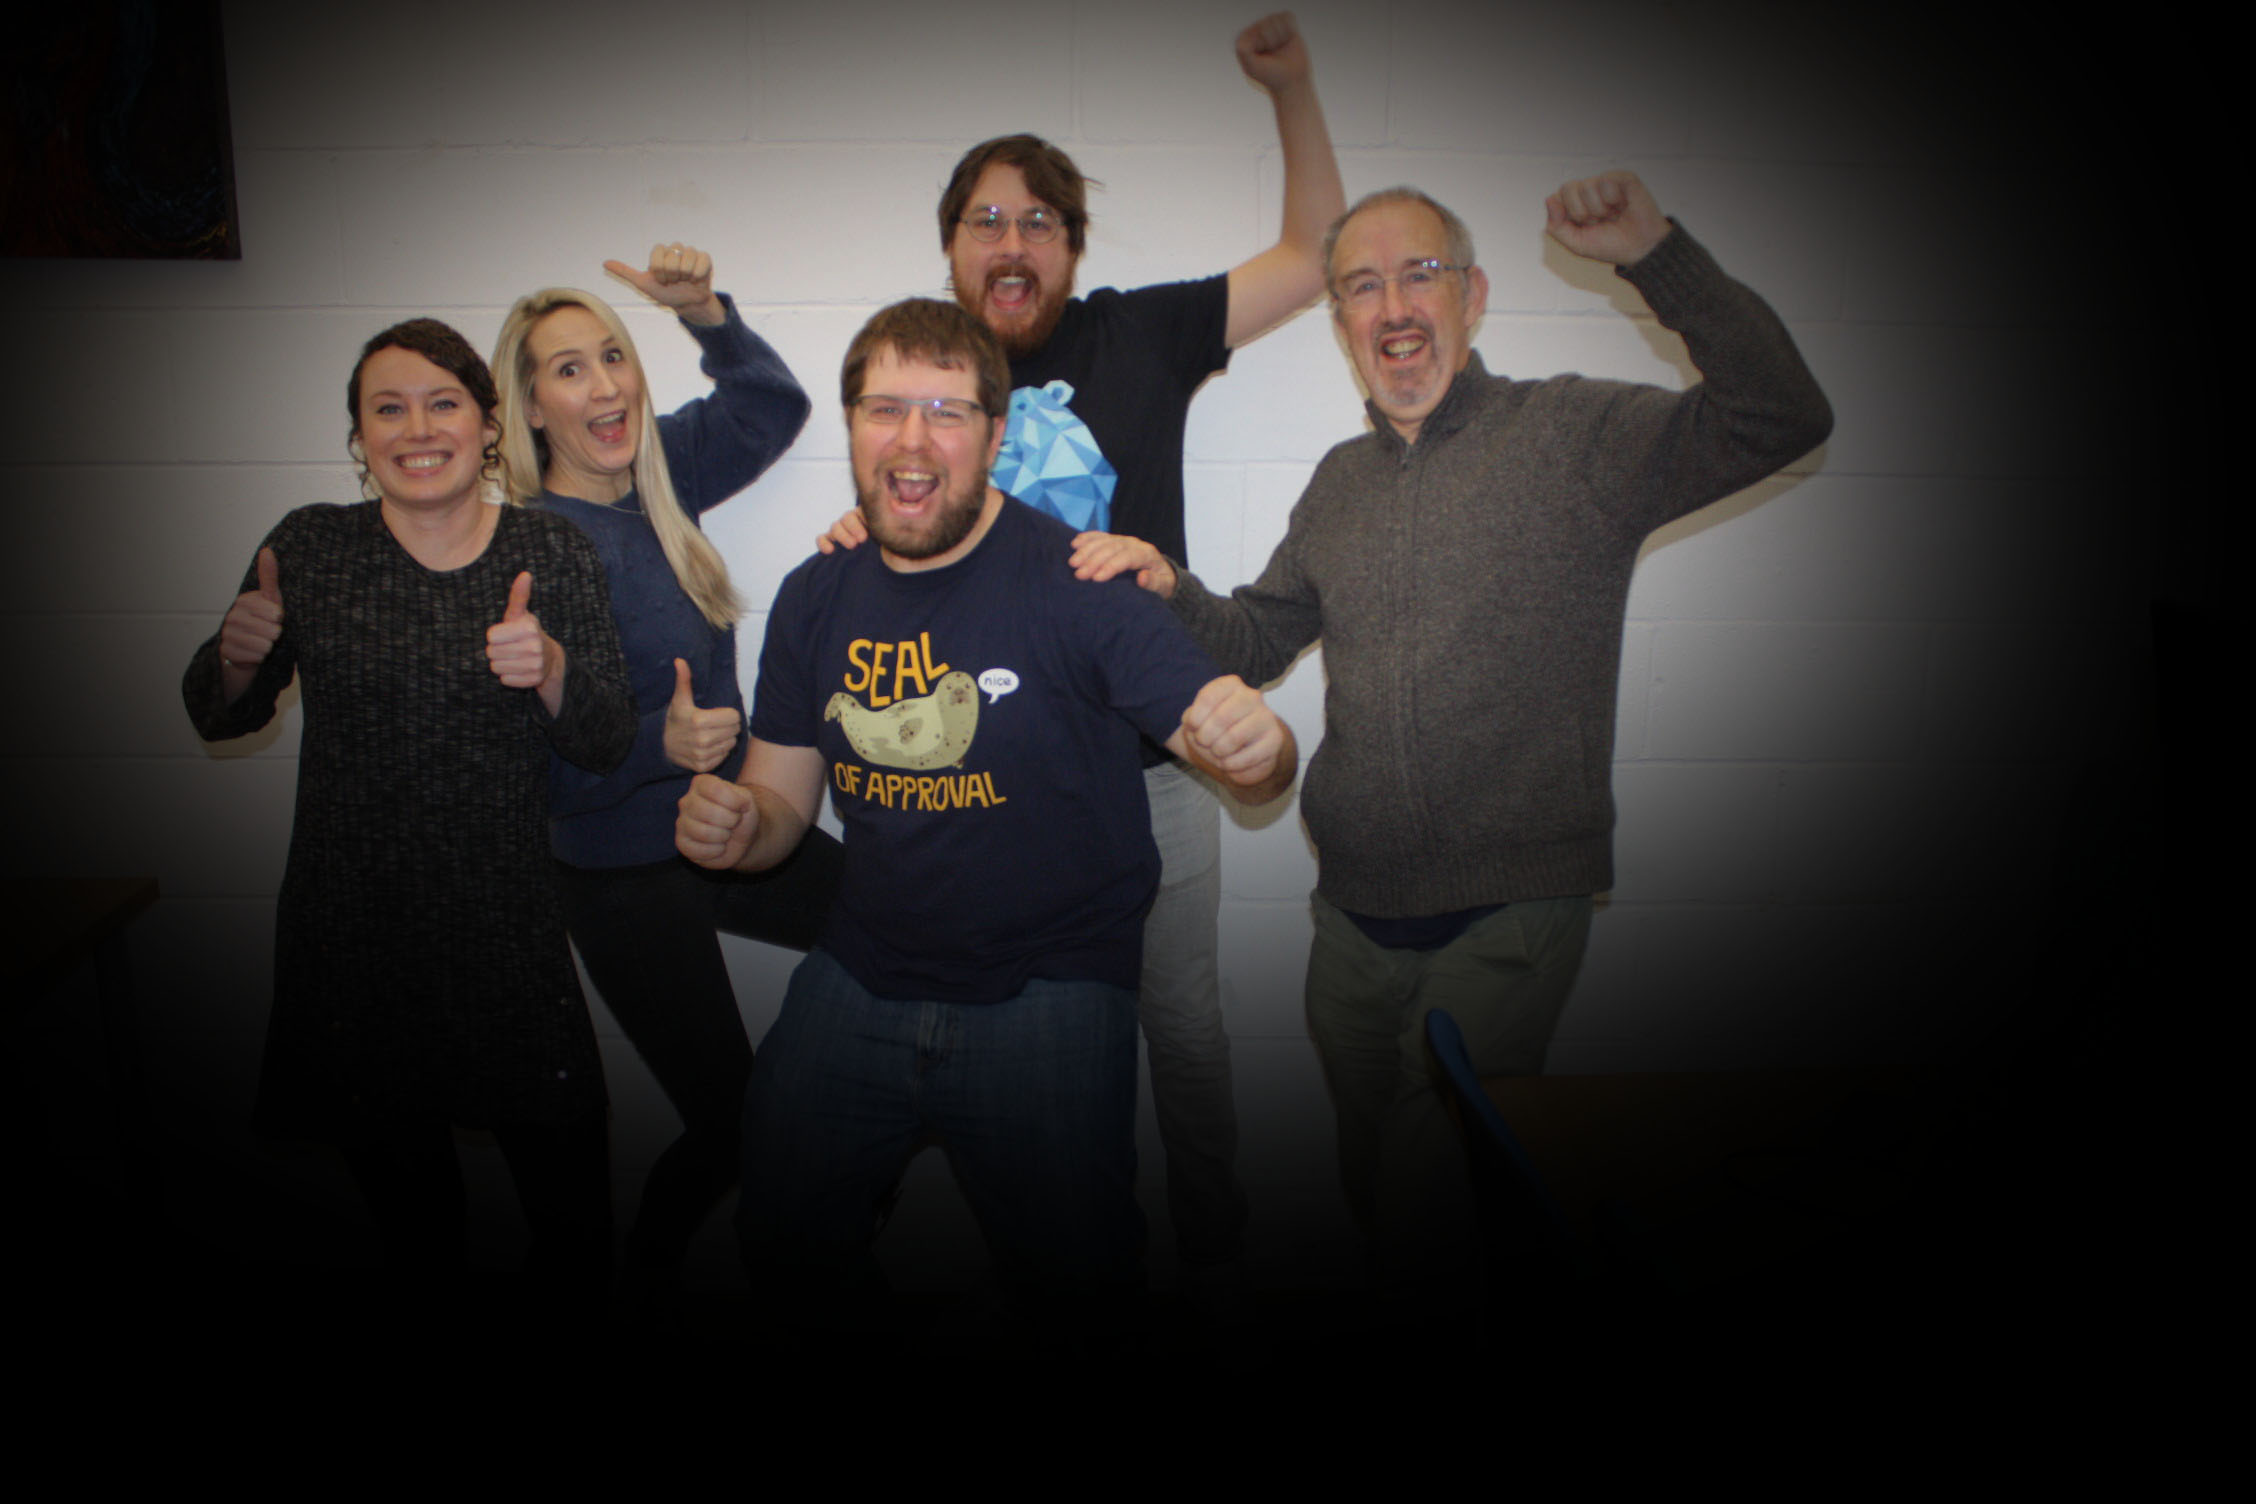
By adjusting the Feather property you can create a vignette like effect that emphasises the people in the group and minimises the extraneous objects in the corners.
So it’s not perfect but it can be seen to improve on the unvarnished initial picture. Of course the better the picture you take the less you need special effects to mask mistakes, but that is another article.
You will want to look carefully at how much time it takes and think about using a tool such as Buzzshot to automate the processing of your photos, adding of logos, and sending out to players.
What is a vignette effect?
Vignette is what it is called when the edges of your picture are darkened - or lightened, making the viewer focus on the action in the middle. It used to be an unwanted side effect in the early days of photography, but is now used to add emphasis and a more decorative feel.In some old vintage photos like this, half the charm comes from this slightly unwanted effect:
Now have a look at this famous image from the Matrix:
The darkness at the edges adds a sense of mystery and depth to the image.
Why is it a popular special effect?
By using a vignette you can add an extra layer of interest, be it a vintage “look and feel” or simply a more mysterious effect as with Matrix picture above. The vintage look is great for escape rooms that have an old or historical context. It helps you get the feeling of going outside your normal everyday life - which is of course what every good escape room does.This applies not just to your advertising but also to the pictures of your victorious (or not so victorious) players. Either way it makes their ordinary group picture just a little bit special even if you aren’t using lots of props and costumes.
And of course the vignette effect still lets your players faces shine through - this is something they want to show off to their friends, so they need to be recognizable! Indeed one of the main uses of the vignette effect is to throw your attention to the main focus of the picture.
It has another rather useful side effect as well. Unless you are lucky enough to have the perfect venue in which to set up and compose your after game portraits then it’s sometimes the case that a supermarket bag, a badly placed litter bin - or any other small but annoying contaminant can creep into the edges of your picture. The vignette effect is perfect for easily editing them out.
I spoke to Kevin Flee - an experienced Games Master with Handmade Mysteries, Photoshop expert and general all round goto person for multi-media activities who told me that much of the Photoshopping required is to compensate for slightly underpar group pictures. In the past this used to be because Escape Rooms didn’t always invest in the best camera phones, but even now taking group portraits is an art, and not all Games Masters are expert at this. And even the most expertly taken photos can still benefit from a little processing.
Thus you can expect to spend some time improving pictures and one of the best ways to get rid of those annoying distractions at the edges is the vignette effect.
Kevin also remarked said that using a pre-designed template such as that you have with Buzzshot seriously cuts down the amount of time you need to spend making the photo publishable.
Creating a vignette in Photoshop
So how easy is it to add a vignette effect in Photoshop? It's not difficult and I'll show you a couple of ways below.What I am going to do here is go through a couple of group pictures of happy games players showing how the effect can be used. One of the pictures, on which I will use the Lens Correction Tool, doesn’t have an annoying bits of furniture in the background, but the second has a chair, a desk and a picture on the wall all cluttering up the picture.
So the first vignette effect I will create a simple way using the Lens Correction Tool, which produces a quite a subtle effect using the Vignette effect control within it, and then I will show another more complicated way using the Ellipse Tool, where you can make the effect much stronger.
Using the Lens Correction Tool
First of all open Photoshop and load your group photo.With your photograph now open in Photoshop from the top menus select Filter and from the menu items select Lens Correction. After selecting the tool you should see a screen as below, with the Lens Correction tool displayed.
The screen should look as below, with your picture inside the Lens Correction Tool.
The Lens Correction Tool has a number of options - in this instance select the custom tab. From here you can see the vignette effect sliders. You can darken the edges of the photo or you can lighten them.
Slide the Vignette control over to the right from it's middle position - you might also slide the Midpoint control over to the right, but no too much.
It’s all rather subtle, even with the Vignette Slider right over to its full extent. The effect can be made a little more dramatic, adding focus to the team players faces by adjusting the Midpoint Tool which has been done above.
If this seems rather underwhelming then there are more invasive and drastic tools to alter the edges of the photograph and make more dramatic vignette effect.
Using The Ellipse Tool
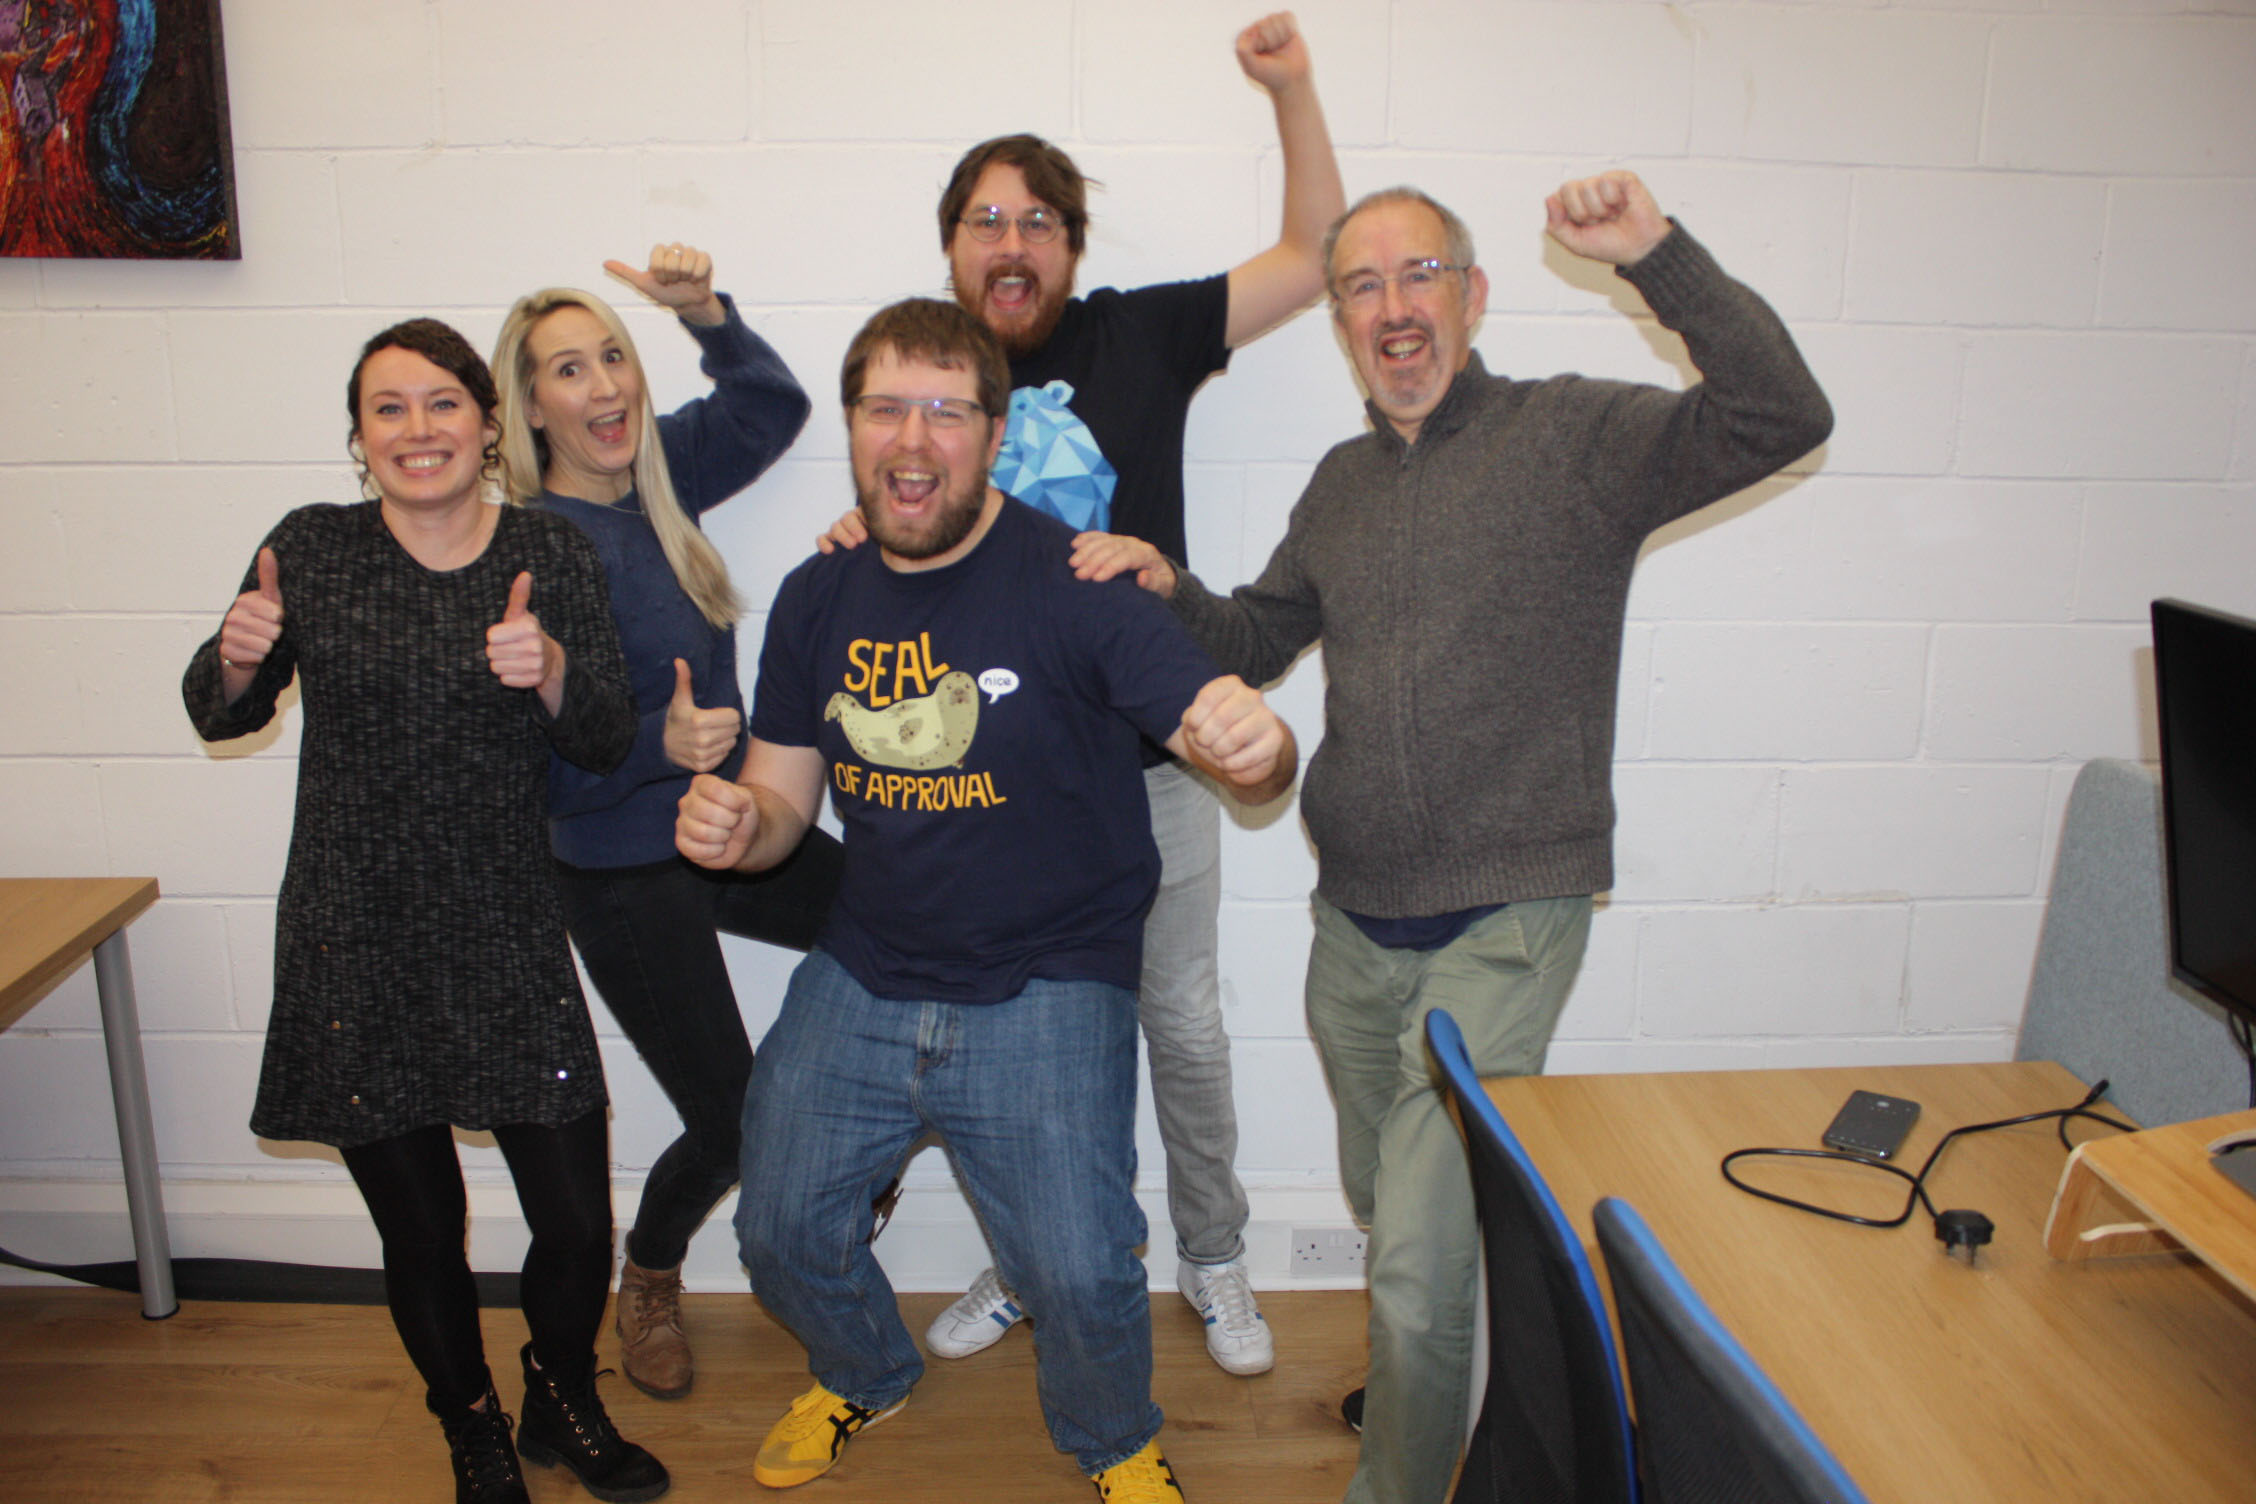
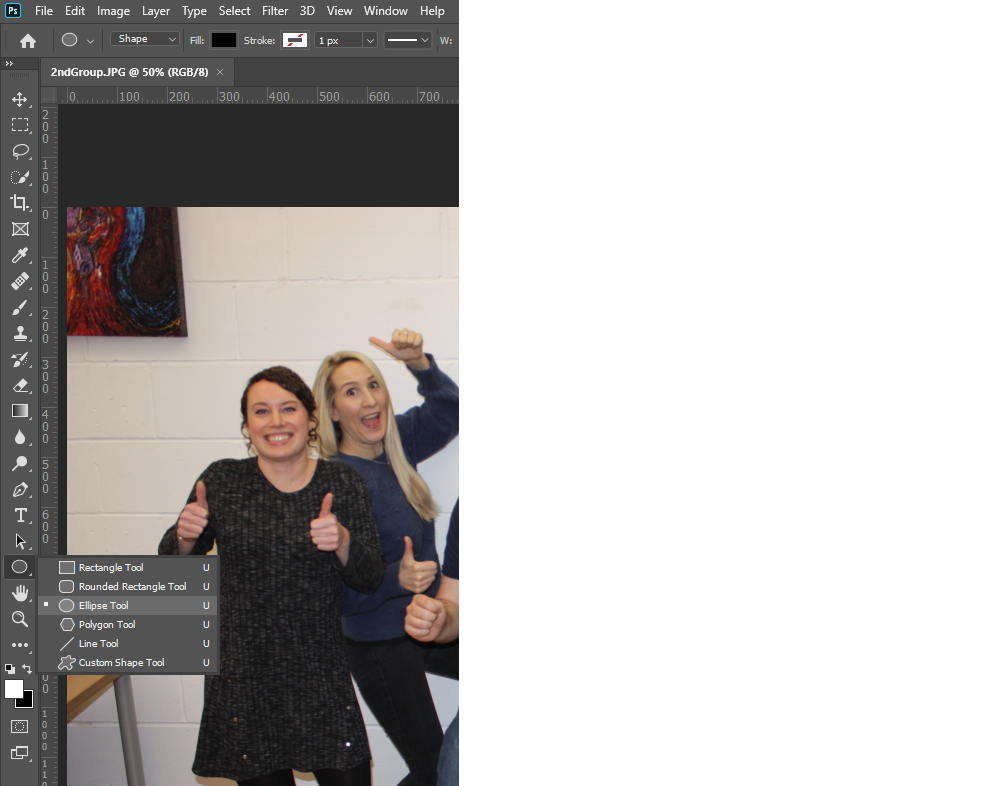
Open the image as before. I’ve chosen a different photograph this time which has a lot wrong with it - the people look good but there are chairs, corners of pictures at the edges all distracting from the players joyous expression.We’re going to use the Ellipse Tool to select the area of the picture that we want everyone to see. The Ellipse Tool is selected by right clicking on the Rectangle Tool, about two thirds of the way down the toolbar on the left of your picture.
With that tool selected click on the a point in that picture on the wall and drag the blue ellipse you can see until it contains all the players as below.
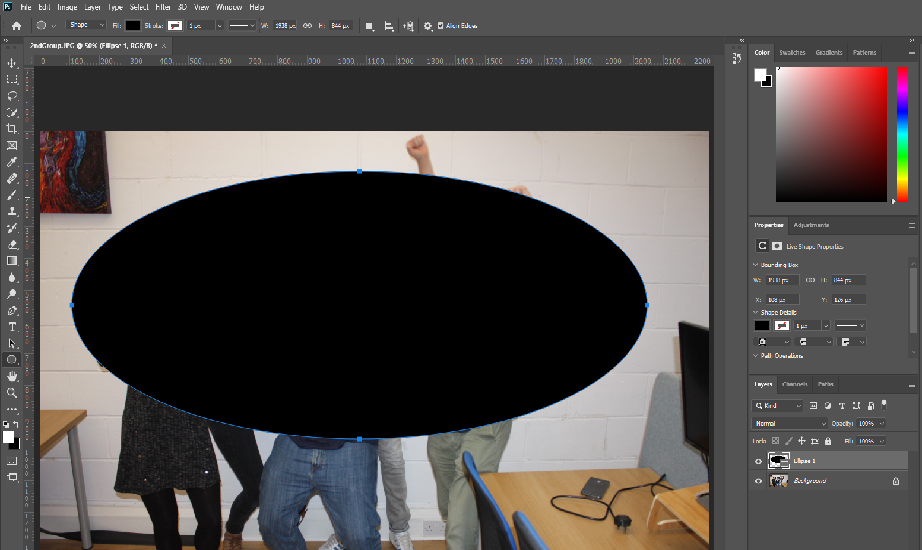
Alarmingly when you take your finger off the mouse button what you get is a black ellipse that obliterates rather than focuses.
With the ellipse still selected go to the Properties box and down at the bottom select the Inverse button (2nd along from the left under Path Properties).
Be aware that sometimes if you have the Layers control, open beneath the Properties Box shown above it looks slightly different - the Path Operations options aren't visible until you've scrolled down the Properties box.
This selects the area inside the ellipse as below:
Use Control - T to select the ellipse and move it and/or resize it to capture all the players.
This is a very blunt and intrusive effect - but it does get rid of all the extraneous items there were in the ordinary picture.
We can use the “Feather” property in the Properties window to lessen the black frame, but still hide the chair and the picture that were intruding onto our composition.
Select the Masks tab in the Properties box:
Then you will see the Feather adjustment tool.
By adjusting the Feather property you can create a vignette like effect that emphasises the people in the group and minimises the extraneous objects in the corners.
So it’s not perfect but it can be seen to improve on the unvarnished initial picture. Of course the better the picture you take the less you need special effects to mask mistakes, but that is another article.
Conclusion
The vignette is a well worn but nonetheless effective tool for sprucing up your Escape Room pictures. It can cover up for any rubbish or extraneous furniture that has crept into the photograph and it focuses attention on the players - your customers- which is exactly what they want and you want.You will want to look carefully at how much time it takes and think about using a tool such as Buzzshot to automate the processing of your photos, adding of logos, and sending out to players.
Be the first to hear about our next blog post
