Add-ons
Add-ons let you sell optional extras alongside a booking. When a customer books a room, they can also purchase things like a photo package, extra game time, or a drinks deal.
This is one of two ways to increase revenue per booking in Buzzshot. For suggesting additional rooms or experiences at nearby times, see Upsells.
Add-ons are different from standalone products or merchandise -- they are always attached to a specific bookable experience. If you want to sell items without requiring a room booking, see Products instead.
Common Add-on Examples
| Add-on | Use Case |
|---|---|
| Extra Time (10 mins) | Let customers purchase additional play time |
| Photo Package | Professional photos from their session |
| Drinks Package | Pre-order drinks for after the game |
| Hint Package | Extra hints during the game |
| Digital Game | A take-home puzzle or online challenge |
Creating Add-ons
Add-ons are set up per bookable, so each room can have its own set of extras.
- Go to Bookable Items and select the experience.
- Click the Addons tab.
If no add-ons exist yet, you will see an empty state:
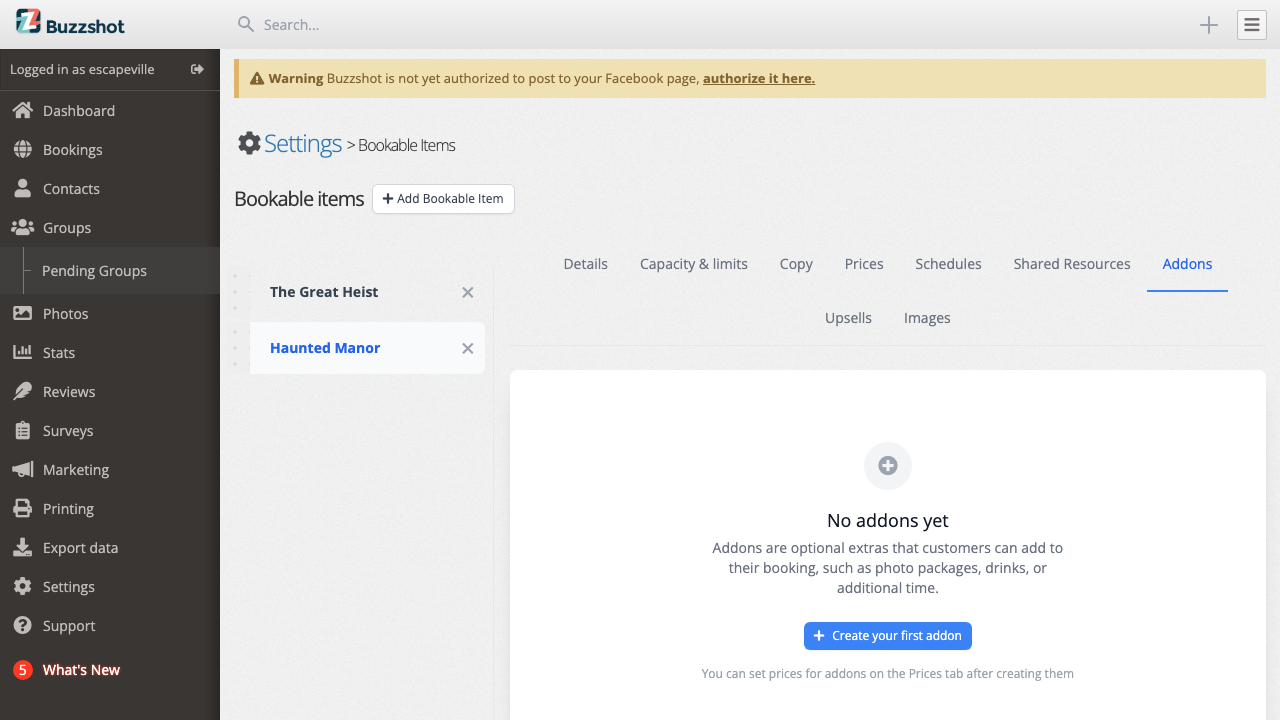
-
Click Create your first addon.
-
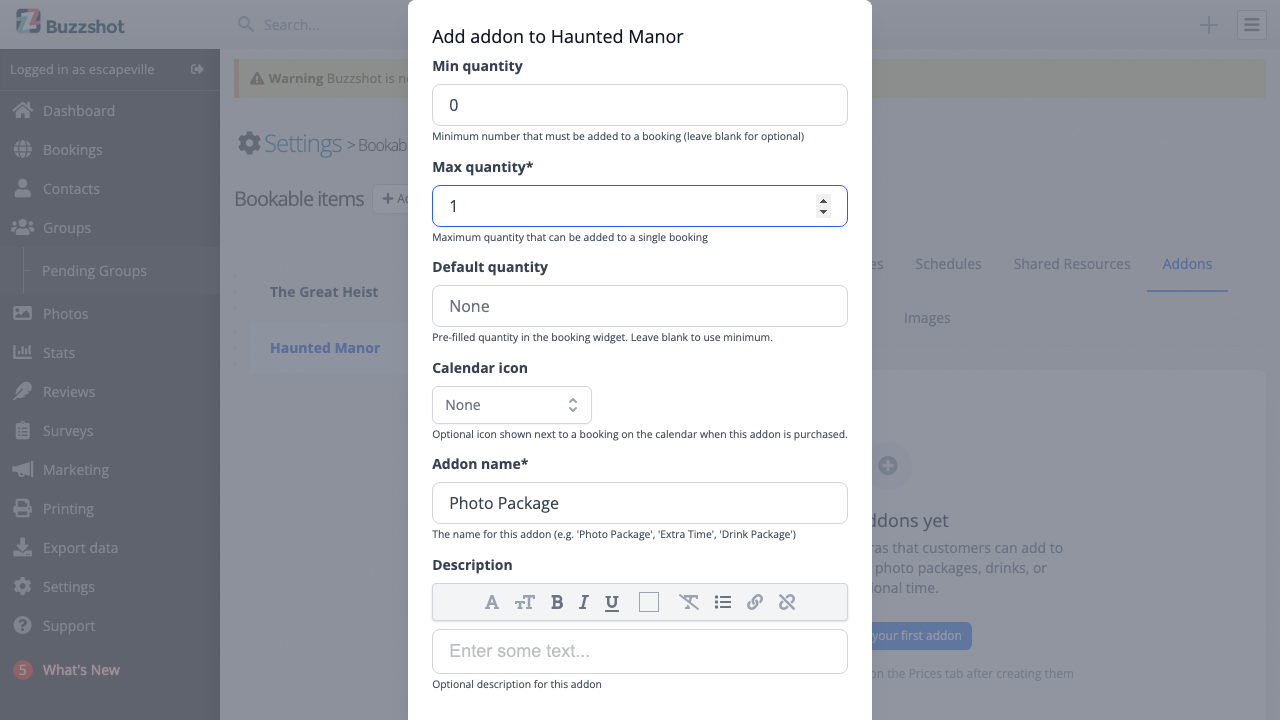
Fill in the fields:
- Addon name -- A short, clear name for the extra (e.g. "Photo Package", "Extra Time"). If your site supports multiple languages, you can provide translations.
- Description -- Optional details explaining what the add-on includes. This is shown to customers during booking.
- Min quantity -- The minimum number that must be added to a booking. Set to 0 (the default) to make the add-on fully optional. Set to a higher number to require customers to purchase at least that many (e.g. set to 1 to make the add-on mandatory).
- Max quantity -- The maximum number of this add-on a customer can add to a single booking. For example, set to 1 for "extra time" (it does not make sense to buy multiples), or set higher for per-person extras like drinks.
- Default quantity -- The quantity that is pre-filled in the booking widget. Leave blank to use the minimum quantity. Useful when you want to suggest a starting amount without requiring it.
- Calendar icon -- Optional. Pick an icon (camera, cake, gift, drink, etc.) that will appear next to a booking on the calendar whenever this add-on has been purchased. Choose None to leave bookings unmarked. See Calendar Icons below for details.
- Click Save.
Setting Prices for Add-ons
After creating an add-on, you need to set its price. Add-on prices are managed in the same place as your ticket prices:
- Go to the Prices tab on the same bookable.
- Select a price group.
- You will see your add-on listed alongside your ticket types. Enter the price.
- Click Save.
Important: Until you set a price, the add-on will appear in the widget but customers won't be able to select it. Make sure you set prices on the Prices tab after creating a new add-on.
Editing and Deleting Add-ons
To edit an add-on:
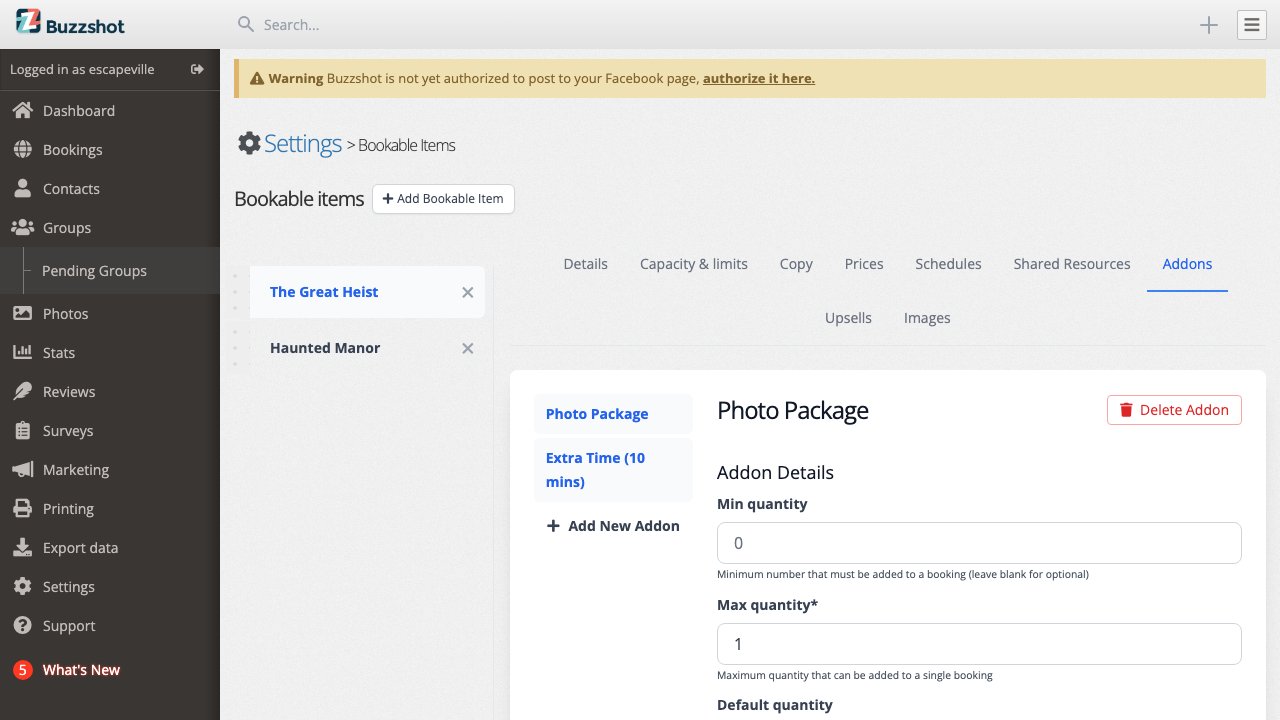
- Go to the Addons tab on the bookable.
- Click the add-on name in the sidebar.
- Update the name, description, min quantity, max quantity, default quantity, or calendar icon.
- Click Save.
To delete an add-on, click Delete Addon and confirm. This is permanent and cannot be undone.
Viewing Purchased Add-ons
When a customer purchases an add-on, it appears in the booking details. To see exactly what add-ons were purchased for a booking, click into the booking from your calendar or bookings list -- purchased add-ons are shown alongside the ticket details.
For a quick at-a-glance view on the calendar, set a calendar icon on the add-on so it shows up on every booking that includes it.
Calendar Icons
A calendar icon is an optional small icon that appears next to a booking on the calendar whenever the matching add-on has been purchased. It's a quick way to see, without opening each booking, which sessions need a photographer, a birthday cake, a drinks tray, and so on.
To set a calendar icon:
- Go to the Addons tab on the bookable.
- Click the add-on you want to mark.
- Under Calendar icon, pick one of the icons in the grid. Hover over an icon to see its name.
- Click Save.
To remove an icon later, edit the add-on again and choose None.
![]()
Hover over an icon to see the add-on name and quantity. Icons are purely visual and only appear in the calendar — customers don't see them.
Tips and Best Practices
- Keep names short and clear. Customers see these during checkout, so "Photo Package" is better than "Professional Photography Package Including Digital and Print Options".
- Use min and max quantity thoughtfully. Set max to 1 for things that only make sense once per booking (like extra time). For per-person extras like drinks, set it higher. Use min quantity to make an add-on mandatory (e.g. min 1) or leave it at 0 to keep it optional.
- Each add-on is per-bookable. If you want the same add-on on multiple rooms, you need to create it separately on each one. Make sure the names and descriptions match so customers have a consistent experience.
- Remember to set prices. New add-ons do not have prices until you set them on the Prices tab. An add-on without a price won't be selectable by customers.
- Use descriptions. If an add-on has terms, conditions, or specific details customers need to know before purchasing, put this in the description field.
- Use calendar icons sparingly. A handful of icons across the calendar makes the things that need extra attention stand out. If every add-on has an icon, the visual cue loses its value -- save them for the add-ons your team needs to prepare for in advance, like photo packages, food, or birthday extras.