Touchless Registration
Touchless Registration lets your players check themselves in on their own phones, instead of passing around the Buzzshot app on a shared tablet at your front desk. You print a QR code, players scan it, find their group, and fill in their details, with no shared device to touch.
It's a great fit if you'd rather not hand a tablet around, want players to register before they arrive, or simply want to speed up check-in.
How it works for players
- The player scans your printed QR code with their phone camera.
- They find their group, or pick their start time.
- They enter their details, and agree to your waiver if you use one.
- They're done. Everyone else in the group scans the same QR code and registers on their own phone, the same way.
Before you start
Players always register into a group, the set of players booked in for a particular game at a particular time. So before your QR code is useful, those groups need to exist:
- If you use Buzzshot Bookings or one of our booking integrations (the recommended setup), this is already handled. Every booking automatically creates a group for players to register against, so there's nothing extra to set up.
- If you don't use any booking system, set up Timeslots instead. Timeslots give players a list of start times to choose from, and Buzzshot creates the group for them when they register.
You only need to set up timeslots if you have neither Buzzshot Bookings nor a booking integration.
Step 1: Open the Touchless Registration page
- Log in to your Buzzshot admin panel.
- Go to Settings.
- Click Touchless Registration.
You can also go straight to the Touchless Registration page.
The page has three tabs: QR Codes, Config, and Page Designs. You'll spend most of your time on QR Codes.
Step 2: Choose which QR code to use
If you have more than one room, you'll see a list down the left-hand side with All Rooms at the top, followed by each of your rooms.
- All Rooms: a single QR code that works for every room. Players scan it, then pick their group or start time from the full list. This is the simplest option, so print one code and use it everywhere.
- A specific room: a code tied to just that room. Players who scan it only see that room's groups and slots. Use this if you want a dedicated code by each room's door.
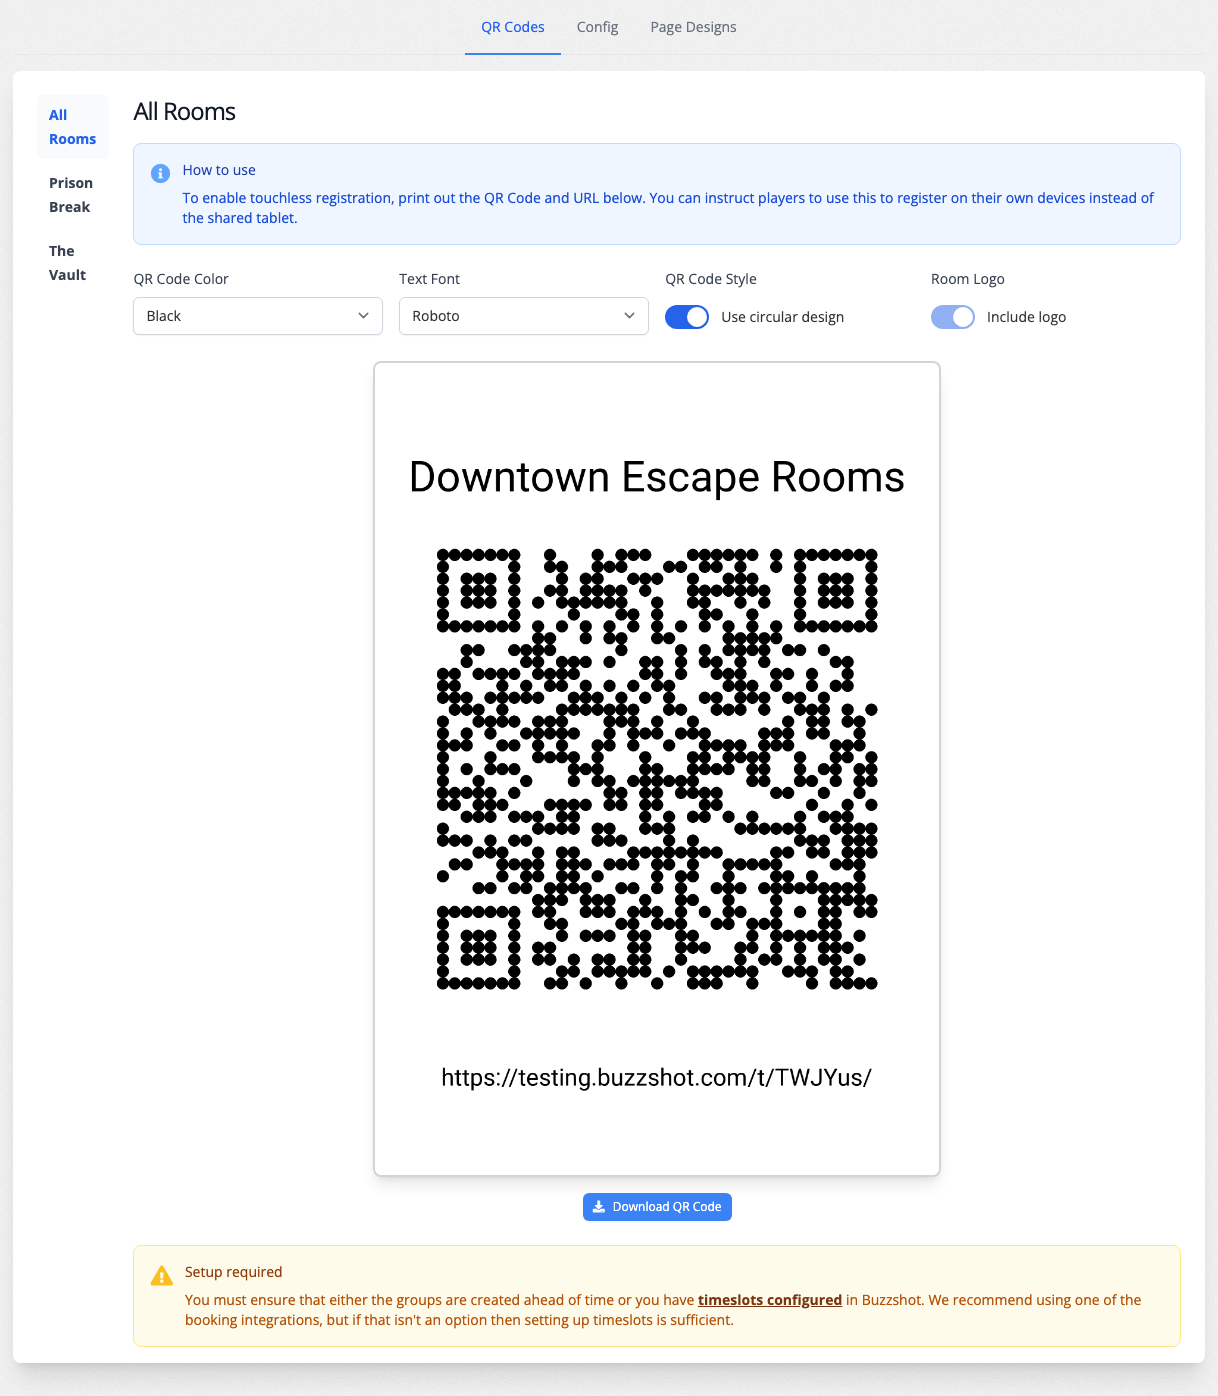
Step 3: Customise the QR code (optional)
Above the code are a few options to make it match your branding:
- QR Code Color: choose a colour for the code. Black scans most reliably, but you can match your brand.
- Text Font: the font used for the title and web address printed beneath the code.
- QR Code Style: turn Use circular design on for a rounded look, or off for a classic square code.
- Room Logo: turn Include logo on to print your room's logo in the centre of the code. This isn't available for the All Rooms code, since it isn't tied to a single room.
The preview updates as you change the options.
Step 4: Download and print
- Click Download QR Code to save the code as an image.
- Print it out. The printed image includes the web address beneath the code, so anyone who can't scan can still type it in.
- Put it somewhere players will see it, such as by the front desk, on each room's door, or in your waiting area.
You can add your own instructions around it before printing, for example "Scan to check in for your game".
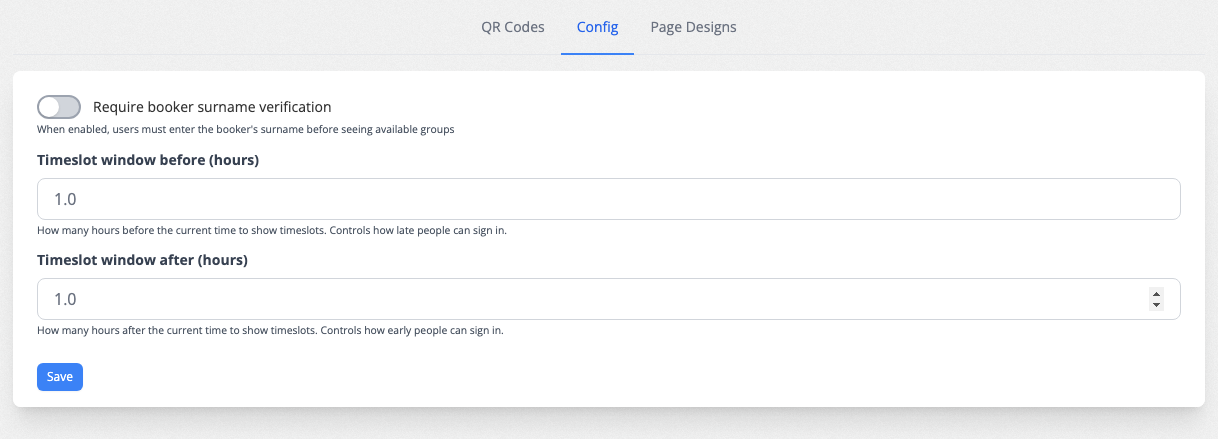
Configuration options
The Config tab has a few settings that control how players find their group:
- Require booker surname verification: when turned on, players must enter the lead booker's surname before they can see any groups. This keeps one group's details private from another and helps players land on the right group. Leave it off for the quickest possible check-in.
- Timeslot window before (hours): controls how late a player can still sign in. For example, set it to 1 to keep a group available for up to an hour after its start time, so latecomers can still register.
- Timeslot window after (hours): controls how early a player can sign in. For example, set it to 1 to show a group from up to an hour before its start time, so players can register before they arrive.
Click Save after making changes.
Customising the player-facing pages (optional)
The Page Designs tab lets you change how the player-facing pages look: the page where players pick their slot, the registration form, and the thank-you page. You can edit the wording and styling and see a live preview, so the experience matches your brand.
Waivers
If your registration form is set up as a waiver, players agree to it as part of registering. There's a tick box to accept your waiver, or, if you collect signatures, signing counts as agreeing. This means touchless registration doubles as a paperless waiver. See Buzzshot Waivers for how to set up your waiver wording.
Troubleshooting
Players say there are no groups or start times to choose from. This usually means there's nothing for them to register against yet. If you use Buzzshot Bookings or an integration, check that the booking exists for the right time. If you don't use a booking system, make sure you've set up Timeslots. Also check the Timeslot window settings on the Config tab. If a player tries to register well before or after their start time, their group may fall outside the window.
A player can't find their group. If Require booker surname verification is on, they must enter the surname exactly as it appears on the booking. Check the surname on the booking, or turn the requirement off.