Rostering Shifts: the Staffing Calendar
The Staffing Calendar is where you roster your team: deciding who is working, and when. You build a schedule of shifts across your staff, then publish it so it goes live and your team can see their shifts.
Staffing is a new, optional feature. If it isn't switched on for your account yet, get in touch and we'll enable it for you.
If you use Buzzshot's automatic staffing (assigning staff to bookings for you), the calendar is also where those shifts come from: auto-staffing only ever uses shifts that you have published. Draft changes you are still working on are ignored until you publish them.
Finding the Calendar
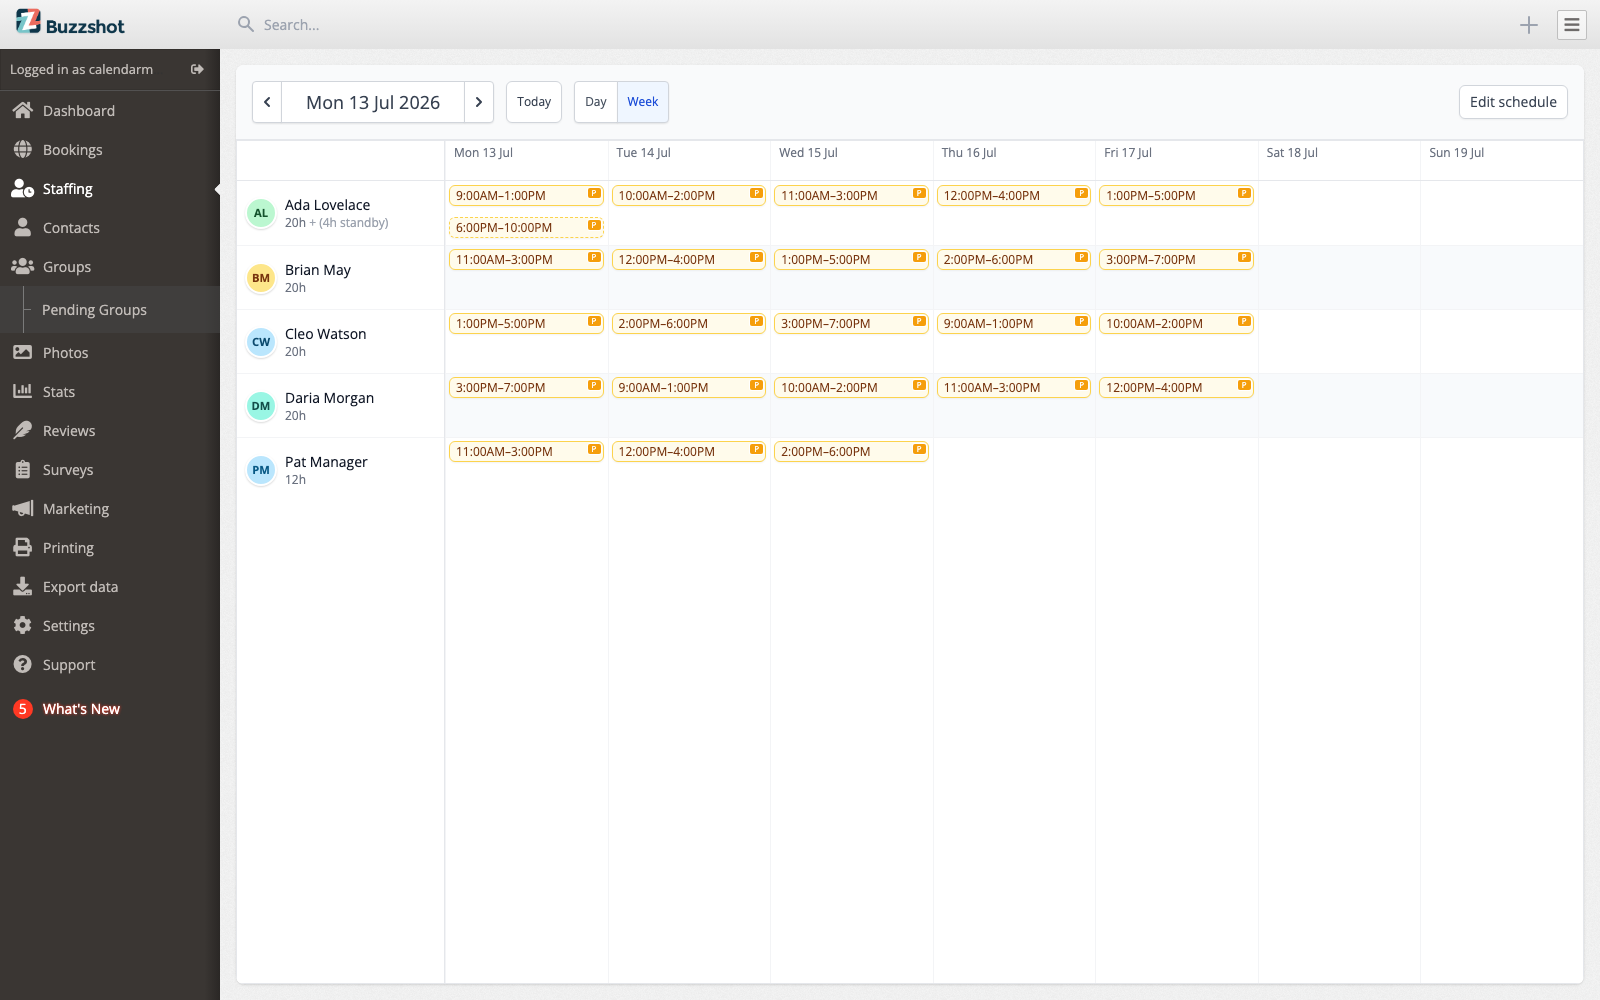
Go to Staffing in the main menu and open the Calendar. You will see your staff members listed down the left-hand side, with time running across the top. Each shift appears as a bar on that staff member's row.
Use the Day and Week buttons to switch between:
- Week view: a whole week at a glance, so you can see how your team's shifts fit together across the days.
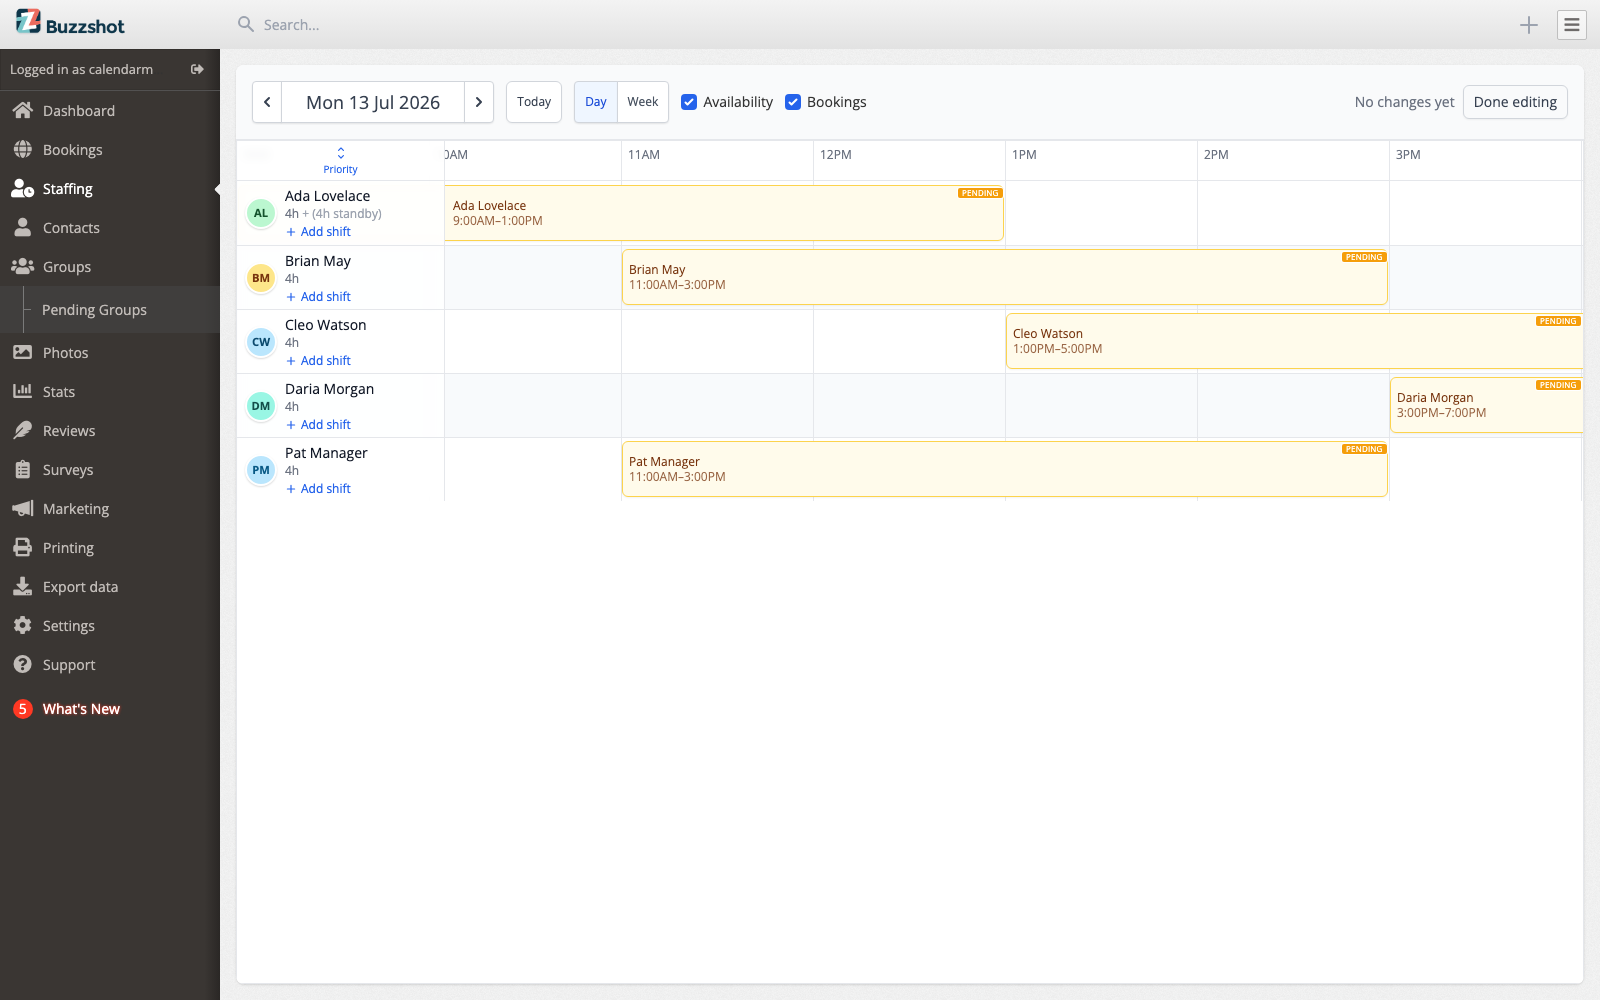
- Day view: a single day in detail, which is the best place to fine-tune one day's roster.
Making Changes: Edit Mode
The calendar starts out in a read-only state so you can look at the schedule without changing anything by accident. To make changes, click Edit schedule. When you are finished, click Done editing.
You can only add, move or remove shifts while you are in edit mode. If a shift bar will not respond to clicks, check that you have clicked Edit schedule first.
Adding a Shift
While in edit mode:
- Find the staff member you want to roster, and click on their row (on the day you want, in week view; or anywhere on their row in day view).
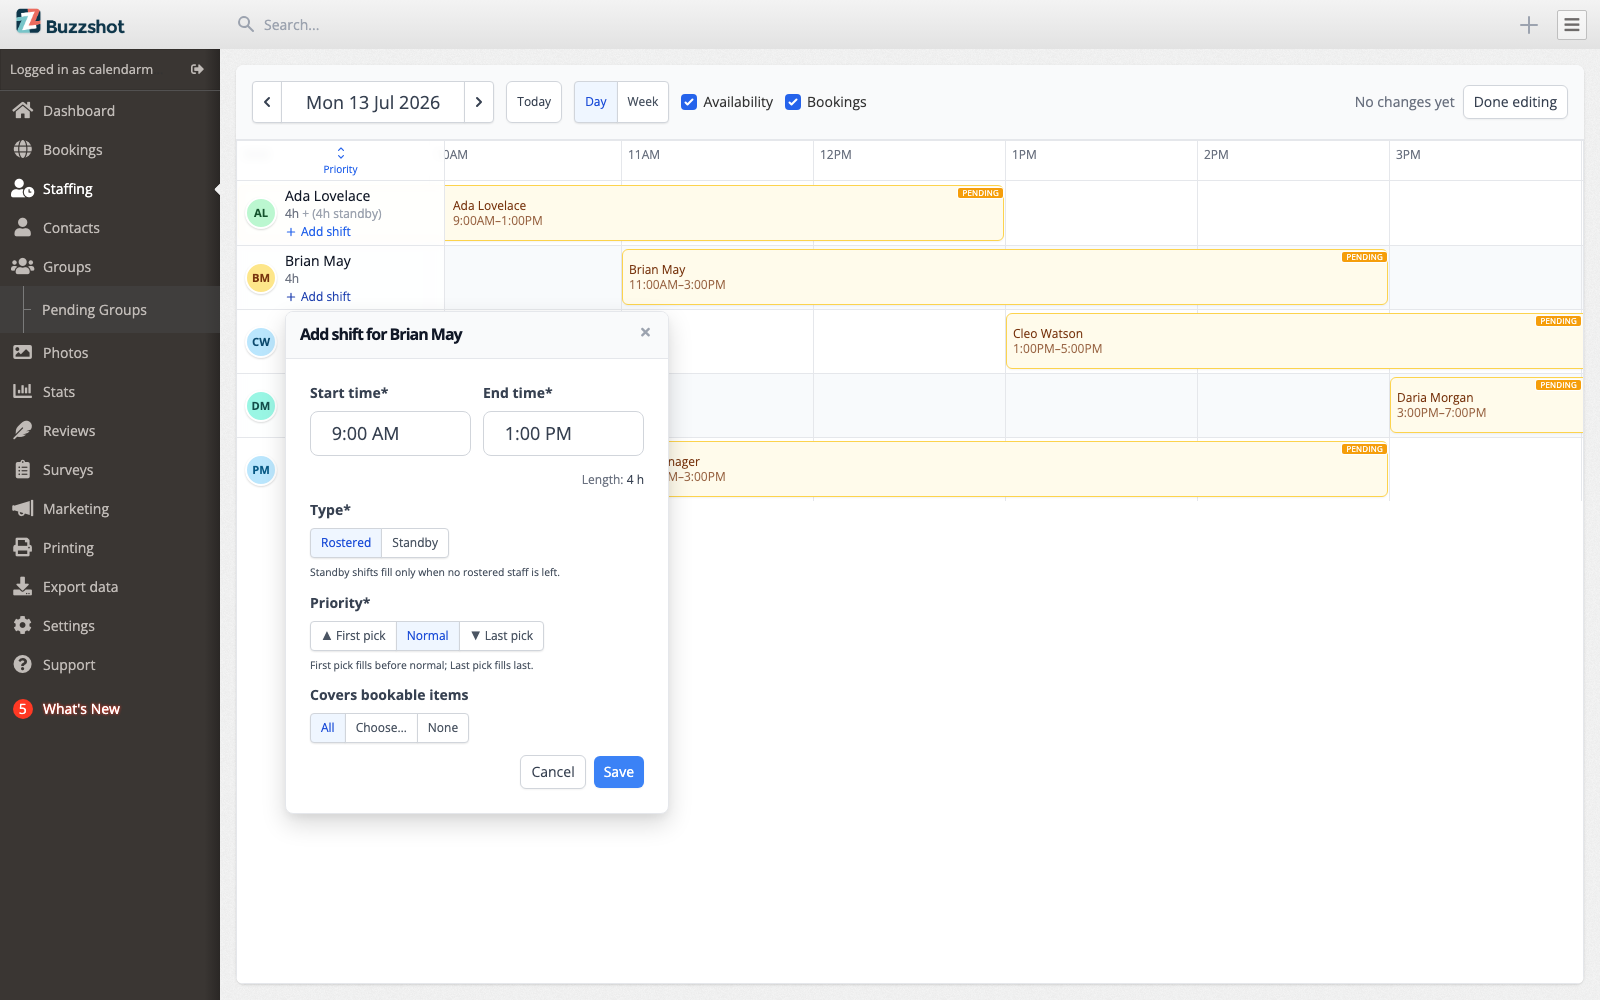
- A small Add shift panel opens.
- Fill in the details:
- Start time and End time: when the shift begins and ends. If the end time is earlier than the start, Buzzshot treats it as an overnight shift running into the next day.
- Day: which day the shift is on. (In week view you choose the day here; in day view it is already set to the day you are looking at.)
- Length: this is worked out for you automatically from the start and end times, so you can see at a glance how long the shift is.
- Covers: which of your bookable items (rooms, games, experiences) this shift is for. Choose All to cover everything, Choose… to pick specific items, or None for a shift that runs no games.
- Click Save.
Standby Shifts
A Standby shift is a backup. The staff member is only called in when everyone rostered for that time is already committed to a booking. It is a way of saying "keep this person in reserve" without rostering them as a full working shift.
To make a shift a standby, set its Type to Standby when you add or edit it. Standby shifts fill only when no rostered staff is left, so they are perfect for on-call cover during your busiest periods.
Standby shifts look different on the calendar. They appear faded, with a Standby tag, so you can tell reserve cover apart from your rostered team at a glance.
Priority: Who Gets Filled First
When more than one person could cover a booking, Priority decides who Buzzshot picks first. There are two levels of control.
Per shift, each shift can be set to:
- First pick: fills before everyone on normal priority (shown with a ▲ marker).
- Normal: the default.
- Last pick: filled last, only after the others (shown with a ▼ marker).
This is useful when, for example, you want a trainee's shift to only be used as a last resort, or you want your most experienced host to always be picked first.
Overall, you can also set an ordering across your staff so that, all else being equal, some team members are preferred over others. Between the two, you can shape exactly who Buzzshot reaches for first when it fills a booking.
Drafts, Publishing and Discarding
This is the most important thing to understand about the calendar.
Every change you make in edit mode (adding a shift, editing one, removing one) is a draft. Drafts are marked with a coloured badge so you can see what has changed but not yet gone live:
- New: a shift you have just added.
- Edited: a shift whose times or details you have changed.
- Removing: a shift you have deleted.
Nothing is live until you click Publish. Publishing commits all your pending draft changes at once, making the new schedule real: your team sees their updated shifts, and auto-staffing starts using them.
Publishing also notifies your team about their shifts, so they can confirm or decline them. Notifications go out through whichever channels you've set up, such as email or a connected chat channel like Discord or Slack.
If you change your mind, click Discard to throw away all your pending drafts and go back to the last published schedule.

Auto-staffing only uses published shifts. A shift you have added but not yet published will not be used to cover any bookings. If you have drafted a week's roster but bookings still show as unstaffed, the most likely reason is that you have not clicked Publish yet.