Getting Started with Buzzshot Bookings
Buzzshot Bookings is a fully-featured online booking and reservation system built right into Buzzshot. It lets your customers book your escape rooms (or other experiences) online, pay securely, and receive confirmation -- all from your own website. Bookings made through the system automatically integrate with the rest of Buzzshot, creating groups, linking to photos, and feeding into your automations and marketing.
This guide walks you through the essential steps to get your first booking system up and running. Each step has a more detailed article if you need it, but this guide will give you enough to get started.
Note: Buzzshot Bookings needs to be enabled on your account. If you don't see a "Bookings" section in your left sidebar menu, get in touch with us and we'll get you set up.
Finding Your Way Around
Once Bookings is enabled, you'll see two new areas in your Buzzshot admin:
The Bookings Menu
In the left sidebar, you'll find a Bookings section with these sub-items:
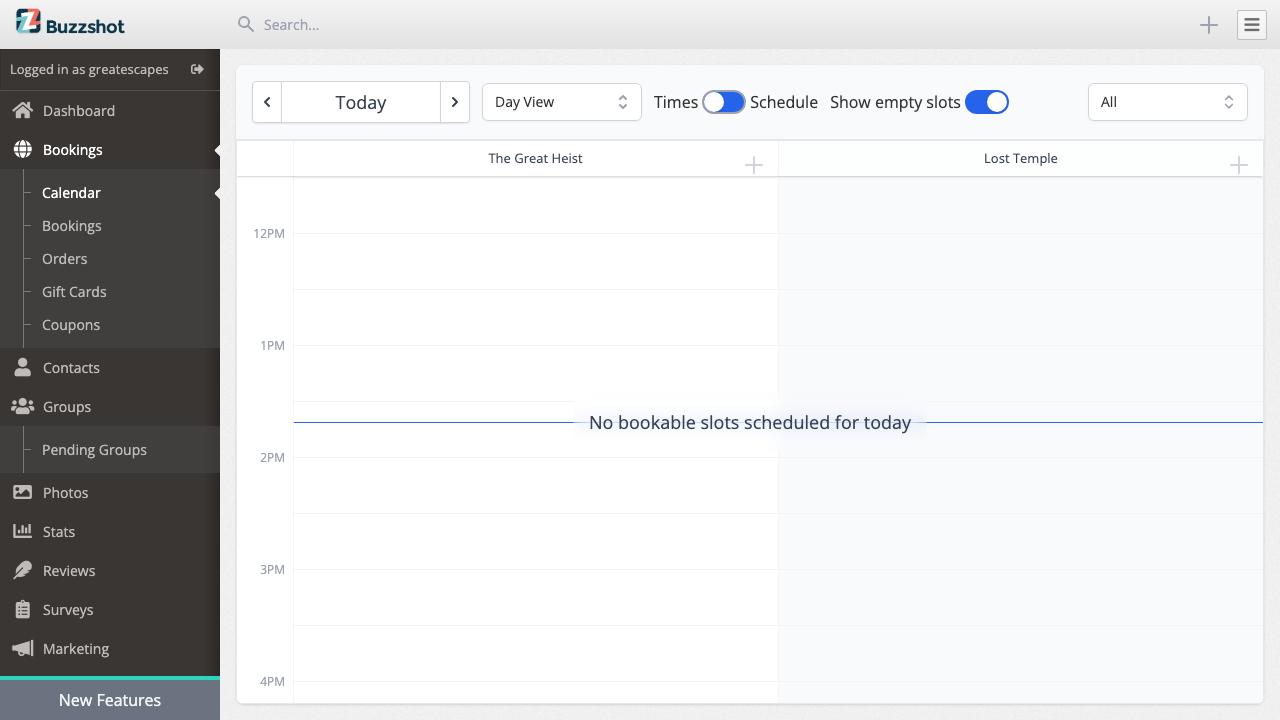
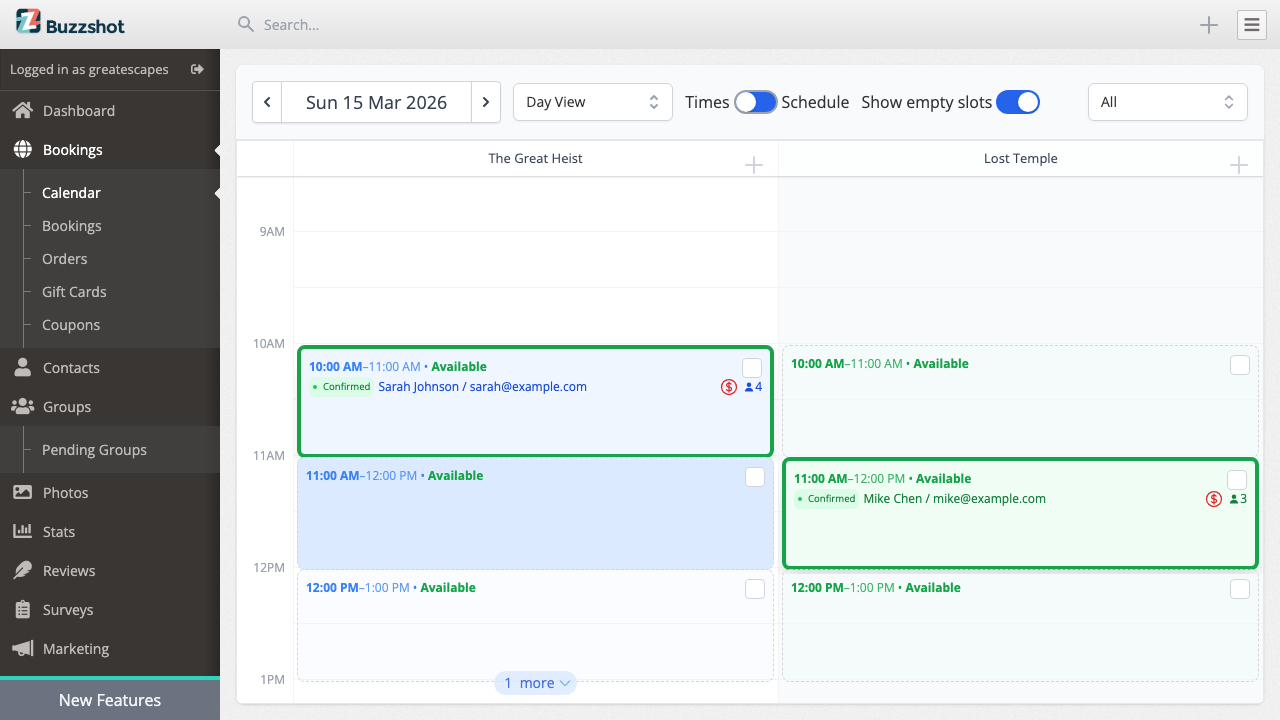
- Calendar -- A visual day-by-day view of all your bookings across all rooms. This is where you'll spend most of your time day-to-day.
- Bookings -- A searchable list of individual bookings with filters for date, status, and room.
- Orders -- The full list of orders. An order is the overall transaction, and each order can contain one or more individual bookings (for example, a customer booking two rooms back-to-back creates one order with two bookings).
- Gift Cards -- Create and manage gift cards that customers can purchase and redeem.
- Coupons -- Set up discount codes for promotions.
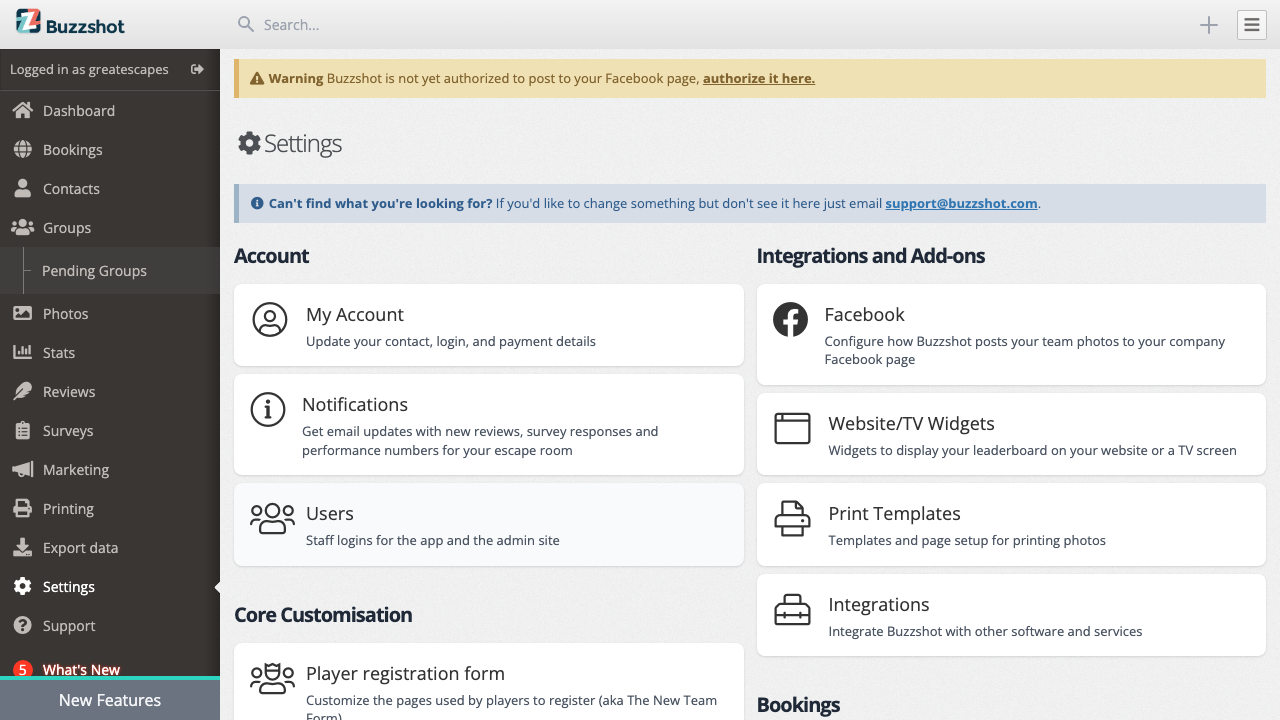
Bookings Settings
Under Settings, you'll find a "Bookings" section with all the configuration options:
- Bookable Items -- Your escape rooms and experiences (what you might call your "rooms" or "games")
- Products -- Standalone products (like merchandise)
- Booking Widgets -- Configure your customer-facing booking interface
- Ticket Types -- Categories like Adult, Child, Family
- Payment Options -- Connect Stripe or other payment providers
- Price Groups -- Alternative pricing (peak/off-peak)
- Shared Resources -- Manage capacity across rooms
- Custom Fields -- Collect extra info during checkout
- Taxes & Fees -- Automatic taxes and booking fees
- Rules -- Dynamic rules for pricing and availability
Don't worry about all of these right now -- we'll focus on the essential ones to get you started.
Setup Checklist
Here are the steps to get your first booking system live, in the recommended order:
- Create your Bookable Items (your escape rooms)
- Set up pricing
- Set up schedules (when rooms are available)
- Connect a payment provider
- Configure your Booking Widget
- Embed the widget on your website
Let's walk through each one.
Switching from another booking system? If you have existing bookings in another system that you'd like imported into Buzzshot, get in touch with us and we can help migrate your data.
Step 1: Create Bookable Items
A bookable item is an experience that customers can reserve a time slot for -- typically one of your escape rooms.
- Go to Settings > Bookable Items
- Click Create Bookable Item (or "Create your first Bookable Item" if this is your first)
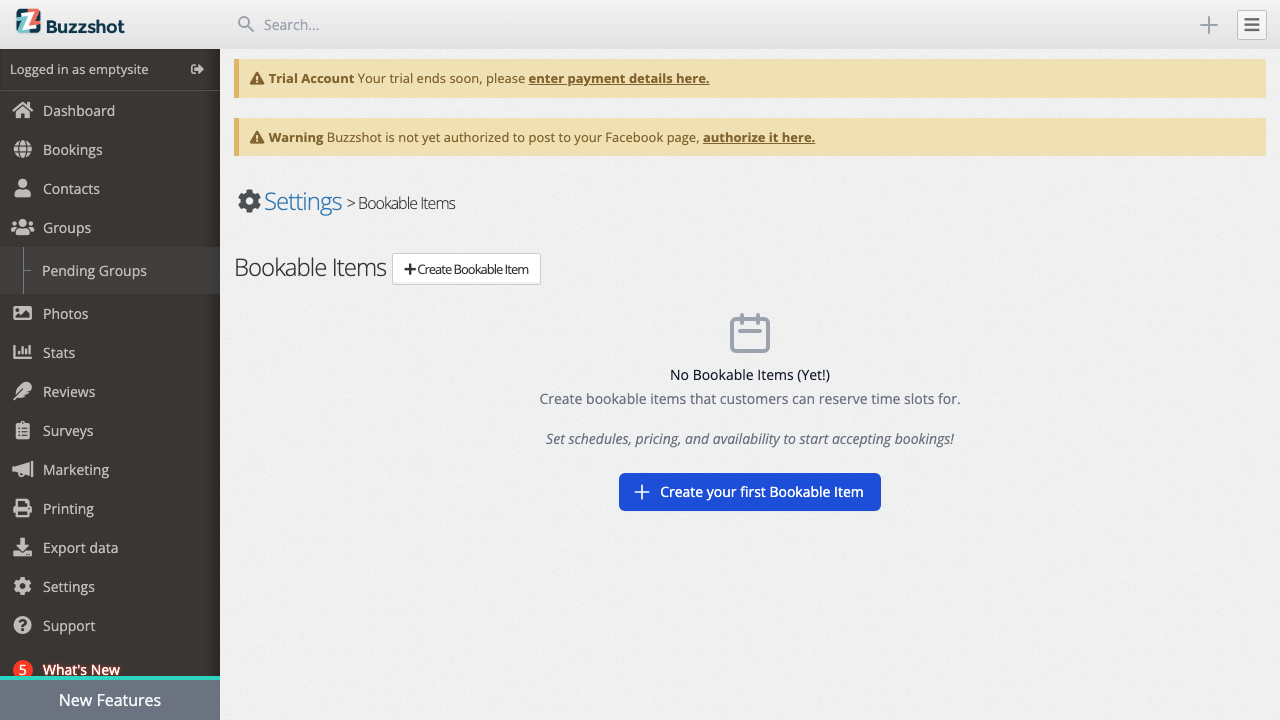
- Enter a name for the room (e.g., "The Great Escape") and you'll be taken to the Details page
Configuring the Details
On the Details tab you'll find these settings:
Match to Room -- If you already have rooms set up in Buzzshot (for photos, groups, etc.), select the matching room here. This links your bookings to the rest of the Buzzshot system so that groups are automatically created for confirmed bookings.
Duration (minutes) -- How long each booking slot is. For example, if your room takes 60 minutes, enter 60. This determines the length of time slots shown to customers.
Minimum people per booking -- The smallest group size you'll accept (usually 2).
Maximum people per booking -- The largest group you'll accept in a single booking (leave blank to use the slot maximum).
Maximum people per slot -- The absolute maximum number of people that can be in the room at once.
Maximum bookings per slot -- Set to 1 for private bookings (one group at a time). Set higher if you allow multiple groups to share a time slot.
Reset Time (minutes) -- How long after a booking ends before the next one can start. Use this to account for room resets, cleaning, or briefings.
Booking Mode -- Controls how customers interact with the bookable item's time slots. Instant bookings lets customers book and pay immediately (the default). Call to Book shows the time slot but asks customers to call you. Request to Book lets customers submit a request that you approve or reject.
Hidden -- Toggle this on to hide the bookable from both the booking widget and the admin calendar. Useful for rooms that are no longer in use or that you don't want appearing anywhere. If you want to hide a room from customers but keep it visible on your admin calendar, leave Hidden off and instead exclude the room from your Booking Widget settings.
Deposit Amount -- Optionally set a fixed deposit amount. When set, customers can choose to pay just the deposit instead of the full price, with the balance due later.

Repeat this process for each of your rooms or experiences.
Step 2: Set Up Pricing
Each bookable item needs prices for its ticket types. A default ticket type is created for you automatically, which is enough for most setups. If you need different ticket types (e.g. Adult and Child with different prices), you can create them in Settings > Ticket Types -- but you can always do this later.
- Go to Settings > Bookable Items and select your room
- Click on the Prices tab
- You'll see your ticket types listed. For each one, set the price per person (or per ticket)
The pricing system supports tiered pricing, meaning you can offer different rates based on group size. For example: - 2-4 people: $30 per person - 5-8 people: $25 per person
A "Default Pricing" price group is created automatically. If you need different pricing for peak and off-peak times, you can create additional price groups later from Settings > Price Groups and then use Rules to apply them to specific time slots.
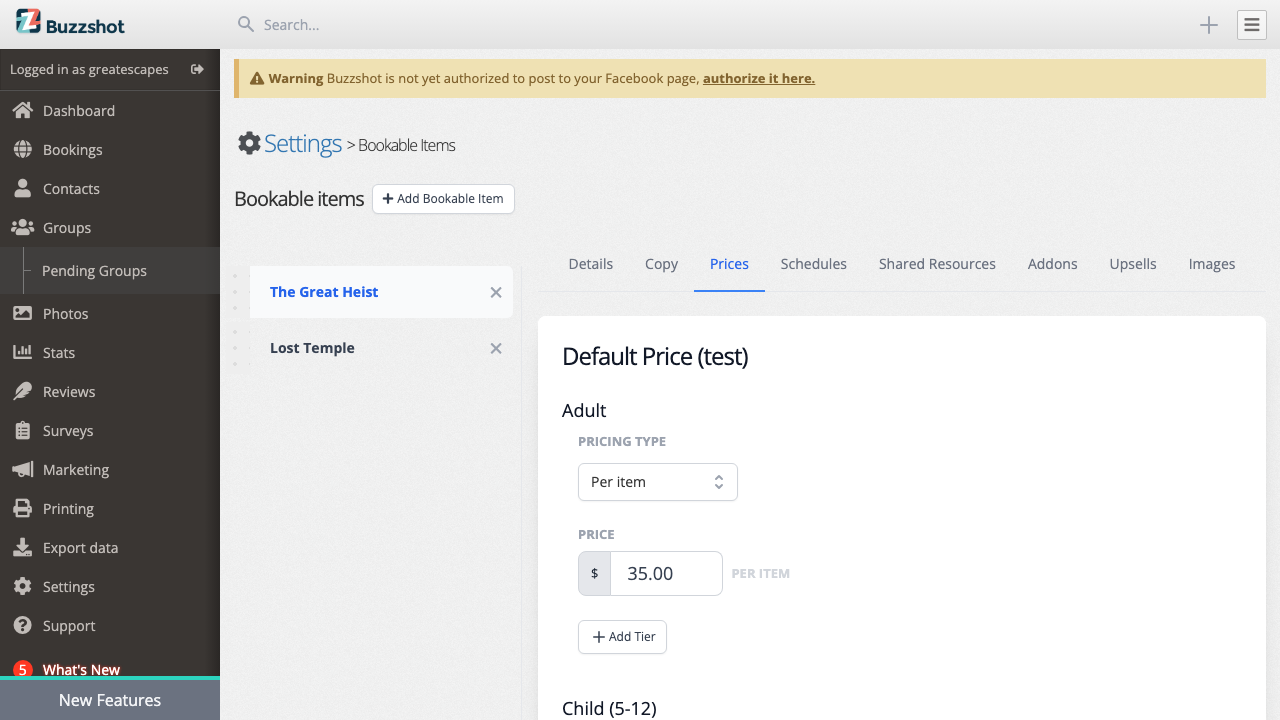
Important: Make sure every ticket type has a price set. If a ticket type is missing a price, you'll see an indicator dot on the bookable item in the sidebar.
Step 3: Set Up Schedules
Schedules define when your rooms are available for booking.
- Go to Settings > Bookable Items and select your room
- Click on the Schedules tab
- You'll see a Default Schedule already set up. Click on it to expand the editor.
- Add your time slots -- the specific times during each day of the week when your room is available. Use Add time slot to add slots, and Repeat to quickly fill a day at regular intervals.
For example, you might set up slots at 10:00, 11:30, 13:00, 14:30, 16:00, and 17:30 for weekdays, and add extra morning and evening slots for weekends.
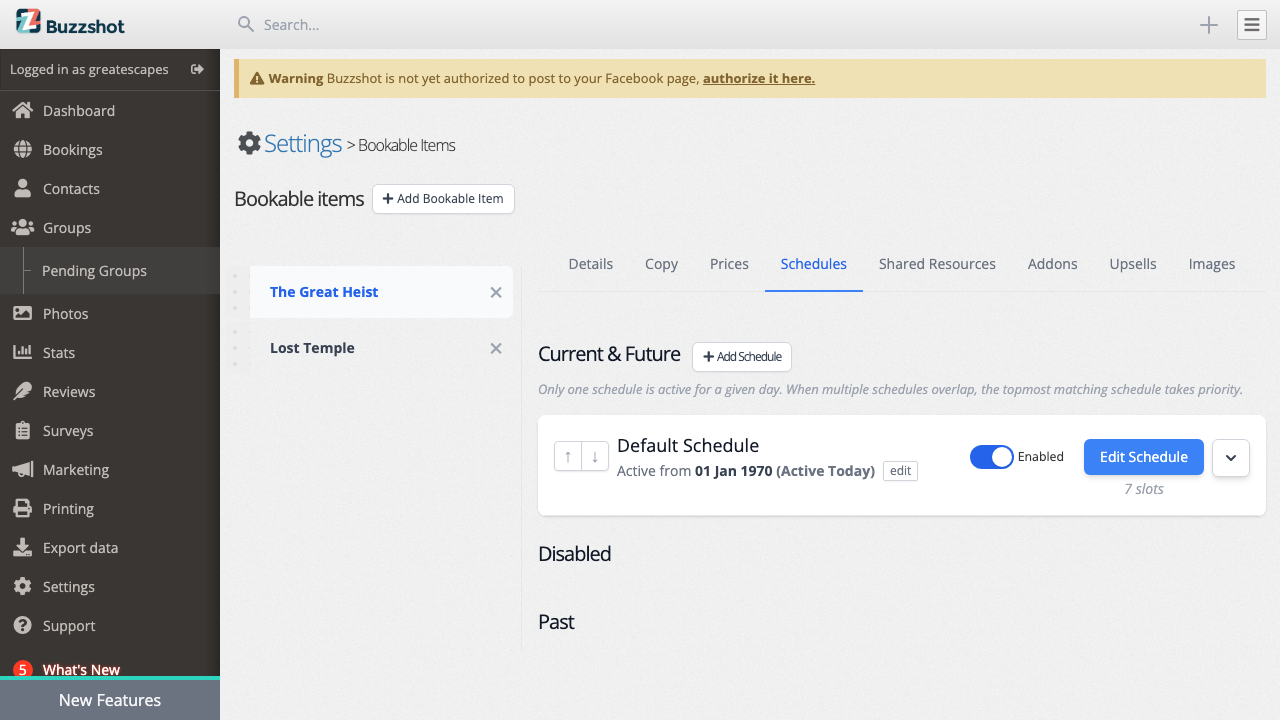
Tips: - You can create multiple schedules for the same room. For example, a "Summer Hours" schedule with an end date and a "Winter Hours" schedule that takes over after. - Schedules can overlap -- if two schedules cover the same time period, both sets of time slots will be available. - The slot duration is determined by the Duration setting on the Details tab of your bookable item.
Step 4: Connect a Payment Provider
To accept online payments, you need to connect a payment provider.
- Go to Settings > Payment Options
- Click Connect with Stripe to begin the Stripe Connect setup
- You'll be redirected to Stripe where you can either create a new Stripe account or connect an existing one
- Follow the Stripe setup steps and authorise the connection
- Once complete, you'll be redirected back to Buzzshot and your Stripe account will appear as a connected payment option
That's it -- customers can now pay for their bookings online using credit cards, Apple Pay, Google Pay, and other methods supported by Stripe.
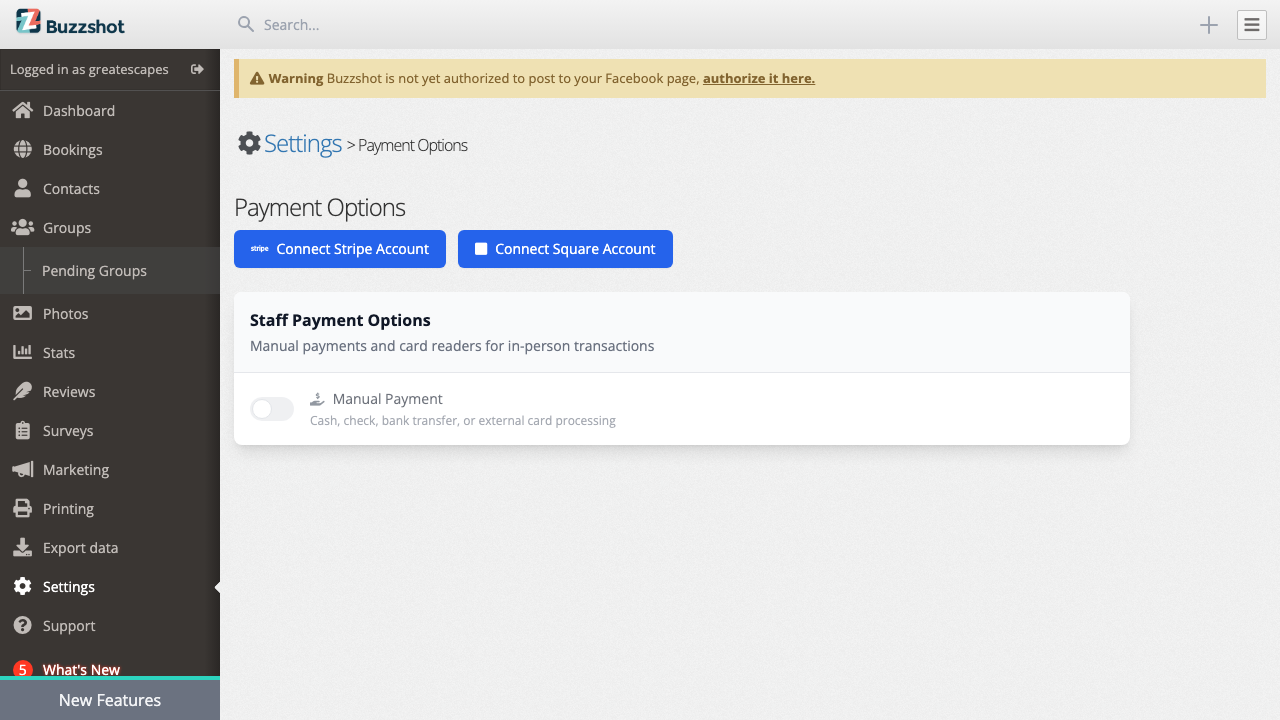
Note:We also support Square as a payment provider and we plan to support more in the future
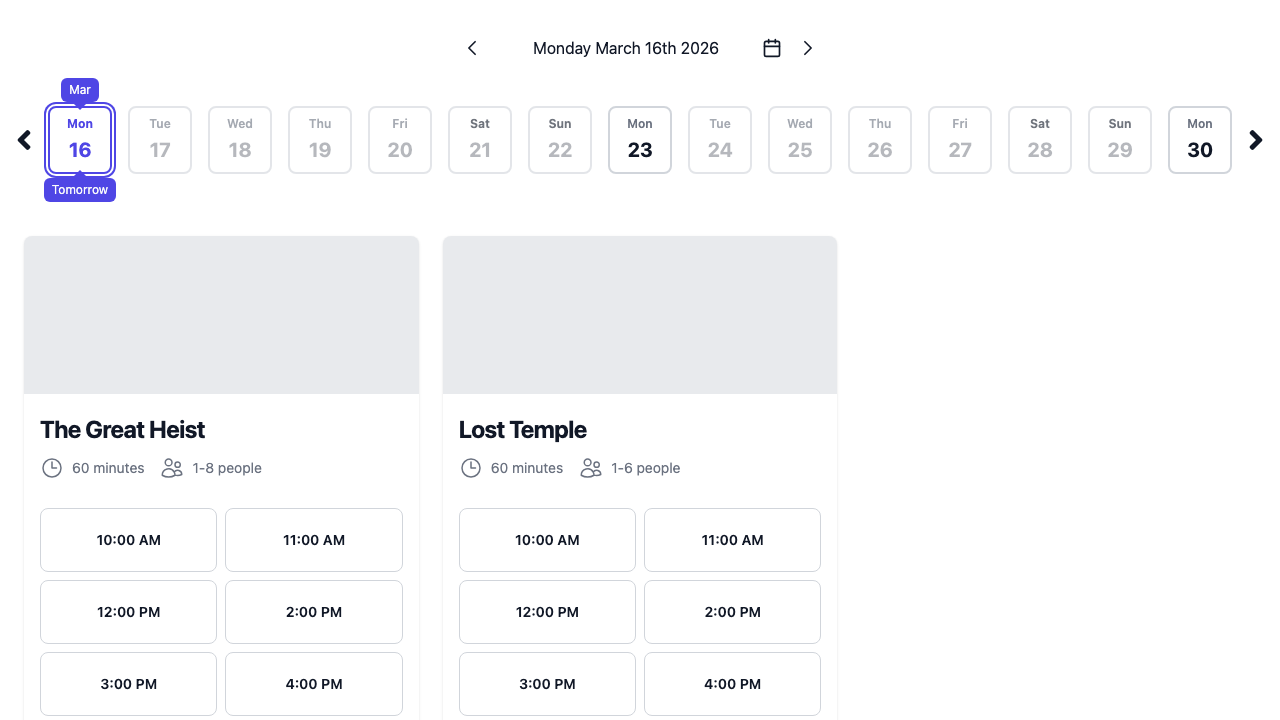
Step 5: Configure Your Booking Widget
The booking widget is what your customers see when they make a booking. A default widget is created automatically, but you'll want to customise it.
- Go to Settings > Booking Widgets
- Select your widget from the sidebar (the default one will be there already)
The widget settings are organised into tabs:
Details -- Choose the listing style (Cards or List view), configure which fields to collect at checkout (email, phone number, billing address, company name), enable CAPTCHA protection, and set up terms and conditions or privacy policy acceptance.
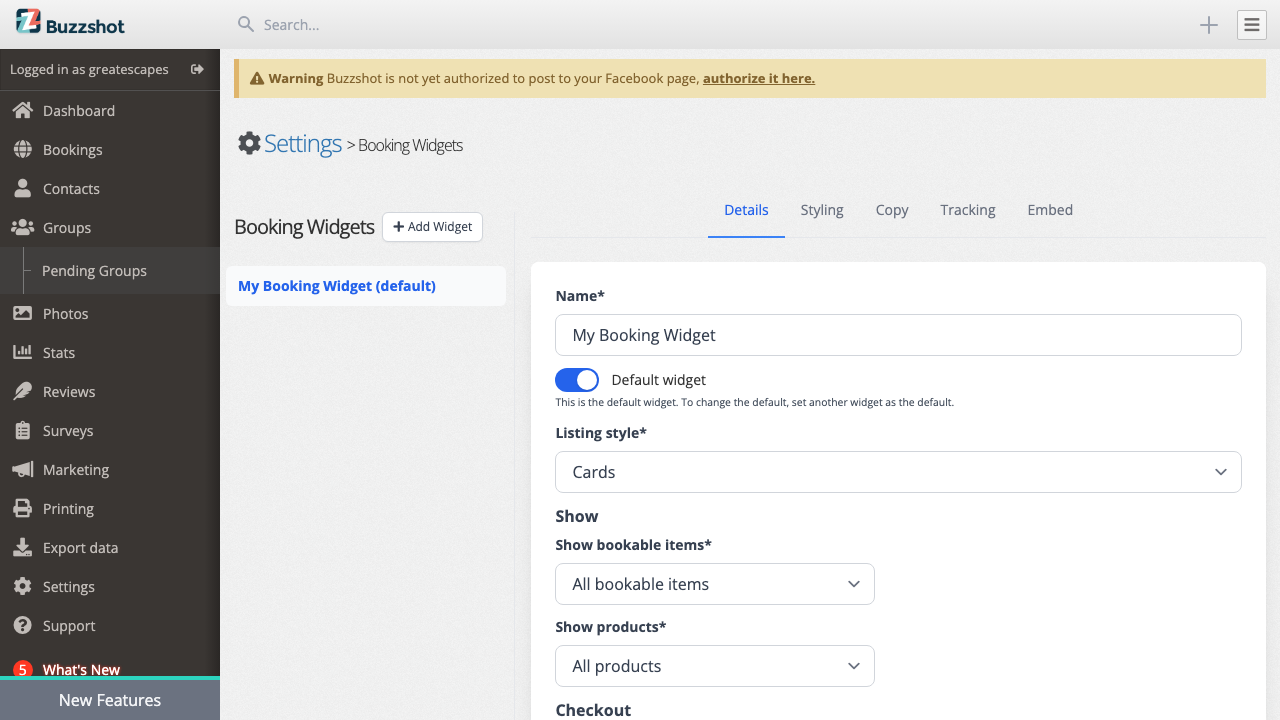
Styling -- Customise the look of your widget to match your brand. Set your brand colour, page background, card background, button colours, and corner style. Most text colours are automatically calculated for good contrast, but you can override them if needed.

Copy -- Customise the messages shown when a slot is set to "Call to Book" or "Request to Book".
Tracking -- Enable Google Tag Manager integration for ecommerce tracking (see our GTM/GA4 setup guide for instructions).
Embed -- Get the embed code for your website (covered in the next step).
Step 6: Embed the Widget on Your Website
The final step is to put your booking widget on your website so customers can find it.
- Go to Settings > Booking Widgets > select your widget > Embed tab
- Set the Target page -- this controls what the widget shows when it opens. You can have it show all your rooms, or select a specific bookable item or product to link directly to it.
- Choose your embed type:
- HTML -- Works with most website platforms
- Wix -- Specific instructions for Wix sites (see our Wix embedding guide)
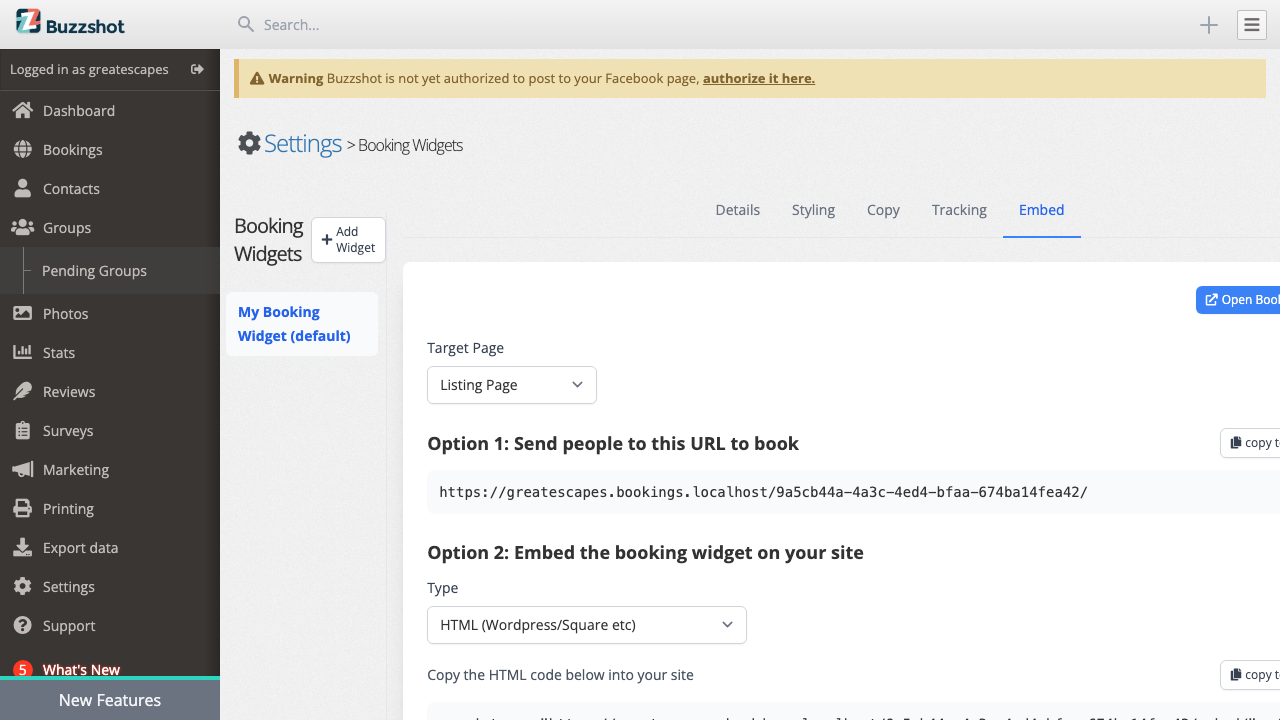
- Copy the embed code snippet
- Paste it into a page on your website where you want the booking widget to appear
- Preview the page to check everything looks right
You also have a hosted booking page at a URL like yourbusiness.buzzshot.net that you can link to directly if you prefer not to embed.
Tip: To link directly to a specific room, you can select it when generating the embed code -- no need to create a separate widget. Multiple widgets are useful if you need different configurations for different categories of rooms, or a dedicated page for merchandise.
Test Your Setup
Before going live, make a test booking to make sure everything works:
- Visit your booking widget (either the hosted URL or your embedded page)
- Select a room and time slot
- Go through the checkout process
- Check that the booking appears in your Bookings > Calendar in the admin
- Verify the order shows up in Bookings > Orders
Tip: You can also use the hosted booking page URL (shown on the widget's Embed tab) to preview and test your widget without embedding it on your website first.
Before going live, we also recommend setting up DKIM and SPF records for your email domain. This ensures that booking confirmation emails sent from Buzzshot are properly authenticated and don't end up in your customers' spam folders. See our email domain setup guide for details.
Next Steps
Once you have the basics working, there are plenty of ways to enhance your booking system:
- Add images and descriptions to your bookable items to make them more appealing in the booking widget (Images tab on each bookable). Primary images are displayed at a 5:2 aspect ratio -- for best results, use images at least 1200 × 480 pixels
- Set up Taxes & Fees (Settings > Taxes & Fees) to automatically apply sales tax or booking fees to orders
- Create Coupon Codes (Bookings > Coupons) for promotions and special offers
- Sell Gift Cards (Bookings > Gift Cards) through your booking widget
- Create Rules (Settings > Rules) for dynamic pricing based on time of day, day of week, or how far in advance the booking is made. Rules are also how you block specific dates for closures or holidays -- for example, closing your venue over Christmas. To block a date, create a rule with the condition set to the dates you want to close and the action set to "Close Slots".
- Important: Individual time slots can be set to "Instant Booking" which overrides all rules, including Request-to-Book restrictions. If your rules don't seem to be taking effect, check whether the affected slots are set to "Default" (follows rules) rather than "Instant Booking" (bypasses rules).
- Set up Shared Resources (Settings > Shared Resources) if you have rooms that share physical capacity or game masters
- Add Custom Fields (Settings > Custom Fields) to collect extra information from customers during checkout
- Set up Add-ons for extras that customers can purchase alongside their booking, such as hint packages, props, food and drink, or merchandise
- Configure Automations to send pre-game reminders, follow-up emails, or review requests to your customers automatically
If you need help with any of these, check out the individual support articles or get in touch with us at support@buzzshot.com.