Saved Filters
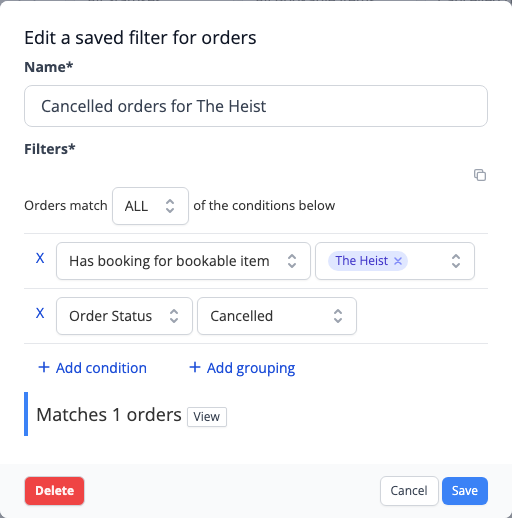
A saved filter is a set of conditions you build once, give a name, and then pick from a list whenever you need it. For example "Birthday parties", "Cancelled orders for The Heist" or "Teams who escaped in under 45 minutes".
You can save filters on three pages:
- Bookings > Orders
- Bookings > Bookings
- Groups
Each page keeps its own saved filters, so an orders filter only appears on the Orders page and in other places that work with orders.
On the Contacts page (called Players in some accounts) the same thing is called a Segment. See Segments.
Building a filter
- Go to Bookings > Orders (or Bookings > Bookings, or Groups).
-
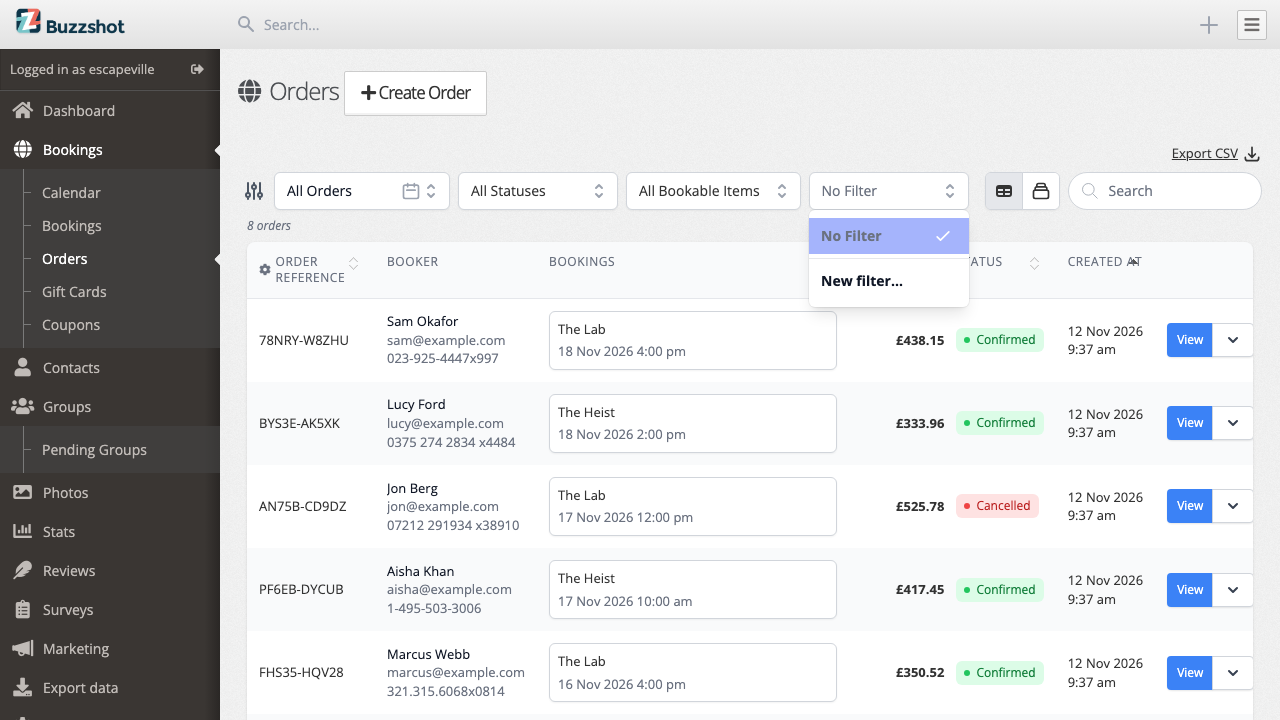
Click the Filter dropdown and choose New filter….
-
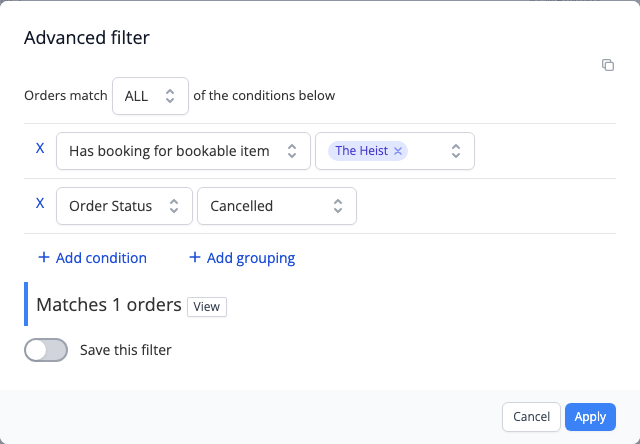
The Advanced filter window opens. Click Add condition and choose what to filter on, such as the order status, the room booked (Has booking for bookable item), an add-on, or a customer's answer to one of your custom fields.
-
Add as many conditions as you need. Use the dropdown at the top to choose whether orders must match ALL, ANY or NONE of them. Add grouping lets you mix the two, for example "booked The Heist AND (includes the Birthday add-on OR includes the Party product)".
The window shows how many orders match as you go.
-
Click Apply.
The list now shows only the matching orders. The dropdown reads Unsaved filter to show that you are using a filter you haven't saved. The filter is part of the page's web address, so you can bookmark the page or send the link to a colleague. Click × next to the dropdown to clear it.
The filter works on top of the page's other controls. If you have also chosen a date range or a status, the list shows orders that match both.
Saving a filter
To keep a filter for next time, turn on Save this filter in the Advanced filter window, type a name, then click Apply.
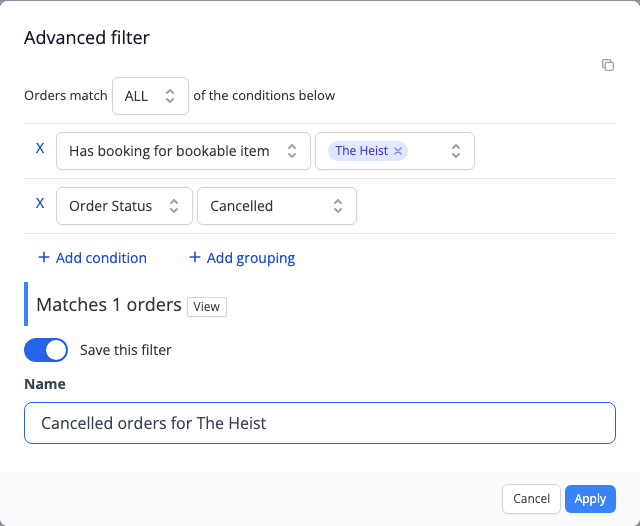
To save a filter you have already applied, click the pencil next to the dropdown, turn on Save this filter and give it a name.
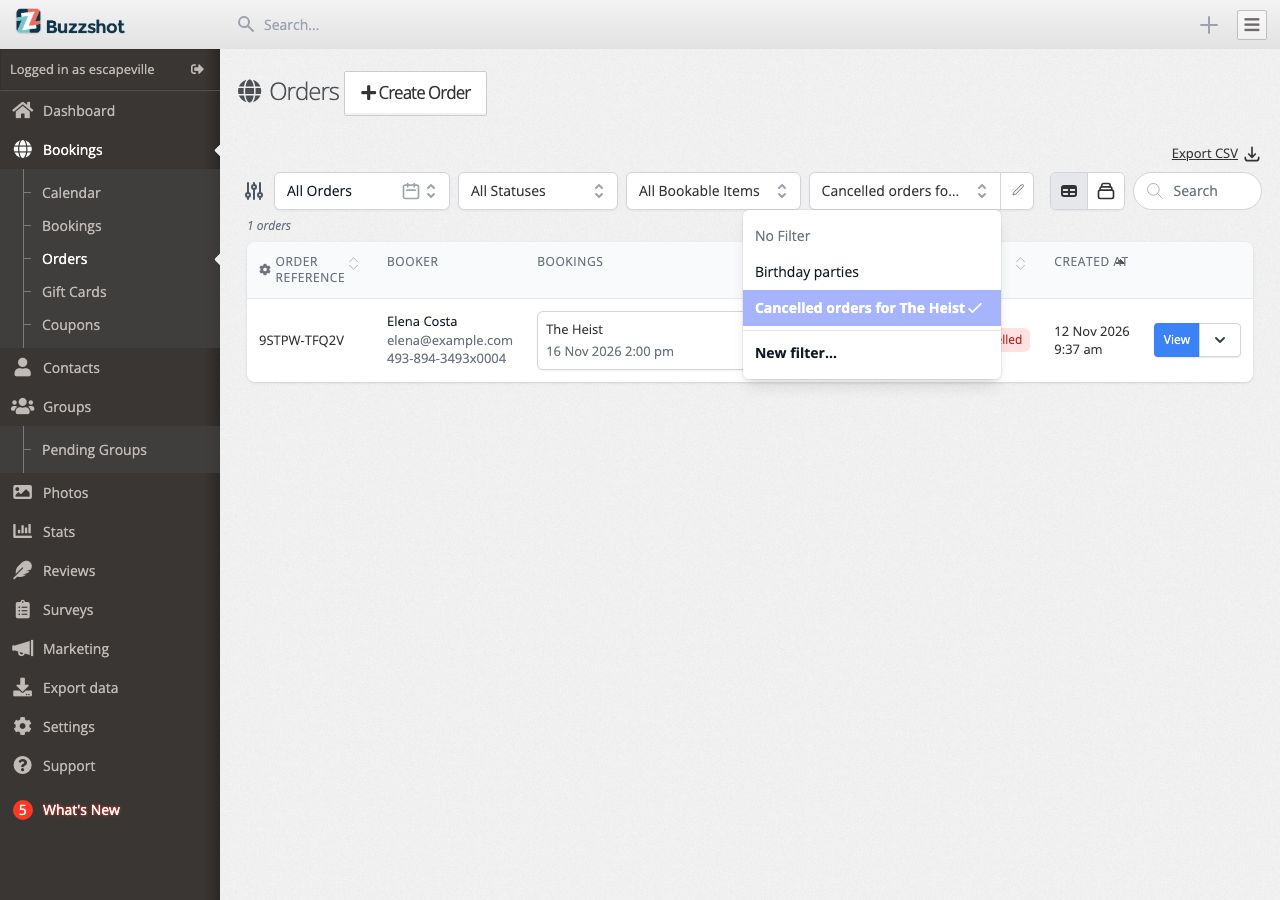
From then on the filter appears in the Filter dropdown under its name. Pick it to apply it.
Saving, editing and deleting filters needs the Edit the settings page permission. Staff without it can still build and apply filters, and pick ones others have saved. See User Permissions.
Changing or deleting a saved filter
- Pick the saved filter in the Filter dropdown.
- Click the pencil next to the dropdown.
- Change the name or conditions and click Save, or click Delete to remove it.
A change applies everywhere the filter is used (see below), straight away.
Using a saved filter somewhere else
Once saved, a filter appears as a choice in other places that filter the same kind of thing. Look for it in the filter's first dropdown, below the built-in choices.
Saved order filters appear in:
- Dashboards: the Filter section of a panel, so a figure counts only those orders. See Building a Panel from Scratch.
- Automations: Which orders does this trigger apply to, on triggers that start from an order.
- Custom fields and checkout pages: the Show for setting, which decides which orders see them. See Custom Fields.
Saved group filters appear in the Only show teams matching setting of a leaderboard.
Inside the Advanced filter window you can also add an In Saved Filter condition. This lets one filter build on another: "In Saved Filter: Birthday parties" plus "Status is Cancelled" gives you cancelled birthday parties, and if you later change what counts as a birthday party, both filters follow.
If you delete a saved filter that something else uses, that place matches nothing until you choose a new filter. A leaderboard shows no teams and an automation stops running for any order, rather than suddenly applying to everyone.