Creating Bookable Items
A bookable item is anything your customers can reserve a time slot for. For most escape room businesses, each bookable represents one of your rooms or experiences. Bookables are the foundation of Buzzshot Bookings. You will need at least one before you can start accepting bookings.
This article covers creating bookable items and configuring their core settings. Pricing, schedules, and other advanced configuration are covered in separate articles.
Important: A bookable will not appear to customers in your booking widget until it has both a schedule (with at least one time slot) and pricing configured. If you have created a bookable but it is not showing up, check those two things first.
Getting Started
To manage your bookable items, go to Settings > Bookable Items in the admin area.
If you have not created any bookables yet, you will see an empty state page with a button to create your first one.
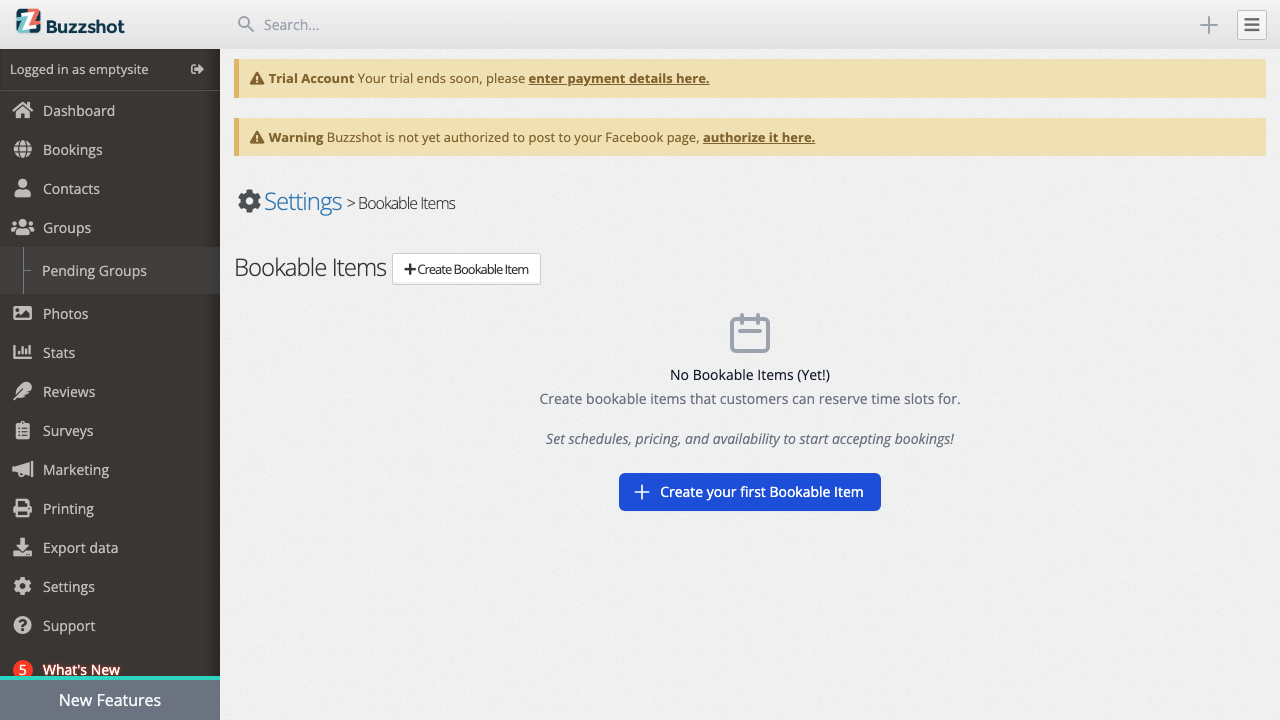
Creating a New Bookable
Click Create Bookable Item (or Create your first Bookable Item if this is your first). A dialog will appear asking you to enter a name for the bookable. This is the name your customers will see in the booking widget, so use something clear and recognisable. For example, "The Great Escape" or "Murder Mystery Room".
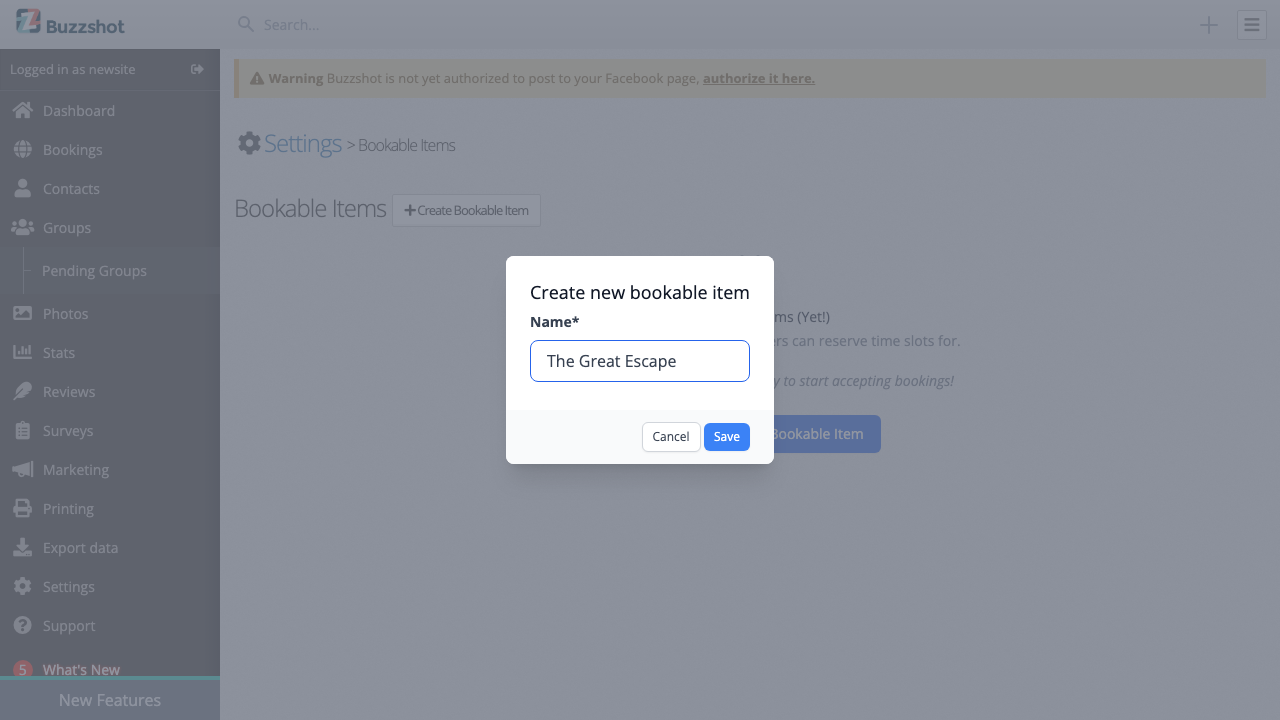
After clicking save, you will be taken to the Details tab where you can configure the bookable's settings.
The Details Tab
The Details tab is where you set up the core behaviour of your bookable. It is organised into a few sections: Basics (name, room, and calendar colour), Booking behaviour (how customers book), and Timing (how long slots run). How many people can book (people per booking, slot sharing, and ticket quantities) has its own Capacity & Limits tab, covered further down.
Match to Room
If you are already using Buzzshot's other features (photos, waivers, surveys, leaderboards), you can link this bookable to one of your existing rooms. This means that when a customer makes a booking, Buzzshot will automatically create a linked group in that room, connecting the booking to your photos, waivers, surveys, and leaderboard features.
If you have not set up rooms in Buzzshot yet, you can skip this for now and come back to it later.

Name
The display name for this bookable. This is what customers see in the booking widget.
Calendar colour
Choose the colour used to highlight this bookable on your admin calendar. This is purely a visual aid to help you tell your experiences apart at a glance. Customers never see it.
Duration (minutes)
The default length of a booking slot in minutes. For example, if your escape room experience lasts 60 minutes, enter 60 here. This determines the length of time slots that appear in the booking calendar.
Reset Time (minutes)
How long after a booking ends before the next one can start. This gives you time to reset the room between groups. For example, if you need 15 minutes to reset your room, enter 15 here.
The system will automatically prevent bookings from being placed too close together based on this value.
Booking Mode
Controls how customers interact with this bookable in the booking widget:
Instant bookings (default): customers can book and pay online immediately. This is the standard setup for most businesses.
Call to Book: online booking is disabled for this experience. Customers will see a message asking them to call you to make a booking. Useful for experiences that need special arrangements.
Request to Book: customers can submit a booking request, but it will not be confirmed until you approve it in the admin area. This is useful if you need to review bookings before accepting them.
Important: The booking mode set here is the default for all of this bookable's slots. It can be overridden for specific time slots using Rules (for example, changing last-minute slots to "Call to Book") or by editing individual slots in the calendar view. If a rule doesn't seem to be taking effect on a particular slot, check whether that slot has been individually set to a specific mode instead of "Default".

Hidden
Toggle this on to hide the bookable from your booking widget. It will still appear in the admin area so you can manage it, but customers will not be able to see or book it. This is useful when you are still setting up a new experience, or when you want to temporarily take one offline.
Note: "Hidden" only hides the bookable from the booking widget. It does not block existing slots or prevent bookings from being processed through other means. To block specific time slots, use the Blocked booking mode on individual slots or via Rules.
Deposit Amount
If you want to offer a deposit option instead of requiring full payment at booking time, enter the fixed deposit amount here. Customers will be able to choose between paying the deposit or the full price at checkout.
Note: The deposit option will only appear at checkout if the order total is equal to or greater than the deposit amount. If a discount code reduces the total below the deposit amount, only full payment will be offered.
Leave this blank if you want to require full payment (the default).

The Capacity & Limits Tab
The Capacity & Limits tab controls how many people can book your experience and how time slots are shared between bookings.
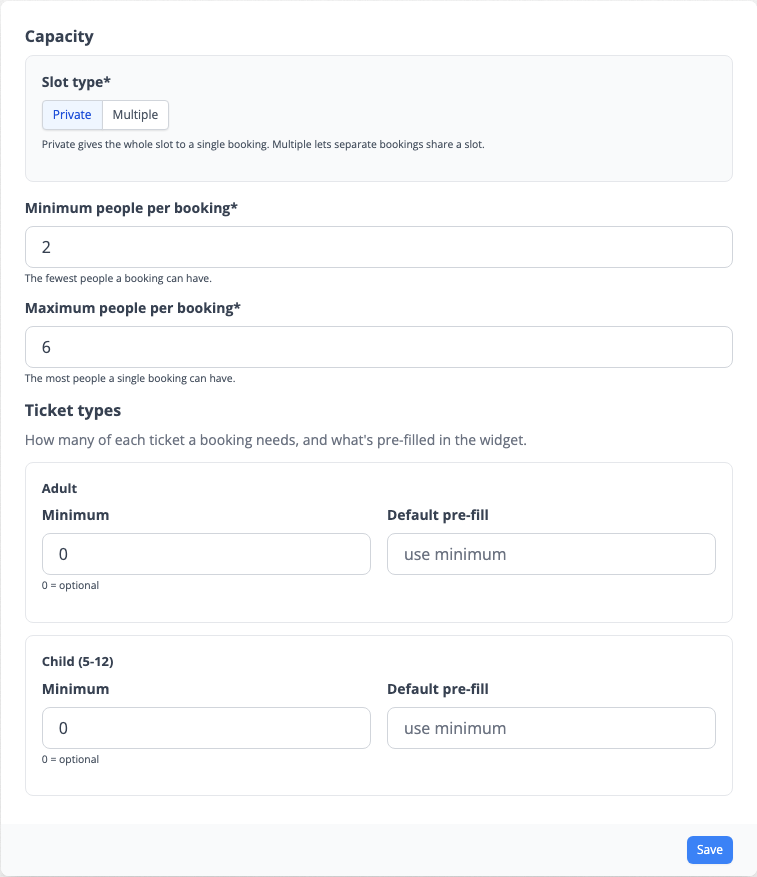
Slot type: Private or Multiple
At the top, choose whether each time slot is Private or Multiple:
- Private: each time slot is given to a single booking. When someone books, the whole slot is theirs. This is the most common setup for escape rooms, and you only need to set the people-per-booking limits below.
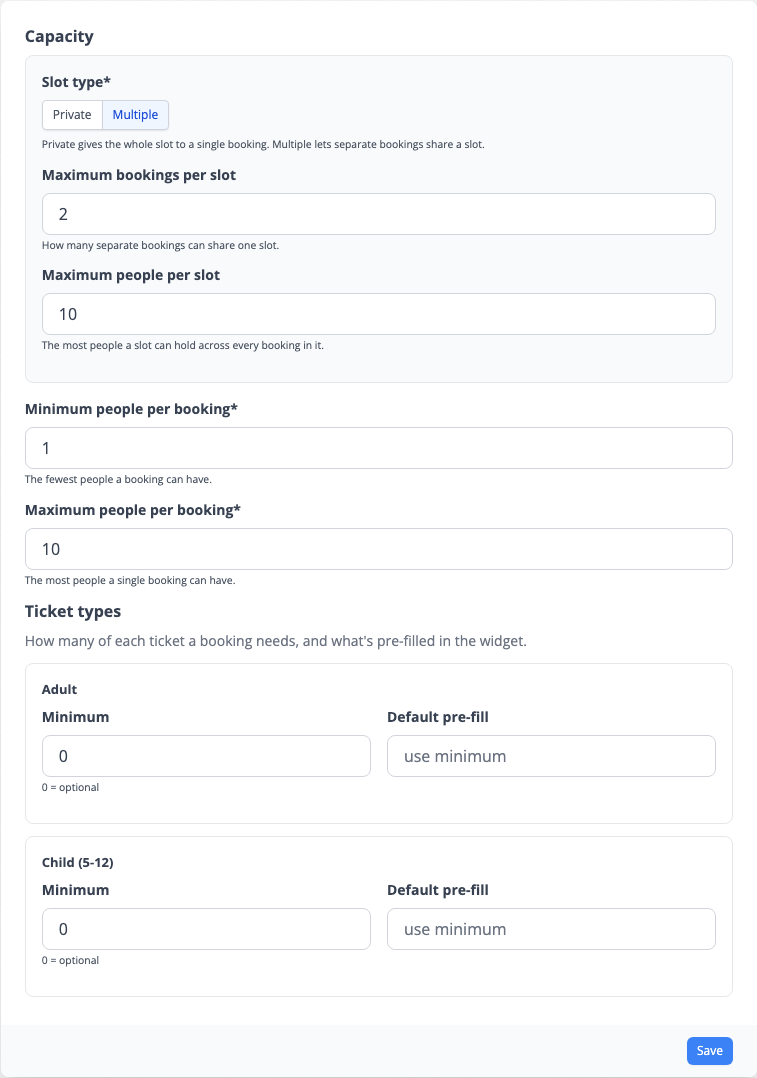
- Multiple: several separate bookings can share the same time slot. Choose this for larger experiences or activity centres where independent bookings go into the same session. Two extra settings appear:
- Maximum bookings per slot: how many separate bookings can share one slot.
- Maximum people per slot: the total number of people allowed in a slot across all of those bookings. This is usually the overall capacity of the space.
Choosing Multiple reveals the two extra slot settings:
People per booking
- Minimum people per booking: the fewest people you accept in a booking. If you do not want solo bookings, set this to 2.
- Maximum people per booking: the most people allowed in a single booking.
Ticket types
If you offer more than one ticket type (such as Adult and Child), a table appears where you can set, for each type:
- Minimum: how many of that ticket must be included in a booking. Set to 0 to make it optional.
- Default pre-fill: the quantity already filled in for the customer in the booking widget. Leave it blank to start at the minimum.
Buzzshot checks these against your people-per-booking limits. If a ticket represents more than one person (for example a "Table of 6"), those people are counted, so it will warn you and stop you saving if a minimum or default would push a booking over its maximum size.
If you only have one ticket type, this section is hidden. The people-per-booking settings above are all you need.
Example: multiple copies of the same room. Suppose you have 3 identical copies of an escape room, each holding up to 8 people. Set the slot type to Multiple, Maximum people per booking to 8, Maximum bookings per slot to 3, and Maximum people per slot to 24. Up to 3 separate bookings can then share the same time, each capped at 8 people.
As you change these settings, Buzzshot shows notes beneath them warning about combinations that do not add up: for example a minimum larger than a maximum, or ticket quantities that need more people than a booking allows.
The Copy Tab (Marketing Text)
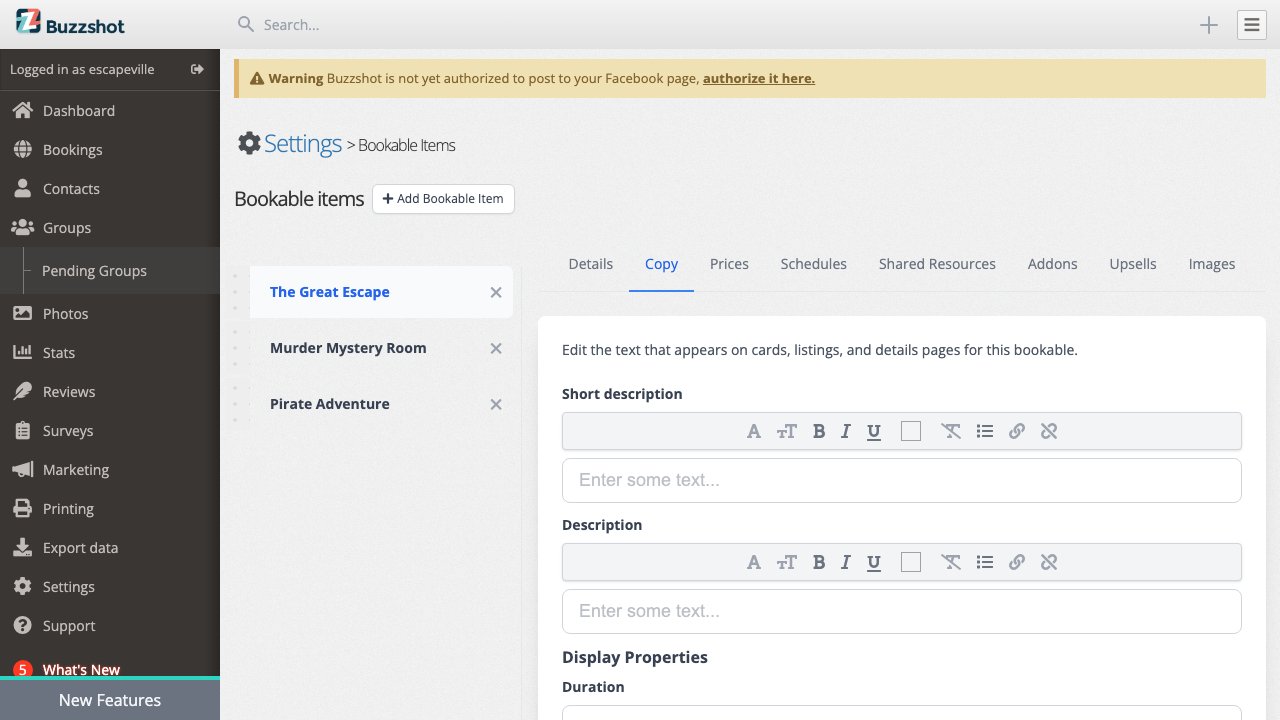
The Copy tab controls the text and information that appears on your bookable's card and detail page in the booking widget.
Descriptions
Short description: a brief summary shown on booking widget cards. Keep this concise: one or two sentences about what makes this experience special.
Description: a longer description shown on the bookable's detail page. You can use rich text formatting here to create an engaging description of the experience.
Display Properties
Display properties add informational badges and details to your bookable's listing. These are all optional. Leave any of them blank to hide that property.
Duration: override the auto-calculated duration text. For example, you might want to display "60-75 minutes" even though your slots are 60 minutes, to account for briefing time.
People count: override the auto-calculated people count. For example, "2-6 players" gives customers a quick view of group size requirements.
Difficulty: add a difficulty rating such as "Beginner", "Intermediate", or "Expert". This helps customers choose an experience appropriate for their group.
Location: a location label such as "Downtown" or "Main Street". Useful if you have multiple venues or want to help customers find you.
Age range: specify age requirements or recommendations, such as "8+", "All ages", or "12-65". This sets expectations before customers book.
The Staffing Tab
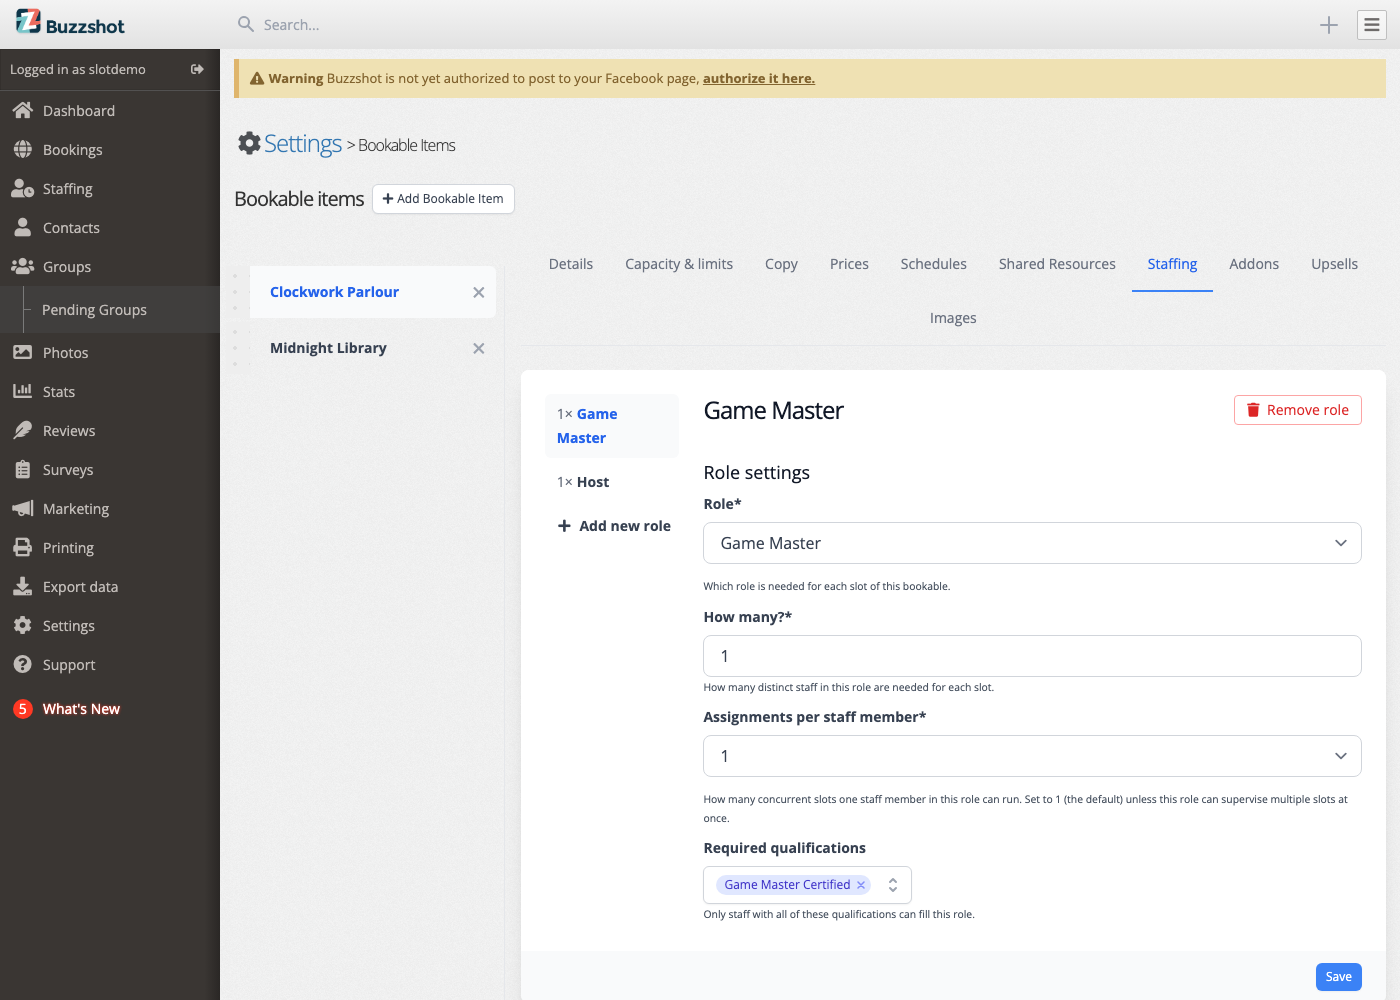
If Staffing is enabled on your account, each bookable gains a Staffing tab. This is where you tell Buzzshot which positions a booking in this room needs, and how many of each. (If you do not see this tab, Staffing is not turned on for your account.)
For example, an escape room might need 1 Game Master to run it plus 1 Host to greet the group, so you would add both roles here, each with a count of 1. A larger experience might need two Game Masters. Add each role your slots need and set How many? to the number of that role required for every booking in this room.
Assignments per staff member
Each role also has an Assignments per staff member setting. This is how many bookings a single person in that role can run at the same time. Leave it at 1 (the default) for roles where one person handles one booking at a time. Raise it only for a role that can cover several concurrent bookings at once, for example a Host who can greet multiple groups.
What this powers
The roles you set here are what drives Buzzshot's automatic staffing and the coverage checks on your bookings calendar. Once a bookable knows what it needs, Buzzshot can fill each slot from your rostered staff and warn you when a slot is not fully covered. To learn more, see Assigning staff to bookings, Setting up Staffing, and the Staffing overview.
Managing Multiple Bookables
Adding More Bookables
Click the Add Bookable Item button at the top of the page to create additional bookables. You will likely have one bookable for each escape room or experience you offer.
Navigating Between Bookables
The sidebar on the left lists all your bookable items. Click any bookable to switch to its settings. The currently selected bookable is highlighted.
Reordering Bookables
You can drag and drop bookables in the sidebar to change their display order. This order is also used in the booking widget, so put your most popular or important experiences at the top.
Indicator Dots
You may notice coloured dots next to some bookables in the sidebar, or next to tabs. These indicate that something needs attention, most commonly that pricing has not been set up yet. Check the indicated tabs to resolve any issues.
Deleting a Bookable
To delete a bookable, click the delete icon next to it in the sidebar. You will be asked to confirm. Deleting a bookable also removes all its associated products, pricing, and schedule data. If there are future bookings linked to this bookable, their associations will be affected. This cannot be undone, so consider hiding it instead if you might want to use it again later or if there are any existing or future bookings.
Next Steps
Once you have created a bookable and configured its details, you will need to complete a few more steps before customers can make bookings:
- Set up pricing: Go to the Prices tab to configure ticket prices. You can set up tiered pricing and multiple price groups.
- Create a schedule: Go to the Schedules tab to define when time slots are available for booking. Your bookable will not appear in the widget until it has a schedule with at least one time slot.
- Add images: Go to the Images tab to upload a primary image, icon, and gallery photos that appear in the booking widget. The primary image is displayed on cards at a 5:2 aspect ratio. For best results, use an image at least 1200 × 480 pixels. You can also upload a video to play in place of the image.
You may also want to explore these optional features:
- Custom Fields: Collect extra information from customers during checkout, such as team names, dietary requirements, or special requests.
- Shared Resources: If multiple bookables share the same physical space or equipment, use the Shared Resources tab to prevent double-booking.
- Rules: Set up dynamic rules to automatically change pricing, booking mode, or availability based on conditions like time of day, day of week, or how far in advance the booking is. Rules are also how you block out dates for closures or holidays.
- Add-ons: Offer optional extras like photo packages or drink packages that customers can add to their booking.
- Upsells: Suggest other bookables to customers during the booking flow, such as "Book a second room after this one!"